Why Do Laser Cut Living Hinges Snap Easily?
A living joint laser cut snaps easily when the wood grain runs the wrong way, the hinge pattern is too thin, or the material is brittle for repeated flexing. Check grain direction, hinge geometry, and material first, then adjust settings and test a small sample before cutting the full piece.
On this page (9 sections)
- Why Do Laser Cut Hinges Snap at the Bridges?
- How Does Grain Direction Affect Living Hinge Strength?
- What Material Causes Early Living Hinge Breakage?
- How Do Hinge Patterns Change Flex and Failure?
- What Laser Settings Weaken Thin Hinge Bridges?
- How Can You Make a Hinge Bend Without Breaking?
- Can You Fix a Hinge That Already Snaps?
- How Do You Prevent Future Hinge Snapping?
- How Should You Choose a Fix for a Snapping Hinge?
A living joint laser cut snaps easily when the hinge segment runs across the grain, the pattern leaves too little material to flex, or the sheet itself is brittle. Most failures come from a mix of design, material, and settings.
A living hinge works by flexing a thin bridge many times. Any weak spot becomes the break point.
Why Do Laser Cut Hinges Snap at the Bridges?
Hinges snap at the bridges because that is where all the bending stress concentrates. Each thin segment acts like a tiny spring, and a nick makes it fail sooner.
Check the outer edges first. Rough cuts, scorch, or tiny notches can turn a smooth bend into a crack.
For a plywood-specific case, see one-sided plywood burn marks.
Our guide to why your laser is leaving burn marks can help you spot heat damage before it becomes a weak hinge.
Pattern spacing matters too. Segments that are too short, too thin, or too close together have less material to share the load.
A pattern with more, well-spaced flex points usually spreads stress more evenly.
Measure your sample after cutting. If bridges vary in width, kerf or focus may be uneven across the sheet.
How Does Grain Direction Affect Living Hinge Strength?
Grain direction is often the main reason a living joint laser cut snaps easily. Wood flexes best along the grain, and a hinge cut across the grain has far less tolerance for repeated bending.
Turn the sheet and check how the grain runs through the hinge area. If hinge strips cross the grain, fibers cannot bend as a group.
They split, whiten, then break after only a few folds.
Plywood can hide this problem. Outer veneers may run one way while an inner layer runs another, so the hinge can look fine from the top and fail underneath.
Test the exact sheet.
Thin, dry, brittle stock has less give than a slightly thicker, more flexible sheet. If you must use a stiff material, make the hinge pattern do more of the work with longer flex sections.
What Material Causes Early Living Hinge Breakage?
Brittle, dry, or cross-grained material causes early breakage because it cannot stretch and recover at the hinge. Dense sheets crack before they flex, especially when cut to a very thin bridge.
Check material for dryness and even thickness. Warped or uneven sheets can change focus and cut depth across the hinge.
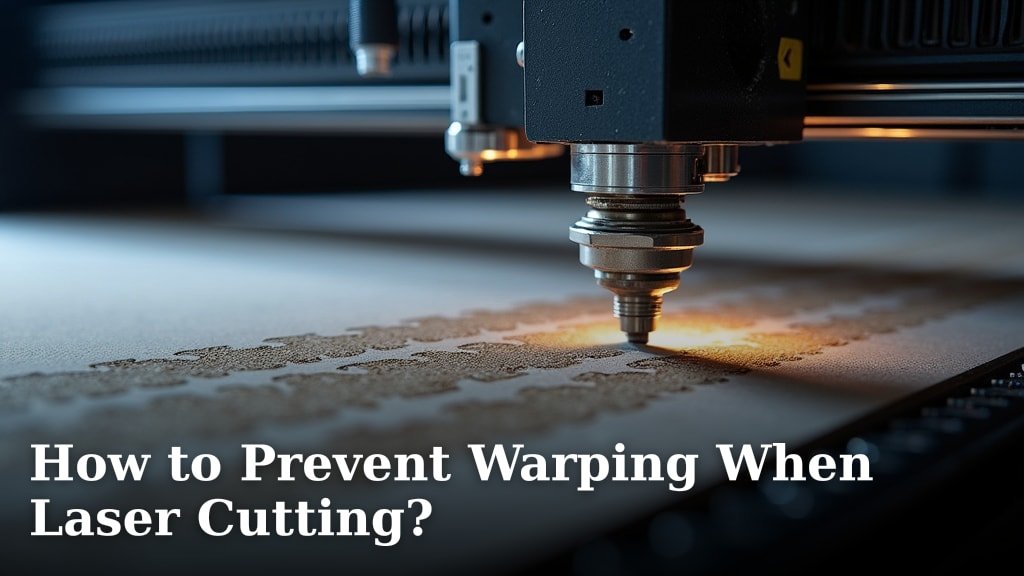
Our guide to how to prevent warping when laser cutting explains why flat stock gives more consistent cuts.
Avoid assuming every wood that laser cuts well will also hinge well. For a material-specific safety check, see Woodpile engraving wood safety.
A sheet that cuts cleanly can still be too stiff for bending.
The hinge area needs different properties from panels or decorative faces.
Use a test piece from the same sheet. Cut the hinge pattern at small scale, bend it through the full motion, and count bends before whitening or cracking appears.
How Can You Test Materials Without Wasting a Full Sheet?
Cut a small hinge sample with the same thickness, grain direction, and settings you plan to use. Bend it slowly to the full angle and repeat while you watch the bridges.
Make three samples if you can. Change only one factor at a time, such as grain direction or hinge width, so you know what helped.
Note settings, material, and bend count for each.
Stop when you see white lines, fiber lifting, or a sudden loss of resistance. Those signs mean the hinge is near failure, even if it has not snapped yet.
How Do Hinge Patterns Change Flex and Failure?
Hinge patterns control how much each bridge flexes, so small spacing changes can change hinge life a lot. Longer and thinner segments bend with less strain, while short, thick segments act like a solid panel.
Compare a few proven styles before you commit. Our roundup of 10 Best Living Hinge Patterns for Laser Cut Wood gives options to test instead of guessing from scratch.
Watch the ends of each segment. Sharp corners concentrate stress and start cracks, while soft transitions or wider end pads often last longer.
Do not shrink a pattern to fit a narrow panel without testing. A smaller hinge area forces each bridge to flex more for the same angle, and nearby holes can weaken the same thin material.
Our guide to snap-fit joints for laser cutting helps you keep joining features separate from that material.
What Laser Settings Weaken Thin Hinge Bridges?
Laser settings weaken hinge bridges when heat, kerf, or incomplete cuts damage the thin material left to flex. Too much power or too slow a speed can char edges, while too little power leaves ragged, half-cut fibers.
Test settings on scrap from the same material. Look at hinge edges under good light, not just at cut-through.
Scorched or rough edges warn that the bridge will crack sooner.
Board speed, passes, and focus all change the result. A slower pass may clean the cut but add heat, and a faster pass may reduce heat but increase roughness, so there is no universal setting.
Keep the hinge area clean after cutting, but do not sand bridges thinner. Our post on removing scorch marks from paper after laser cutting covers gentle cleaning for delicate cut work.
How Can You Make a Hinge Bend Without Breaking?
You can make a hinge bend without breaking by giving each bridge more length, more width, and a cleaner edge. Start with grain along the hinge, then adjust the pattern until a test sample survives many full bends.
Work in this order: material, grain, pattern, then settings. Changing settings cannot fix a hinge that runs across the grain.
Changing the pattern cannot fix brittle material that will not flex at all.
Bend the test sample the way the finished piece will move. A lid hinge and a wrap-around hinge put stress in different places, so test the full motion, not just a small flex.
Use eye and respiratory protection for cutting and finishing. The LP-LaserPair LaserPair Laser Safety Glasses 200-534nm cover 200-534nm and 740-1095nm laser light, with a wrap-around TR90 resin frame, polycarbonate lenses, scratch-resistant coating, and 23% visible light transmission for visual clarity.
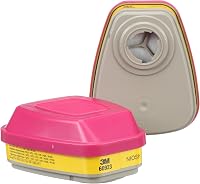
For dust and fumes from cutting and light sanding, use a properly fitted respirator. The 3M P100 Respirator Cartridge/Filter 60923 is a 1 pair NIOSH approved cartridge/filter for certain organic vapors, acid gases, and particulates, made with glass fiber paper in magenta and yellow.
It uses a bayonet-style connection with compatible 3M half and full facepieces, and its swept-back design aims to improve field of view and comfort.
What Safety Gear Helps When Testing Hinges?
Eye protection, respiratory protection, and a good fit help you test hinges safely and see damage early. Clear vision helps you spot whitening and cracks, and clean air helps when you sand or sweep test pieces.
The 3M Rugged Comfort Quick Latch Half Facepiece Reusable Respirator is a NIOSH approved half facepiece with a quick latch drop-down design, adjustable head harness, Cool Flow Valve, and silicone faceseal. Its low-profile design gives a wide field of view, which helps when you inspect thin hinge bridges up close.
Match the cartridge to the facepiece. The P100 cartridge fits 3M 6000, 7000, and FF-400 series facepieces with bayonet connections, among others named in its compatibility details.
Always follow respirator instructions for fit, storage, and cartridge replacement.
Can You Fix a Hinge That Already Snaps?
You can fix a snapping hinge only by changing the cause, not by reinforcing a cracked bridge. Glue or tape rarely restores the original flex, and they often make the hinge stiffer.
For a machine hinge rather than a living hinge, see HPC laser cutter hinge replacement.
First, check grain and pattern on the failed piece. If grain runs across the hinge, recut with the sheet turned.
If the pattern is too dense, try a more open pattern with longer flex sections.
Next, check material and settings. A thinner, more flexible sheet may solve the problem, or a cleaner cut may remove the stress riser that started the crack.
Test each change on a sample before you recut the full part.
Learn from the break location. A break in the middle points to pattern or material.
A break at the end points to sharp corners. A break along one edge points to cut quality or grain.
How Do You Prevent Future Hinge Snapping?
You prevent future snapping by testing grain, pattern, material, and settings as one system. Keep a simple note for each project: material, thickness, grain direction, pattern name, and settings.
Flat stock helps every part of that system. Warped sheets change focus and kerf, so a hinge that should be even comes out thin in one spot.
Flat, dry material gives you a fair test and a more repeatable cut.
Clean cuts also protect the hinge. Soot and loose char add roughness at the exact place that must flex.
Our guide to laser cut matboard with no soot shows how cleaning and settings affect delicate sheet materials.
Store finished hinges flat and avoid forcing them past the designed angle. A living hinge has a safe range of motion, and repeated over-flexing will shorten its life even when the material and pattern are right.
How Should You Choose a Fix for a Snapping Hinge?
Choose a fix based on the break, not on the easiest change. If grain is wrong, turn the sheet.
If the pattern is too stiff, choose a more flexible pattern.
If material is brittle, change the material. If edges are rough, change the settings.
For most beginners, grain and pattern are the fastest wins. Turn the sheet so the hinge runs with the grain, then test a more open hinge pattern.
Those two changes solve many cases where a living joint laser cut snaps easily.
Use the test sample as your decision rule. Pick the option that survives the most full bends with no whitening, cracking, or looseness.
If no option passes, the material may be wrong for a living hinge, and a separate hardware hinge may be the better design.
Frequently asked questions
Why do living hinges break after a few bends?
Most living hinges break because the hinge strips run across the grain, the cuts are too deep or too narrow, or the material is too brittle for flexing. Thicker, more flexible material and a tested pattern with wider hinge segments usually last longer.
Always test the exact pattern and material before a full cut.
What wood works best for laser cut living hinges?
Flexible, even-grained woods and plywood that tolerate bending work better than brittle, cross-grained stock. Avoid brittle sheets for hinges that must bend many times.
Test the same thickness and pattern you plan to use, because small changes in material can change hinge life.
How do I test a living hinge before cutting a whole project?
Cut a small sample strip with the full hinge pattern, using the same material, thickness, and settings. Bend it slowly through its full range many times and inspect the hinge segments for whitening, cracking, or looseness.
Adjust the pattern or material if the sample fails early.
Does laser setting affect living hinge strength?
Yes, settings affect cut depth, kerf width, and heat damage along the hinge edges. Too much power or too slow a speed can weaken thin bridges, while too little power can leave rough, incomplete cuts.
Test settings on scrap and compare hinge bends, not just cut-through.