How to Prevent Yellowing When Laser Cutting PETG
To laser cut PETG without yellow edges, use the lowest power that cleanly cuts, keep speed high enough to limit heat, and use strong air assist. Slow, hot cuts brown and yellow PETG, so test small pieces and adjust before cutting your final part.
On this page (8 sections)
- Why does PETG turn yellow when laser cut?
- How do you set speed and power to laser cut PETG without yellow edges?
- What does air assist do for PETG edges?
- How do you prepare PETG before you cut?
- How do you vent fumes and protect your lungs?
- Which laser safety glasses fit PETG work?
- How do you fix yellow edges after a cut?
- How do you get a clean final part from PETG?
To laser cut PETG without yellow edges, use the lowest power that cleanly cuts, keep speed high enough to limit heat, and use strong air assist. Slow, hot cuts brown PETG, so test small pieces and adjust before cutting your final part.
Yellowing is a heat problem, not a color problem. PETG is clear until the laser overheats the edge.
When heat builds, the edge melts, smokes, and turns yellow or brown.
Why does PETG turn yellow when laser cut?
PETG turns yellow when heat stays on the edge too long. Low speed, high power, and weak air assist all make that worse.
The plastic melts instead of vaporizing cleanly, and the hot edge changes color as it cools.
Masking, backing, and film add to the problem. If you cut through tape or a paper backing, the laser heats more material at once.
That extra heat can discolor PETG even when settings look right for bare plastic.
Fitted parts can also trap heat. Small holes, tight corners, and detailed shapes slow the head down.
For another plastic-cutting failure, see mirror acrylic spaghettifying.
Each slow spot gets more heat, so corners often yellow first.
How do you set speed and power to laser cut PETG without yellow edges?
Start fast and start low on power, then raise power only until the cut is clean. A cut that just goes through usually keeps a clearer edge than a slow, powerful cut.
Test on scrap in the same thickness as your final part.
Change one setting at a time. Raise speed first and watch for incomplete cuts.
Then raise power in small steps until the piece drops out cleanly. Slow speed only if low power cannot finish the cut.
Our guide to Laser Cutting PETG: Best Settings & Safety Guide gives a fuller starting point. Use it as a base, then run test cuts.
Color, thickness, and coatings can shift the result.
How do you test settings on clear PETG?
Test straight lines, corners, and small holes on the same scrap piece. Cut each shape at a slightly different speed or power so you can compare edges side by side.
Mark each test on the back so you know what changed.
Look at the edge under bright light. A good edge is clear or pale and smooth.
A yellow edge means too much heat. An incomplete cut means you need more power or less speed.
If you work with clear sheet most often, cutting clear petg on glowforge can help you plan for machines that limit settings. Clear material shows yellowing fast, so it is a good test for heat control.
What does air assist do for PETG edges?
Air assist blows flame away and cools the edge as it cuts. That means less heat stays in the plastic, so the edge stays clearer.
Strong, steady air matters more than on wood, where the main goal is a clean burn line. For a wood material safety check, see the Woodpile laser engraving safety guide.
Keep the nozzle clean and close to the sheet. A clogged nozzle or loose hose can cut air flow without you noticing.
Check the nozzle before each run and confirm air flows when the head moves.
Do not turn air assist off to get a stronger cut. If the cut stalls, raise power a small step or lower speed a small step instead.
Turning air off trades a clean edge for extra heat.
How do you prepare PETG before you cut?
Remove film, masking, and backing, and clean the sheet before cutting. Extra layers add heat and can leave color on the edge.
PETG often ships with film on both sides, so check both faces under bright light.
Wipe dust and fingerprints off with a clean, dry cloth. Dirt can smoke and mark the edge.
If the sheet has a coating or label you cannot remove, test a scrap piece first.
Secure the sheet so it does not move or warp. A moving sheet changes focus and can make one side cut hotter than the other.
Our guide on How to Prevent Warping When Laser Cutting? covers flat holding methods for thin plastic.
When should you remove masking before cutting?
Remove masking before cutting when you want the clearest edge. Masking protects the face during handling, but it adds a layer for the laser to burn through.
That layer can add heat and leave residue near the cut.
If you need masking for engraving or painting, cut first and mask after, if your process allows it. Or test masked and unmasked pieces side by side.
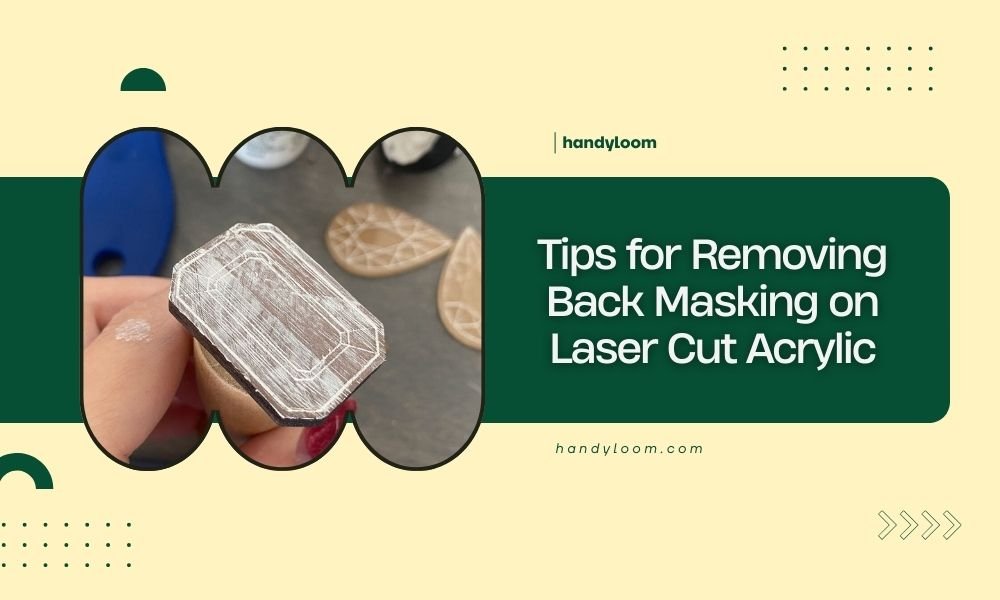
Tips for removing back masking on laser cut acrylic apply to PETG too. Peel slowly at a low angle so you do not stress the edge.
If backing leaves glue, test a plastic-safe cleaner on scrap first.
How do you vent fumes and protect your lungs?
Vent the laser outside and wear a respirator rated for particles and vapors when you cut PETG. Laser cutting creates fumes and fine particles from heated plastic.
For another material-specific fume concern, see laser cutting plywood and formaldehyde.
Good ventilation carries them away, but a respirator adds protection during setup, cleanup, and test cuts.
Keep the exhaust hose pointed outside, not into the room. Do not use a fan as your only vent.
Check that room air does not blow smoke back toward you. Stay with the machine while it runs, since plastic can flame if settings are wrong.
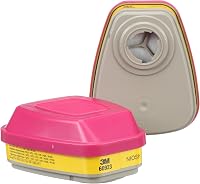
The 3M P100 Respirator Cartridge/Filter 60923 is NIOSH approved against certain organic vapors, acid gases, and particulates. It comes as 1 pair and twists on and off with a bayonet connection for 3M Half and Full Face Pieces 6000, 7000 and FF-400 Series.
The swept back design gives a wider field of view and added comfort during long cuts.
A respirator works only when it fits. 3M says it must be properly fitted for use in labs, chemical manufacturing, petrochemical, and pharmaceutical work.
Replace cartridges when damaged, hard to breathe through, or past the maker schedule. Keep facepiece seals clean and check for cuts before each use.
Which laser safety glasses fit PETG work?
Match your glasses to your laser wavelengths before you cut. PETG work often uses diode lasers in the blue range and fiber or CO2 lasers in infrared ranges.
One pair does not cover every laser, so check the protection range against your machine.
The LP-LaserPair LaserPair Laser Safety Glasses cover 180-534nm at O.D 7+ and 740-1095nm ranges. That range includes 355nm, 405nm, 532nm, 808nm, 980nm, and 1064nm wavelengths.
The frame has a wrap-around design with side coverage and 23% visible light transmission, so you can see your work while the lens filters laser light.
LaserPair says the glasses meet EN207 and A1EN207 certifications through DIN CERTCO. The frame uses TR90 with a scratch resistant polycarbonate lens.
Do not wipe the frame with alcohol or alcohol based disinfectant.
The xTool Laser Safety Glasses cover 316nm-450nm and 900nm-1080nm lasers. They fit xTool F1, F1 Ultra, S1, M1 Ultra, M1, D1 Pro, and D1 machines.
At 50g, the frame is light enough for long cuts without much strain.
Choose between LaserPair and xTool by wavelength first. If your machine uses 532nm green or 1064nm infrared light, LaserPair covers those ranges.
If you use an xTool machine in the ranges above, the xTool pair matches that list. Read the range on the lens or frame and match it to your machine manual.
How do you fix yellow edges after a cut?
Treat yellow edges as a sign to cut faster, not slower. Lower power a step, raise speed a step, and confirm air assist is on.
Cut a new test piece and compare.
One change at a time shows which fix worked.
If the edge is brown or bubbled, heat was much too high. Check for masking you missed.
Check that the sheet is flat and at the right focus. A sheet that lifts toward the lens can burn at raised spots.
If yellow shows only on curves and corners, the head slowed down there. Raise speed for detail work, or split the job into separate cuts so small shapes do not linger.
Our note on Why Is My Laser Cut Edge Rough? covers rough edges that often come with the same heat issue.
Burrs and melted bits near the edge point to the same fix. For plastic parts in general, minimizing burrs when laser cutting polypropylene shows how air flow and speed reduce melted buildup.
PETG responds to those same changes.
What should you do if PETG flames during a cut?
Stop the cut right away if PETG flames or smokes hard. Close the lid, turn the laser off, and let it cool.
Flames mean settings are far too hot for the plastic, and they can ignite nearby material.
Check air assist first, since it is the most common cause. Then lower power and raise speed.
Do not restart the same job with the same settings. Cut a fresh test piece after each change, and keep a fire extinguisher rated for electrical fires within reach.
Never cut plastics you cannot identify. Coatings, paints, and unknown blends can release harmful fumes.
If a sheet smells sharp, smokes at low power, or melts like wax, stop and check the material type before you cut again.
How do you get a clean final part from PETG?
Cut a test piece, check the edge in bright light, then cut the final part with the same settings. Keep the sheet clean, flat, and free of film.
Save your settings in a note so you can repeat a good result.
After the cut, handle the part with clean hands. PETG edges can hold heat and pick up marks from gloves or tools.
Peel any remaining film slowly, holding the part flat so you do not stress the edge. Store finished parts away from direct sun and heat.
The pattern is the same across machine manuals and PETG guides: less heat, more air, and a test cut before the real one. That is how you laser cut PETG without yellow edges, time after time.
Frequently asked questions
Why does PETG turn yellow when laser cut?
PETG usually turns yellow when the laser stays in one spot too long and heats the edge past what the plastic can handle. Low speed, high power, poor air assist, and cutting through masking or adhesive can all add heat.
A faster cut with lower power and clean air flow keeps the edge clearer.
Can clear PETG be cut without yellow edges?
Clear PETG can cut with a clear edge when heat stays under control and the material is clean. Use a test piece, raise speed, lower power in small steps, and keep air assist on.
Remove any backing or film before cutting, since extra layers make the cut hotter and less even.
What laser settings work best for PETG?
Start with your machine maker's PETG settings, then test at a higher speed and slightly lower power than the first guess. Look for a clean cut without flame, smoke, or brown color.
Change one setting at a time and record each result, since thickness and color change the heat the edge receives.
Is PETG safe to laser cut at home?
PETG can be laser cut only with proper eye protection, ventilation, and respiratory protection for fumes and particles. Check your laser manual and local rules before you start, and never cut unknown or coated plastics.
Keep a fire extinguisher nearby and stay with the machine while it runs.