9 Best Laser Engravers for PMAGs (November 2026)
The best laser engravers for PMAGs include the xTool S1 40W Laser Cutter and Laser Engraver for controlled PMAG marking at home, the xTool F2 5W IR & 15W Diode for mixed polymer and metal marking, and the xTool M2 10W Laser Engraver for beginners marking polymer at home.
On this page (8 sections)
- How we compared laser engravers for PMAG marking
- The best laser engravers for PMAGs, pick by pick
- Side by side: power, area and safety class
- Can a 10W diode laser engrave polymer magazine bodies?
- How do you set up a PMAG for laser marking?
- What if you also mark tools, brass or coated metal?
- How much should you spend on a PMAG laser engraver?
- Which laser engraver for PMAGs is the best buy?
The best laser engraver for PMAGs is the xTool S1 40W for most buyers. Its enclosed bed and auto-focus help place a clean mark on a flat polymer side.
PMAGs here means polymer AR magazines. We compare decorative surface marking on the outside of the polymer body only.
A good mark is shallow, legible and repeatable. It should show a logo or number without melting the surface into a rough groove.
Our picks at a glance
-
1
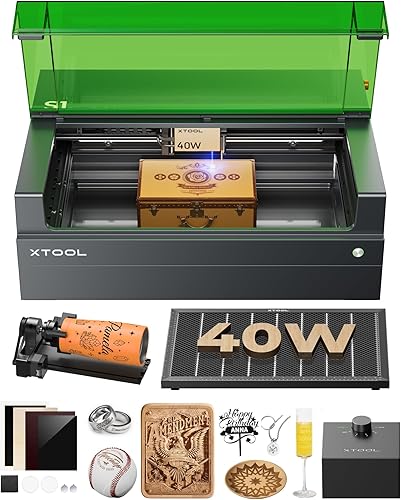 Best for controlled PMAG marking at home
xTool S1 40W Laser Cutter and Laser Engraver
9.5/10 our score
See it on Amazon -
2

-
3

- 4
 Check it
LaserPecker LP2 Laser Engraver with Roller
Best for portable handheld PMAG marking - 5
 Check it
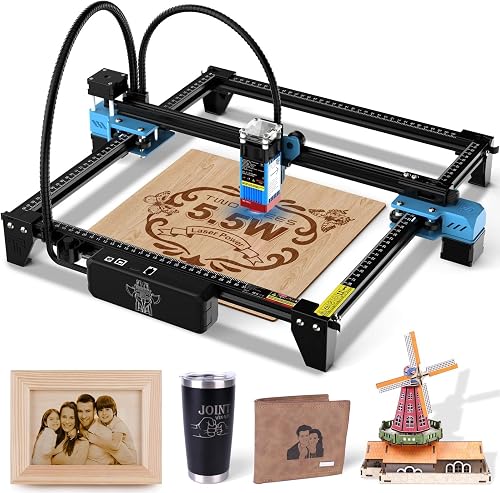
Twotrees TTS-55 Pro Laser Engraver 5500mW Laser
Best budget diode for light surface marks - 6
 Check it
ORTUR Laser Master 2 S2 LU2-10A Laser
Best for large flat PMAG layouts - 7
 Check it
ACMER S1 Laser Engraver Machine
Best for small detailed polymer marks - 8
 Check it
BlazeX M3 10W Laser Engraver Machine
Best for curved mag bodies with rotary set - 9
 Check it
Twotrees TTS-10 Pro Laser Engraver
Best for deep engraving on coated parts
How we compared laser engravers for PMAG marking
We compared power, bed size, safety class, alignment tools and rotary options for one job. That job is a crisp, shallow mark on a flat or gently curved polymer surface.
We checked specs and buyer comments on setup, focus and smoke control.
Most PMAG sides are flat enough for a gantry machine. A roller helps on tubes, but adds setup steps for a simple side logo.
What we weighted for a polymer side
Power is headroom. A 5.5W to 10W diode can make a light etch, while a 40W machine works faster with more melt risk if settings are wrong.
Bed size helps layout. A PMAG side is about 5 to 6 inches long on many models, so a 300 mm square bed fits one mag with test space.
A larger bed helps for batch layouts.
Safety class matters at home. Enclosed Class 1 models block light and smoke better than open frames.
Open Class 4 models need glasses, a controlled room and exhaust.
Alignment matters for repeat work. A camera preview, framing run or clear bed scale helps land the same mark on each mag.
What we did not count as proof
Top speed alone did not decide the ranking. A fast gantry can still make a fuzzy mark if focus is off or the spot is wide.
Material lists needed care. A claim of 300 plus materials usually covers wood, leather, paper and acrylic first.
Polymer mag bodies are a narrower target, so we judged each pick on focus control and test workflow.
The best laser engravers for PMAGs, pick by pick
The top pick gives the most control for home use. The others trade power, portability or price for the same basic task.
xTool S1 40W Laser Cutter and Laser Engraver: Best for controlled PMAG marking at home
- 40W laser power
- 23.93 x 15.16 in bed
- 600mm/s engraving speed
- Class 1 enclosed design
A large enclosed machine with auto-focus and a rotary bundle for curved and larger parts.
Pros
- Large bed for full magazine bodies
- Enclosed Class 1 design
- Auto-focus reduces setup errors
Cons
- Large 86.8 lb footprint
- High power needs careful test settings
The xTool S1 40W suits buyers who want one enclosed machine for mags, wood, acrylic and metal projects. Its 23.93 by 15.16 in bed lets you lay a PMAG flat with room around it for test marks.
At 600mm/s, you can run a design fast, but speed is not the goal on polymer. Slow down for a darker line, or raise speed for a lighter etch, and test both on scrap polymer first.
Auto-focus and xTool Creative Space help with placement. The enclosed cover filters 99 percent of laser light, per xTool, and the design blocks smoke and noise.
Pin-point Positioning and AutoPassthrough also matter for larger work. You can plan a long sign or a rotary job without rebuilding the design for each pass.
The trade-off is size and weight at 86.8 lb. This is a bench machine, not a travel tool.
If you want a small portable unit, look lower in this list.
xTool F2 5W IR & 15W Diode: Best for mixed polymer and metal marking
- 5W IR and 15W diode lasers
- Built-in 50MP camera
- 6000mm/s speed
- Portable 10 lb desktop design
A dual laser desktop model with camera alignment for small parts and on-site marking.
Pros
- IR laser for metal color marking
- Camera helps small part placement
- Portable for events and markets
Cons
- Class 4 laser needs strict eye protection
- Small desktop work area
The xTool F2 suits makers who also mark coated metal, brass or other small parts. Its 5W IR plus 15W diode pair gives two tools in one desktop unit.
The IR side is for color marking on metal. The diode side handles embossing and cutting on thicker material.
A built-in 50MP camera gives up to 0.1 mm alignment accuracy on small pieces, per xTool. That helps a logo land in the same spot on each mag.
At 6000mm/s, marking is fast for small batch work. It weighs only 4.6 kg from xTool specs, so it moves to fairs and pop-ups.
The Slide Extension and RA3 accessory path also help with coasters, phone cases and small batch runs. The trade-off is safety class. xTool lists this as a Class 4 laser, so you need proper eye protection and a controlled area.
xTool M2 10W Laser Engraver: Best for beginners marking polymer at home
- 10W diode laser
- Built-in dual cameras
- Class 1 enclosed design
- 300 plus material range from xTool
An enclosed 10W machine with dual cameras and templates for home craft marking.
Pros
- Dual camera preview
- Enclosed for home use
- Beginner friendly software
Cons
- Rotary and inkjet modules sold separately
- 36.2 lb unit takes bench space
The xTool M2 10W suits home DIY buyers who want an enclosed machine with simple preview. Its 10W diode and dual cameras help place a design before you burn.
The cameras give a real-time preview of the workspace. That reduces wasted mags from crooked logos or text running off a curved edge.
xTool Studio includes templates and an AI image generator. You can start from text or a simple logo without learning full design software.
Class 1 enclosed safety and real-time monitoring make this a calmer pick for a home room. The unit weighs 36.2 lb, so plan for fixed bench space.
The 10W diode also seals felt and fabric edges and cuts cardstock, leather and wood. The CMYK inkjet module and RA3 Lite rotary are not included in this standalone unit.
Budget for them only if you need color printing or rotary work.
LaserPecker LP2 Laser Engraver with Roller: Best for portable handheld PMAG marking
- Portable handheld design
- Versatile electric roller
- 0.05 mm compressed spot
- 1417 in/min max engraving speed
A small handheld engraver with a roller for curved surfaces and mobile work.
Pros
- Portable and handheld
- Roller for cylindrical parts
- Simple phone or PC connection
Cons
- 4 in width limits placement
- Cannot engrave pure or shiny metal
The LaserPecker LP2 suits buyers who want to mark a mag at a table, in a shop or at an event. Its portable handheld design weighs 10.25 lb and connects to a phone or PC.
A 0.05 mm compressed spot helps with small text and fine line work. Max engraving speed is 1417 in/min, per LaserPecker.
The versatile electric roller gives cylinder mode for round parts. Slab mode and trolley mode extend engraving length up to 196 in, with width at 4 in.
For PMAGs, the 4 in width is the limit to watch. Measure your design before you start, and keep the laser distance at 11 cm as directed.
Resolution options at 1K, 1.3K and 2K let you trade speed for detail on small marks. The trade-off is material limits.
LaserPecker says it cannot engrave pure metal or shiny metal, and light or transparent material can reflect the beam.
Twotrees TTS-55 Pro Laser Engraver 5500mW Laser: Best budget diode for light surface marks
- 5500mW laser
- 300 x 300 mm work area
- 0.08 x 0.46 mm spot
- Air assist support
A compact 5.5W diode with a 300 mm square work area and air assist support.
Pros
- Affordable entry power
- Large square work area
- Works with LightBurn and LaserGRBL
Cons
- Class II open frame needs eye protection
- 8.23 lb frame is less enclosed
The Twotrees TTS-55 Pro suits budget buyers who want a 300 mm square area for flat marking. Its 5500mW laser is enough for light surface marks when you test settings.
The work area is 300 by 300 mm. You can lay out one mag or a small group of flat parts with room for test swatches.
A 0.08 by 0.46 mm spot and LD plus FAC plus C-Lens compression help with detail. Twotrees says engraving accuracy reaches 0.1 mm.
Air assist support helps clear smoke and debris at the burn line. That can keep a polymer line cleaner than a still-air run.
A fast 32-bit control board supports online work, TF card offline work, Wi-Fi and web control. LaserGRBL and LightBurn support helps if you already use those programs.
The trade-off is the open frame and Class II laser. You need safety glasses, control of bystanders and good ventilation for polymer fumes.
ORTUR Laser Master 2 S2 LU2-10A Laser: Best for large flat PMAG layouts
- 10000mW laser module
- 390 x 410 mm engraving area
- 0.05 x 0.1 mm compressed point
- G-sensor safety stop
A 10W open frame machine with a large area for several mags laid flat.
Pros
- Large 390 x 410 mm area
- Fine compressed spot
- Modular metal frame
Cons
- Class 4 open frame
- Needs separate safety glasses and ventilation
The ORTUR Laser Master 2 S2 LU2-10A suits buyers who want a large flat area on a budget. Its 390 by 410 mm engraving area fits several mags side by side.
A 10000mW module with a 0.05 by 0.1 mm compressed point gives fine detail for text and line art. That spot helps on polymer where a wide spot can look fuzzy.
The full metal frame and modular design make assembly and part swaps simple. ORTUR says assembly takes about 10 to 15 minutes.
Safety features include a G-sensor that stops the laser if the machine moves or tilts. The protective cover filters 98 percent of UV light, per ORTUR, and glasses are in the package.
Dual fan cooling on the 235 g laser module helps with longer runs. The trade-off is the Class 4 open frame.
This needs a dedicated work area, eye protection and exhaust, not a casual desktop corner.
ACMER S1 Laser Engraver Machine: Best for small detailed polymer marks
- 2500mW diode laser
- 130 x 130 mm work area
- 0.01 mm positioning accuracy
- 99 percent preassembled
A light 2.5W machine for small logos and text on a single mag at a time.
Pros
- Very portable at 3.98 lb
- Fast setup
- Fine positioning for detail
Cons
- Small 130 mm area
- 2.5W is slow for deep marks
The ACMER S1 suits buyers who mark one mag at a time and want light weight. Its 2500mW diode and 130 by 130 mm area fit small logos, names and simple marks.
At 3.98 lb, this is the lightest pick here. It stores in a closet and moves to a friend's bench without a bench press.
Positioning accuracy is 0.01 mm, per ACMER. That helps with repeat text placement when you mark a set of mags.
Engraving speed reaches 10,000mm/min. On polymer, you will likely run slower for a controlled etch, so treat top speed as a limit, not a target.
The 455 nm diode, 2 mm focal length and aluminum alloy frame suit wood, bamboo, leather, plastic and PCB work. Acmerstudio is included, and LightBurn and LaserGRBL are also supported.
The trade-off is power and area. A 2.5W laser is slower for deep marks, and the 130 mm area fits one mag body at a time.
BlazeX M3 10W Laser Engraver Machine: Best for curved mag bodies with rotary set
- 10W laser module
- Rotary roller with height risers
- Class 1 safety
- Protective enclosure included
A 10W enclosed machine with a rotary kit for cylindrical and curved marking.
Pros
- Rotary kit included
- Enclosure and honeycomb bed
- Class 1 safety rating
Cons
- 16.22 lb desktop unit
- Newer model with less buyer history
The BlazeX M3 10W suits buyers who want a rotary option for curved mag bodies. Its 10W module and rotary roller with height risers help on cylindrical parts.
The kit includes a protective enclosure, honeycomb bed, toolkit and 13 materials. That gives you a full setup in one box for flat or rotary work.
Accuracy is 0.01 mm, per BlazeX. Fine accuracy helps with small text on a narrow mag side.
Class 1 safety, a fan for smoke and sensors that stop on tilt or lid open make this a home friendly pick. It weighs 16.22 lb.
The 360 degree rotary setup also suits tumblers and wine bottles. Height risers reduce clearance problems on taller items.
Compatibility with LightBurn, LaserGRBL and CutLabX helps if you already have a workflow. The trade-off is newer status.
This model has less buyer history than the older Twotrees and ORTUR picks in this group.
Twotrees TTS-10 Pro Laser Engraver: Best for deep engraving on coated parts
- 10000mW optical power
- 300 x 300 mm work area
- 450nm blue light diode
- Air assist pump included
A 10W diode desktop machine for deeper marks on wood, acrylic and coated metal.
Pros
- 10W power with air assist
- 300 mm square area
- Offline TF card work
Cons
- Not for bare steel without coating
- Open frame needs safety setup
The Twotrees TTS-10 Pro suits buyers who want 10W power on a 300 mm square bed. Its 10000mW optical power gives deeper marks on coated parts and other materials.
The work area is 300 by 300 mm. That fits a PMAG flat with space for test patches at the edge.
A 0.069 mm laser spot and plus or minus 0.1 mm engraving precision help with crisp lines. The machine runs at up to 30,000mm/min in related Twotrees specs for this class.
An air assist pump and tubing are included. Air assist helps with cutting and can improve edge quality on some materials.
A 32-bit dual-core board supports online work, TF card offline work, mobile app control and web control. A 4 GB TF card and card reader are included in the package.
The trade-off is material limits. Twotrees says bare stainless steel or uncoated metal is not recommended without marking spray or surface prep.
That note matters if you mix mags with metal parts.
Side by side: power, area and safety class
The xTool S1 40W leads on bed size and enclosed safety. The xTool F2 leads on dual laser range.
The ORTUR leads on flat area per dollar in this group.
| Product | Best for | Power | Bed Size | Speed | Our score |
|---|---|---|---|---|---|
| xTool S1 40W Laser Cutter and Laser Engraver | controlled PMAG marking at home | 40W | 23.93 x 15.16 in | 600mm/s | 9.5 |
| xTool F2 5W IR & 15W Diode | mixed polymer and metal marking | 5W IR and 15W diode | 6000mm/s | 9.4 | |
| xTool M2 10W Laser Engraver | beginners marking polymer at home | 10W | 9.3 | ||
| LaserPecker LP2 Laser Engraver with Roller | portable handheld PMAG marking | 9.3 | |||
| Twotrees TTS-55 Pro Laser Engraver 5500mW Laser | budget diode for light surface marks | 5500mW | 9.2 | ||
| ORTUR Laser Master 2 S2 LU2-10A Laser | large flat PMAG layouts | 10000mW | 9.1 | ||
| ACMER S1 Laser Engraver Machine | small detailed polymer marks | 2500mW | 9.0 | ||
| BlazeX M3 10W Laser Engraver Machine | curved mag bodies with rotary set | 10W | 9.0 | ||
| Twotrees TTS-10 Pro Laser Engraver | deep engraving on coated parts | 10000mW | 8.9 |
For PMAGs, safety class matters more than top speed. Enclosed Class 1 models reduce stray light and smoke in a home room.
Open frame Class 4 models need glasses, a closed door policy and exhaust. Do not let kids or pets share the room during a run.
How to read the comparison for a flat mag side
A large bed helps only if you use the extra space. One mag, one logo and one test strip fit in 300 mm.
Bigger beds help when you mark a full set in one run.
A fine spot helps with text. A spot near 0.05 mm can hold thin strokes better than a wide spot on polymer.
Focus still decides the final look, because a perfect spot out of focus looks wide.
Power helps with repeat depth. A 10W diode reaches a darker mark faster than a 2.5W diode.
The same power can melt a thin polymer wall if you stack passes without cooling time.
Safety class in plain terms
Class 1 enclosed design blocks most light and keeps the beam inside the cover. That makes home use calmer, but you still need ventilation and you must never look into the beam.
Class 4 open frame design exposes the beam path. You need rated glasses, a clear work zone and a rule that no one walks in during a run.
That setup can work well, but it is not casual.
Can a 10W diode laser engrave polymer magazine bodies?
Yes. A 10W diode can make decorative surface marks on polymer when you start at low power and test in small steps.
The question is how deep you want the mark to go.
A shallow etch that changes color or texture needs less power than a deep groove. Polymer melts before it cuts cleanly on many diode machines, so a light pass is often the cleanest look.
If you want to compare metal marking too, read can a 10w laser engrave metal and our guide to the Best Laser Engraver For Metal. Those pages help separate polymer marking from metal work.
Diode vs infrared for PMAGs
Diode lasers are the standard pick for polymer surface marking. Infrared lasers shine on metal color marking and fine metal detail.
For a mag only buyer, diode power, focus control and speed control matter most. An IR source adds cost you may not use.
An IR laser can mark bare metal with color change, while a diode laser often needs coating or spray on bare metal. That split is why the xTool F2 dual laser sits in a different use case from the diode only picks.
How much power do you really need?
A 5.5W diode can mark light designs. A 10W diode gives more headroom for faster or darker marks.
A 40W machine gives the most headroom, but it also melts polymer faster if settings are wrong.
Start with a small test square. Change one setting at a time, either power or speed, and note the result.
Spacing matters too. Two light passes with a pause can look cleaner than one heavy pass.
Polymer holds heat, so a pause lets the surface cool before the next pass.
How do you set up a PMAG for laser marking?
Lay the mag flat, unloaded, with the side you want to mark facing up. Remove any rounds and keep the mag away from the work area until marking is done.
Clean the surface with a dry cloth. Dirt and oil can cause uneven marks and extra smoke.
Tape a test patch of scrap polymer to the bed, or use a hidden inside area. Run your design at low power first and check the depth.
Use How to Use a Laser Engraver? for the full setup steps. Also read How Does a Laser Engraver Work? to understand focus, power and speed before your first run.
Focus and placement tips
Focus is the most common cause of fuzzy marks. Set focus on the exact surface height, not on the bed.
Use a camera preview or a light frame run to check placement. A 1 mm shift looks small on paper and large on a 1 inch logo.
A PMAG side is not fully flat near ribs and windows. Place the design on the flattest panel and keep text away from raised ribs.
If the design must cross a rib, test again after raising the head or tilting the mag in small steps.
Ventilation and eye protection
Polymer smoke is unpleasant and can irritate lungs. Run an exhaust fan or work near a window with air moving out of the room.
Wear glasses rated for your laser wavelength and power. Class 1 enclosed models reduce risk, but never look into the beam.
Keep a fire watch during the run. Polymer can catch fire if power is too high or focus sits on a thin edge.
Stop the job, let the part cool and lower power before you try again.
Test marks that save mags
Make a test grid on scrap polymer with the same color and finish. Mark power in one direction and speed in the other, then check each square under good light.
Note the settings that give a clean line without shiny melt. Use that square as your starting point for the real mag.
Change only one setting at a time after that.
What if you also mark tools, brass or coated metal?
Many buyers mark mags and tools with the same machine. A 10W diode handles coated metal and anodized parts better than bare steel.
Our roundup of the best laser engraver for tools covers tool marking needs. For brass parts, see the Best Laser Engraver For Brass guide.
The xTool F2 with its 5W IR laser is the pick here for metal color marking. The Twotrees TTS-10 Pro notes bare steel needs coating or spray, so plan for that step.
Coated metal vs bare metal
Coated, painted or anodized metal marks easier than bare shiny metal. The laser removes or changes the coating layer first.
Bare steel and brass often need an IR laser or a marking spray. Test a small area before you commit a full design.
Shiny surfaces can reflect the beam and give a weak mark. A matte coating or spray layer gives the laser a surface it can act on.
Wipe and test again after the first pass.
When a dual laser is worth it
A dual laser is worth it when metal marking is a regular job, not a one off test. Color marking on metal, fine metal detail and small batch metal work use the IR side more often.
For polymer only work, a single diode laser is simpler. You save money and you avoid the extra focus and safety steps that come with a second source.
How much should you spend on a PMAG laser engraver?
Budget diode models from 5.5W to 10W cover basic polymer marking. The Twotrees TTS-55 Pro and ORTUR models in this list sit in that range.
Mid-range enclosed models add safety and ease of use. The xTool M2 10W and BlazeX M3 10W add enclosures and cameras.
Premium picks add power or dual lasers. The xTool S1 40W and xTool F2 cost more because they do more than mark mags.
The specs that matter most
Look at laser power in mW or W, bed size, spot size and safety class. Those four specs predict your result better than top speed claims.
Spot size under 0.1 mm helps with small text. A bed over 300 mm helps with batch layouts.
Class 1 enclosed safety helps in a home room.
Focus method matters as well. Auto focus helps when mag height changes from rib to panel.
A manual focus tool works, but it adds a step for each new part.
What to budget beyond the machine
Plan for glasses rated for your laser if the model is open frame. Plan for exhaust tubing, a fan or a window setup for polymer smoke.
Plan for test material in a similar polymer finish. Scrap polymer helps you find settings without risking a good mag.
A honeycomb bed or raised slats also help if the mag sits uneven on a flat plate.
Which laser engraver for PMAGs is the best buy?
The best laser engraver for PMAGs depends on your room and your other projects. Pick the xTool S1 40W for enclosed power and a large bed.
Pick the xTool M2 10W for a simpler enclosed home setup.
Pick the Twotrees TTS-55 Pro or ORTUR 10W model for a lower cost open frame. Pick the LaserPecker LP2 for portable work.
Pick the xTool F2 when metal marking matters too.
Our score weighs specs, features and buyer feedback against what you are shopping for. Start with a test mark, check ventilation and glasses, and move power up in small steps.
A final pick by use case
Choose the ACMER S1 for light weight and small marks. Choose the BlazeX M3 for rotary work with an enclosure in the box.
Choose the Twotrees TTS-10 Pro for 10W power with air assist included.
Match the machine to the room first, then to the design. An enclosed model fits a home room better.
An open frame fits a workshop with exhaust and a clear safety zone. That order keeps the mark clean and the setup safe.
Our top 3 picks at a glance
-
1
Best for controlled PMAG marking at home
xTool S1 40W Laser Cutter and Laser Engraver
9.5/10 our score
See it on Amazon -
2
-
3
Frequently asked questions
What laser power is enough for decorative PMAG marking?
A 5W to 10W diode is enough for light decorative surface marks on polymer when settings are tested in small steps. Higher power helps with deeper or faster marks, but it also raises melt and fire risk.
Start low, test on a hidden area, and increase power or reduce speed in small changes.
Can a laser engraver mark PMAGs safely?
Yes, with ventilation, eye protection matching the laser class, and no unattended runs. Polymer can melt, smoke and catch fire, so keep a close watch and use an enclosure or exhaust where possible.
Never engrave a loaded magazine, and follow the maker safety steps for your exact model.
Do you need a rotary attachment for PMAGs?
No. Most PMAG bodies are flat enough for straight marking, and a flat bed gives simpler alignment.
A rotary roller helps on curved tubes and tumblers, and it can help on a rounded mag body.
If you only mark flat sides, a flat bed is simpler and often cheaper.
Diode or infrared laser for polymer magazines?
A diode laser is the common choice for polymer surface marking in this group. Infrared lasers are mainly useful for metal color marking and fine metal work.
For polymer only, diode power, focus and speed control matter more than adding an IR source.


