How to Use Shrink Wrap for Sublimation
To use shrink wrap for sublimation, fit a sleeve over the transfer and blank, then heat it according to the blank and wrap instructions so the paper stays close to the coated surface. Let the item cool enough to handle before removing the sleeve.
On this page (7 sections)
- How do you use shrink wrap for sublimation?
- How do you fit sublimation shrink wrap sleeves?
- How should you secure the transfer before heating?
- How do you heat a wrapped sublimation blank?
- How do you remove sublimation shrink wrap sleeves?
- What causes uneven results with sublimation shrink wrap?
- Which supplies should you choose for your project?
To use shrink wrap for sublimation, wrap the transfer around a compatible blank, secure it, slide on a fitted sleeve, and heat it as directed. The sleeve presses the transfer against the coated surface; let the item cool before removing the wrap.
A close fit matters. A loose sleeve may leave parts of the transfer away from the blank, while a sleeve that's too tight can be hard to position or remove.
How do you use shrink wrap for sublimation?
Place the transfer against the blank, then cover it with a fitted shrink sleeve before heating. Follow the instructions for your particular blank, sleeve, and heating method because settings and removal steps vary.
- Confirm the blank is made for sublimation and check its heating directions.
- Cut the printed transfer to fit, leaving a manageable edge at the seam.
- Wrap the paper around the blank with the printed side facing the coated surface.
- Secure the seam and any loose edges with heat tape.
- Pull the sleeve over the transfer without shifting the paper.
- Heat the assembly as directed, then cool it enough to handle.
- Cut or peel the sleeve away carefully and remove the transfer paper.
A sublimation printer machine and compatible sublimation ink are needed to make sublimation transfers. Ordinary inkjet transfer paper is made for a different process, so check the paper and printer instructions before printing.
For paper compatibility, see using sublimation ink on paper.
What supplies help you prepare a transfer?
Use sublimation paper, a compatible blank, heat tape, and a sleeve sized for that blank. Keep scissors nearby for trimming the paper and sleeve where the instructions allow.
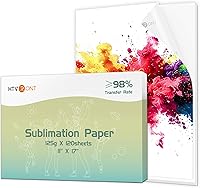
A-SUB Sublimation Paper is an option for readers printing sublimation transfers: it comes in 8.5 x 11 in sheets, and its instructions say it works with sublimation ink and a compatible printer.
This paper is intended for white or light-colored polyester, materials with up to 30% cotton, and coated ceramic, tile, metal, and drinkware blanks. For a vehicle project, compare sublimation car coaster blanks for compatible shapes and coatings.
Confirm that your blank is coated for sublimation and that its shape fits your design.
Compare JOYCLUB sublimation blanks for compatible project options.
For apparel projects, Avery Heat Transfer Paper is designed for dark-colored cotton and cotton/poly fabric, and works with inkjet printers. It is not a substitute for sublimation paper on a coated drinkware blank.
How do you fit sublimation shrink wrap sleeves?
Choose a sleeve that covers the transfer area and fits the blank without large gaps. Check the sleeve's size and shape against the blank before you print or tape the transfer.
Lay the transfer flat around the blank and smooth out folds before adding the sleeve. Keep the paper seam straight, then secure it so it can't lift as you slide on the wrap.
Move the sleeve into position with small adjustments. If pulling it on shifts the paper, stop and reset the transfer rather than heating it out of alignment.
The guide to best sublimation shrink wrap sleeves for tumblers can help you compare sleeves for cylindrical blanks. For other drinkware shapes, see options for best sublimation shrink wrap for mugs and best sublimation shrink wrap for shot glasses.
How should you secure the transfer before heating?
Use heat tape to hold the transfer edges and seam still before fitting the shrink sleeve. The sleeve adds pressure, but it doesn't replace securing loose paper.
Keep tape on the paper or in areas allowed by the blank's instructions. Tape placed across the image area can block contact or leave a mark.
A heat tape for sublimation tumblers guide can help you choose tape for wrapping drinkware. If cutting long strips slows you down, compare a best heat tape dispenser for sublimation for easier handling.
For designs with several paper pieces, sublimation paper clips may help hold sections during setup. Use them only where they won't obstruct the sleeve or heating process.
How do you heat a wrapped sublimation blank?
Use the temperature, time, and heating method specified for the blank and sleeve. There is no single setting that applies to every coating, size, press, or wrap.
Check that the sleeve is smooth and the paper is still in position before heating. Keep the work area clear, use the press or oven only as its maker directs, and handle hot parts with suitable protection.
The Fancierstudio Digital Heat Press 15 x includes electronic time and heat control, with adjustable pressure. Its listed temperature range is 0–699°F, but use only settings suited to your blank and transfer process.
A heat press doesn't automatically suit every wrapped drinkware blank. Compare a sublimation oven and heat press against the blank's directions.
Check the shape and clearances for your setup, and follow the blank's directions for using a press, convection oven, or other approved method.
How do you remove sublimation shrink wrap sleeves?
Let the blank cool enough to handle, then cut or peel the sleeve away carefully. Keep scissors pointed away from the coating and transfer area.
Start at an edge where the sleeve doesn't cover the printed surface. Remove the wrap and paper slowly, then check the result for areas where the paper shifted or failed to contact the blank.
Don't pull a hot sleeve against your skin or rush removal while the blank is difficult to hold. Follow the blank's cooling instructions before handling or using it.
What causes uneven results with sublimation shrink wrap?
Uneven contact, a shifted transfer, or a sleeve that doesn't fit can leave an inconsistent result. Check the full setup before changing time or temperature.
Common setup problems include:
- Loose paper: secure the seam and edges with heat tape.
- Wrinkles: smooth the paper before covering it with a sleeve.
- Poor sleeve fit: compare the sleeve shape with the blank before heating.
- Wrong blank: confirm it has a sublimation-ready coating.
- Unapproved settings: follow the directions for the blank and sleeve.
Changing several parts of the process at once makes it harder to identify the cause. Adjust one setup detail at a time, while staying within the manufacturers' directions.
Can a silicone wrap replace a shrink sleeve?
A silicone wrap and a shrink sleeve are different tools, and which one suits your blank depends on the product directions and heating method. A silicone wrap may be useful for supported press setups, while a shrink sleeve fits around the transfer and blank.
Compare a best sublimation silicone wrap if your process calls for one. Don't combine wraps or add pressure unless the blank and tool instructions allow it.
Which supplies should you choose for your project?
For sublimation shrink wrap, match the sleeve to the blank, secure the transfer with heat tape, and use the blank's approved heating process. Start with a test design on a compatible blank if you need to adjust your setup.
Choose tumbler sleeves for suitable cylindrical blanks, and compare mug or shot glass options when the shape changes. For coaster projects, compare wood and MDF sublimation coaster blanks for compatible coated surfaces.
Pick sublimation paper for coated drinkware and keep inkjet transfer paper for the fabric projects it is designed for.
If the transfer moves, fix the fit or tape placement before changing heat settings. Follow the blank's instructions from wrapping through cooling and removal.
Frequently asked questions
How do you use sublimation shrink wrap sleeves?
Wrap the printed transfer around a compatible sublimation blank, secure its seam and edges with heat tape, and pull a correctly sized sleeve over the assembly. Follow the sleeve and blank instructions for heating, then let the item cool enough to handle before cutting or peeling the sleeve away.
Can you reuse sublimation shrink wrap?
Use each sleeve only as its maker directs. Heat can change the sleeve's shape, and a sleeve that no longer fits snugly may not hold the paper against the blank.
Check for tears, loose areas, or residue before each project, and replace it if its condition is uncertain.
Does shrink wrap replace heat tape for sublimation?
No. Heat tape can hold the transfer seam and edges in place, while a shrink sleeve applies pressure around the blank during heating.
Use both when the wrap and blank instructions call for them, and keep tape away from areas where it could mark the finished surface.
Can you use shrink wrap on any sublimation blank?
No. Use a sleeve only with blanks and heating methods that its maker approves.
Tumblers, mugs, and shot glasses may have different shapes and heating instructions, so check the blank's coating, dimensions, and process before wrapping it.