How to Design Shirts for Sublimation
Sublimation shirt designs need the right size, placement, and mirror setting before printing. Build the artwork at the final print size, keep key details away from seams, and use white or light polyester shirts for the strongest result.
On this page (8 sections)
- What shirts work for sublimation shirt designs?
- How large should a sublimation shirt design be?
- How do you place artwork on the shirt?
- How do you prepare sublimation designs for shirts?
- Which paper should you use?
- How do you press the design?
- What mistakes affect sublimation shirt designs?
- How do you choose the right design workflow?
Sublimation shirts design starts with artwork sized for the finished shirt, placed away from seams, mirrored when needed, and printed for a white or light polyester surface. A paper mockup helps you check scale and position before you use ink, paper, and heat.
The process has four decisions: choose the shirt, build the artwork, set up the transfer, and press it evenly. Your design can look sharp on screen but still appear too small, too high, or dull if one of those steps is missed.
What shirts work for sublimation shirt designs?
White and light-colored polyester shirts are the safest starting point for sublimation. The ink works best on high-polyester fabric, while dark fabric and cotton can change how the colors appear.
Check the fabric blend before designing. A shirt with a high cotton content may not give the same color strength or wash appearance as polyester.
For a collared polyester option, compare polo shirt blanks for sublimation.
For a closer look at fabric choices, read how to choose sublimation shirts blanks. For child-sized options, see kids' sublimation shirt blanks.
Light shirts also give your artwork a cleaner base because standard sublimation printing does not add a white ink layer. The shirt color becomes part of the final look, so pale blue, pink, gray, or another light shade can shift the design's colors.
For darker options, see whether you can sublimate on red or purple shirts.
Use the guide to what shirt colors work best for sublimation when your artwork depends on bright whites, soft pastels, or strong contrast.
Can you sublimate on cotton shirts?
Cotton is not the usual surface for standard sublimation. If you want to work with cotton, review how to sublimation on cotton shirts for methods that use a suitable transfer approach.
A design made for polyester may need a different workflow on cotton. Test the process on a spare shirt or fabric sample before making a customer order.
How large should a sublimation shirt design be?
Size the artwork to the print area, not the full shirt. Measure between the seams, collar, pockets, and sleeves, then leave enough space for the design to sit flat.
Common starting points include:
- Small chest design: about 3–5 inches wide
- Large front design: about 10–12 inches wide
- Back design: about 10–12 inches wide
- Sleeve design: measure the sleeve before setting the width
These are starting points, not fixed rules. A tall illustration may need a narrower width, while a short phrase may need more width to remain readable.
Create the artwork at its final print size whenever possible. Enlarging a small, low-resolution image can make edges look soft or reveal pixelation in fine details.
Keep important words, faces, borders, and logos away from the collar and side seams. A design that touches a seam may not press evenly, and a curved shirt surface can make straight lines look uneven.
How do you place artwork on the shirt?
Center the design between the side seams and use the collar as your vertical reference. A small chest mark sits higher than a full front graphic, so decide the placement before applying heat.
For a full front design, lay the shirt flat and smooth. Mark the center line by folding the shirt lightly or using a ruler, then check that the artwork is the same distance from both side seams.
For a small chest design, position the artwork below the collar rather than directly under it. Leave room for the neckline and avoid placing the design over a pocket unless the artwork is made for that shape.
Long sleeve shirts need extra care because the sleeve changes shape when laid flat. See the guide to best sublimation shirts long sleeve before planning a sleeve or cuff design.
How do you prepare sublimation designs for shirts?
Build the design at the correct canvas size, check the colors, and mirror the artwork before printing. Keep text large enough to read and avoid details that will disappear when the image is transferred.
Use a design program that shows the print area at full size. Add temporary guides for the center line, safe edges, and any shirt features such as pockets.
Mirror the file if it contains text or directional artwork. A mirrored transfer looks backward on paper but reads correctly after pressing.
Remove any temporary guides before exporting the final file.
Print a plain paper proof first. Hold it against the shirt to check the size, chest position, and relationship between the design and the seams.
Which paper should you use?
Use sublimation paper with sublimation ink and a compatible sublimation printer. Regular printer ink does not replace sublimation ink, and the paper size should match the artwork and printer settings.
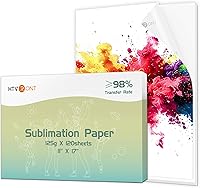
The A-SUB paper is suited to creators who want a larger pack for repeated shirt projects. Its 8.5 x 11 inch size works for many small and medium designs, but a large full-front graphic may need a different paper size or a tiled layout.
The paper is also described for compatible polyester, ceramic, tile, phone case, metal plate, tumbler, and mug projects. For another shaped textile blank, compare sublimation oven mitt blanks.
Those uses do not make every blank compatible, so confirm that the surface is made for sublimation before printing.
For a printer choice, see the sublimation printer machine buying guide.
Can heat transfer paper be used for every sublimation design?
No. Heat transfer paper and sublimation paper serve different processes, inks, and fabric choices.
Avery Heat Transfer Paper suits dark cotton and cotton/poly projects made with an inkjet printer. It includes 5 sheets and is designed for cutting with scissors or an electronic or die-cutting machine.
This is a useful alternative when your shirt is dark or has too much cotton for standard sublimation. It is not a substitute for sublimation paper when you are transferring sublimation ink into light polyester.
How do you press the design?
Press the transfer on a clean, flat shirt with the pressure, temperature, and time suited to your paper and blank. Follow the instructions for the materials you chose, and keep the design flat during the press.
The Fancierstudio Digital Heat Press 15 x 15 gives you a pressing area that suits many shirt designs up to that size. Its 110-volt, 1800-watt design has a temperature range of 0–699°F and a time range of 0–999 seconds.
The adjustable pressure helps you match the press to the shirt and transfer setup. Its upward-opening design can save space around the work area, while the Teflon-coated heat platen is intended for pressing work.
Measure your design before choosing a press. A 15 x 15 inch platen does not mean every shirt design should fill the entire area.
What mistakes affect sublimation shirt designs?
The most common problems come from the wrong shirt, incorrect mirroring, poor placement, or uneven heat. A short checklist can prevent most avoidable waste.
- Confirm the shirt is white or light polyester when using standard sublimation.
- Check the artwork size against the shirt before printing.
- Mirror text and directional images.
- Remove temporary guides and unwanted background elements.
- Keep the shirt smooth and free from lint.
- Center the transfer before pressing.
- Use the paper and shirt instructions for time and temperature.
- Let the shirt cool as directed before judging the final color.
Do not judge placement from the transfer paper alone. The design may look different after pressing, so use a full-size paper proof and measure from the collar and side seams.
If you are designing for women’s shirts, the cut and neckline can change the best position. Compare best sublimation shirts for women before setting a reusable template.
How do you choose the right design workflow?
Choose standard sublimation for light polyester shirts, and choose printable transfer paper when you need a dark cotton or cotton/poly shirt. Then match the paper size and press area to the design you plan to make.
For repeated polyester work, the A-SUB 8.5 x 11 inch paper gives you 110 sheets for multiple projects. For dark cotton projects, Avery's 5-sheet pack fits smaller batches and supports inkjet-printed iron-on designs.
A 15 x 15 inch heat press suits many shirt layouts and gives you room to press designs within that area. If you also work with other craft materials, the guide to How to Design & Make a Laser Cut Wood Box covers a different kind of design planning.
The decision rule is simple: choose the shirt first, size the artwork to its usable area, mirror only when the process requires it, and make a paper proof before pressing. That approach keeps sublimation shirts design work easier to repeat and easier to correct.
Frequently asked questions
What size should a sublimation shirt design be?
Most adult front designs work well when you size the artwork to the shirt area you want to cover, often about 10–12 inches wide. Measure the shirt, account for seams and collars, and print a paper mockup at full size before using transfer paper.
Do sublimation designs need to be mirrored?
Mirror sublimation artwork before printing when the design contains words, numbers, or an intentional direction. The mirrored transfer is pressed onto the shirt so the finished image reads correctly.
Check your printer software and design program before sending the final file.
What shirts work best for sublimation?
White or light-colored polyester shirts work best because sublimation ink becomes part of the polyester fibers and does not add an opaque white layer. Dark shirts and high-cotton fabrics can change the color or prevent the design from showing clearly.
How do you place a sublimation design on a shirt?
Center the design between the side seams, then place it according to the shirt area you want to cover. A full front design sits lower than a small chest logo.
Use a ruler, shirt alignment guide, or folded reference line before pressing.