
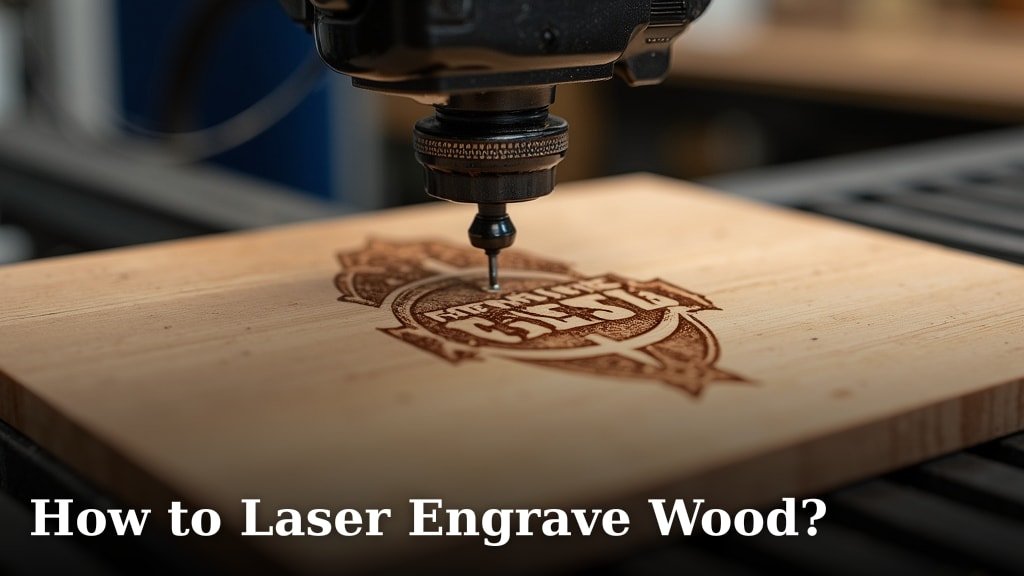
The easiest way to laser engrave wood is by using a CO2 laser engraver to precisely burn designs onto the material’s surface. This method offers incredible detail and permanence, making it a favorite for custom projects. You’ll prepare your design, choose the right wood, and then set your laser for etching.
Laser engraving lets you add personal touches to wood items, from custom gifts to home decor. We’ve found that understanding your wood type and laser settings is key to getting sharp, beautiful results. It’s a fun and rewarding craft once you know the basics.
- Select the right wood.
- Prepare your digital design.
- Choose appropriate laser settings.
- Execute the engraving process.
- Finish and protect your piece.
Let’s walk through exactly how to laser engrave wood, step by step, so you can start creating your own masterpieces.
Getting Started with Wood Laser Engraving
Ready to turn your creative ideas into tangible art? Laser engraving wood is a rewarding process. We’ll walk you through each step, ensuring you feel confident and prepared. It’s all about understanding your tools and materials.
Understanding Your Laser Engraver
Before you even think about wood, let’s talk about your laser. Most hobbyists and small businesses use CO2 laser engravers for wood. Why CO2? They offer a good balance of power, precision, and cost-effectiveness for organic materials like wood, leather, and acrylics. Do you know your laser’s wattage?
Choosing the Right Wattage
The wattage of your laser directly impacts its capabilities. Higher wattage means more power, allowing for faster cuts and deeper engravings. For most wood engraving projects, a 40W to 60W CO2 laser is a great starting point. If you plan on cutting thicker wood, you might want to consider 80W or higher. It’s like choosing a car; what are you planning to do with it?
- 40W-60W: Ideal for detailed engraving and thin cuts (up to 1/8 inch wood).
- 80W-100W: Good for deeper engraving and cutting thicker materials (up to 1/4 inch wood).
- 100W+: Best for industrial applications, fast production, and very thick materials.
Selecting the Best Wood for Engraving
The type of wood you choose makes a huge difference in your results. Not all woods engrave equally well. We found that lighter, softer woods often produce better contrast and cleaner edges. Think about the final look you’re aiming for.
Popular Wood Types for Laser Engraving
Here’s a quick overview of woods that generally work well and some to approach with caution.
| Wood Type | Engraving Quality | Notes |
|---|---|---|
| Plywood (Baltic Birch) | Excellent | Consistent, fine grain, good contrast. Very popular. |
| Maple | Very Good | Light color, produces good contrast. Harder wood, may need more power. |
| Cherry | Very Good | Rich color, engraves with a warm, dark tone. |
| Alder | Excellent | Soft, light, engraves beautifully with good contrast. |
| Basswood | Good | Very soft, can char easily. Great for fine detail if settings are optimized. |
| Pine | Fair | Inconsistent grain, resin content can cause uneven engraving. Be careful. |
| MDF | Good | Engraves uniformly, but produces more ash. Requires good ventilation. |
We often recommend starting with Baltic Birch plywood. It’s affordable, widely available, and gives consistent results, which is perfect for learning. Remember, denser woods require more power and may engrave less deeply.
Preparing Your Design for Engraving
Your design is the heart of your project. Whether it’s a detailed graphic or simple text, proper preparation is key. Most laser engravers use vector or raster images. Have you thought about your design’s resolution?
Vector vs. Raster Graphics
- Vector Graphics (e.g., SVG, AI, DXF): These are made of paths and lines. They are scalable without losing quality, making them perfect for cutting and line engraving. Your laser will follow these paths precisely.
- Raster Graphics (e.g., JPG, PNG, BMP): These are made of pixels. They are ideal for engraving photos and detailed images where shades of gray are needed. The laser will “burn” each pixel, creating a shaded effect. Think of it like printing a picture.
For engraving, you’ll want to ensure your raster images have a high resolution (300 DPI or more) for the best detail. Low-resolution images will look pixelated on your wood piece. No one wants that!
Software and File Formats
You’ll use graphic design software like Adobe Illustrator, CorelDRAW, or Inkscape to create and prepare your designs. These programs allow you to manipulate lines, shapes, and text. Export your designs in formats compatible with your laser software, often DXF, SVG, AI, or JPG/PNG for raster images. Always double-check your file type before sending it to the laser.
Setting Up Your Laser for Engraving
This is where the magic happens, but it also requires precision. Correct laser settings are crucial for a successful engrave. What are the three main settings you’ll adjust?
Power, Speed, and Frequency
- Power: This controls the intensity of the laser beam. Too much power, and you’ll burn through the wood or cause excessive charring. Too little, and your engraving will be too faint. It’s expressed as a percentage of your laser’s maximum wattage.
- Speed: This dictates how fast the laser head moves across the material. Slower speeds allow the laser to dwell longer, resulting in deeper and darker engraves. Faster speeds create lighter, shallower marks.
- Frequency (or DPI for raster): For vector engraving, frequency (Hz) determines how many pulses per second the laser emits. For raster engraving, DPI (dots per inch) controls the density of the engraved dots. Higher DPI means more detail and a darker engrave.
There’s no one-size-fits-all setting. Different woods react differently, and even slight variations in wood density can affect the outcome. This is why testing is so important.
Performing Test Engravings
Please, please, please: always run test engravings on a scrap piece of the exact wood you plan to use. This is probably the most valuable tip we can give you. Why waste your good material?
Create a small “test matrix” with varying power and speed settings. Engrave a small square or line with each combination. This will quickly show you which settings yield the best contrast, depth, and minimal charring for your specific wood. It’s like finding the sweet spot for baking a cake; a little trial and error makes all the difference.
The Engraving Process: Step-by-Step
With your design ready and settings dialed in, you’re set to engrave. Follow these steps for a smooth process.
- Place Your Wood: Securely place your wood piece inside the laser bed. Use clamps or a magnetic bed if available to prevent movement during engraving. Ensure it’s perfectly flat.
- Focus the Laser: Adjust the laser’s focal length according to your machine’s instructions. Proper focus ensures the sharpest possible engrave. Some machines have auto-focus, others require manual adjustment with a focus tool.
- Set Origin Point: Tell the laser where your design should start on the wood. This is usually the top-left corner or the center, depending on your software and preference.
- Run a “Frame” Test: Before starting the actual engrave, run a “frame” or “boundary” test. This moves the laser head around the outer perimeter of your design without firing, showing you exactly where it will engrave. This prevents your design from going off the edge of your material.
- Start Engraving: Once everything looks good, close the laser lid and press the start button. Stay near your machine and monitor the process. Never leave a laser engraver unattended while it’s operating.
Safety First: Essential Precautions
Laser engravers are powerful tools. Safety should always be your top priority. Accidents can happen quickly if you’re not careful (OSHA recommends clear safety protocols for laser use).
- Ventilation: Wood engraving produces smoke and fumes. Always use a proper exhaust system to vent these outdoors or through an air filtration system. Breathing these fumes is harmful.
- Eye Protection: Wear approved laser safety glasses (OD rating specific to your laser wavelength) if your machine does not have an interlocked, protective viewing window. Never look directly into the laser beam.
- Fire Safety: Keep a fire extinguisher (ABC type) or a fire blanket nearby. Wood is flammable, and flare-ups can occur. Do not engrave oily or resin-heavy woods without extra caution.
- Never Leave Unattended: As mentioned, never walk away from a running laser engraver. Things can go wrong quickly.
- Cleanliness: Keep your laser machine clean, especially the optics (lens and mirrors). A dirty lens can reduce laser power and even cause internal fires.
Post-Engraving Finishing Touches
You’ve engraved your masterpiece; now it’s time to clean it up and protect it. What’s the best way to remove that smoky residue?
Cleaning and Sealing Your Engraving
Engraving wood often leaves a smoky residue, especially around the edges of the engrave. You can carefully remove this with a damp cloth, fine-grit sandpaper (220 grit or higher), or a soft brush. For stubborn residue, some people use rubbing alcohol or a mild wood cleaner. Always test on a scrap piece first.
Once clean, consider applying a finish. A clear spray lacquer, polyurethane, or wood oil will protect the wood and enhance the engraved design. It also helps prevent future smudging. Let your creativity shine through the protection!
Checklist for Success
Before you hit that “start” button, run through this quick checklist:
- Is your wood type suitable for engraving?
- Is your design file clean and high-resolution?
- Are your laser power, speed, and frequency optimized?
- Is the laser focused correctly?
- Is the wood secured and flat in the bed?
- Is your ventilation system active and functioning?
Conclusion
You’ve now got a solid understanding of how to laser engrave wood. From choosing the right wood and setting up your machine to applying the perfect finish, each step plays a vital role in your project’s success. Remember, practice and patience are your best friends in this craft. We’ve found that learning to fine-tune your settings and doing test runs will save you a lot of headaches.
So, gather your materials, double-check your safety precautions, and don’t be afraid to experiment. Your journey into creating personalized, laser-engraved wood pieces starts now. What will you engrave first?
Frequently Asked Questions
What kind of designs can I laser engrave onto wood?
You can engrave almost anything! This includes text, logos, photos, intricate patterns, and custom artwork. Just make sure your design file is high-resolution for the best results, especially with raster images like photos.
How do I prevent charring or excessive smoke when engraving wood?
To minimize charring and smoke, adjust your laser settings. Often, a higher speed with slightly less power can help. Ensuring your wood is dry and using a good air assist system to blow away debris also makes a big difference.
Can I engrave curved or uneven wood surfaces?
Most standard laser engravers work best on flat surfaces. For curved items, you might need a rotary attachment that spins the object. This allows the laser to maintain focus and engrave evenly across the rounded surface.
Is it possible to color in laser engraved wood designs?
Yes, you absolutely can! After engraving and cleaning your piece, you can fill the engraved areas with paint, wood stain, or even epoxy resin. This adds a beautiful pop of color and can make your design stand out even more.
How often should I clean my laser engraver when working with wood?
Wood engraving creates a lot of dust and residue. We recommend cleaning your laser’s lens, mirrors, and bed after every few hours of use, or after any project that produces significant debris. Regular cleaning maintains laser performance and prolongs your machine’s life.
