
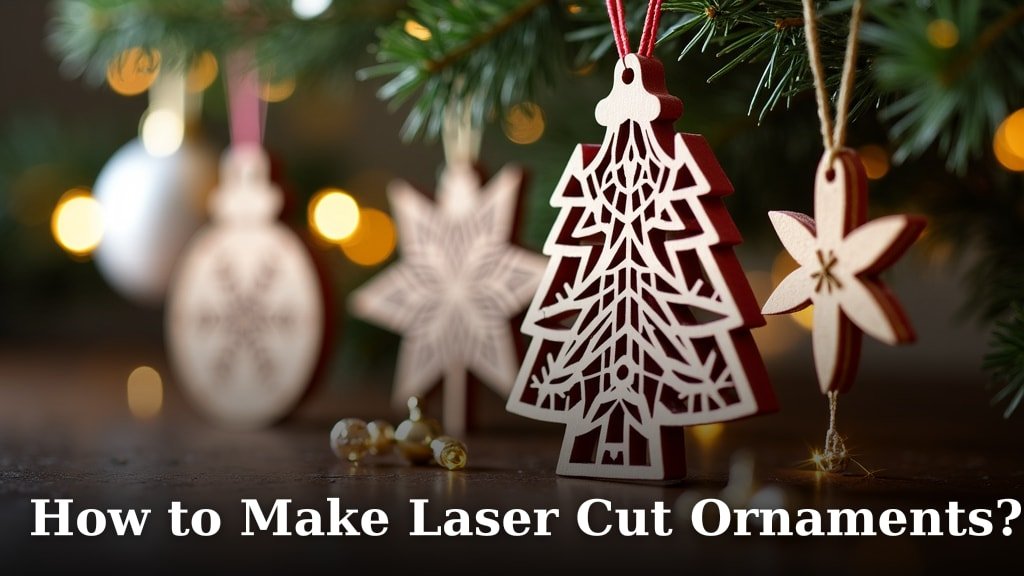
The easiest way to make laser cut ornaments is by designing your artwork digitally, selecting suitable materials, and then programming your laser cutter to etch and cut the designs. This process allows for precise, intricate details in your ornaments.
You can create stunning custom ornaments for holidays, gifts, or even as a small business venture. We found that laser cutting opens up a world of possibilities for personalized and unique creations. It’s a rewarding hobby for crafters and makers of all levels.
- Design your ornament digitally using software.
- Choose laser-friendly materials like wood or acrylic.
- Set up your laser cutter with the correct settings.
- Cut and engrave your designs precisely.
- Finish your ornaments with sanding, painting, or assembly.
Ready to get started? Let’s walk through exactly how to make amazing laser cut ornaments, step by step.
Creating Your Laser Cut Ornaments Step-by-Step
Making laser-cut ornaments is a fun, creative journey. We’ll guide you through each stage, from initial design to the final, polished piece.
Designing Your Ornament Files
The first step in making any laser-cut item is to create a digital design. This is your blueprint. Without a good design, your ornament won’t turn out well.
Choosing the Right Software
For designing, you have several options. What kind of software works best for you? It depends on your skill level and budget.
- Vector Graphics Software: Programs like Adobe Illustrator, CorelDRAW, or Inkscape (free) are ideal. They create designs using lines and curves, which laser cutters understand perfectly. Think of these as drawing with math, not pixels.
- CAD Software: For more technical or 3D designs, Fusion 360 or AutoCAD might be better. These are often used for precision engineering, but they work for intricate ornament shapes too.
- Online Design Tools: Some laser cutter brands offer their own simple design software. These are great for beginners. They often have
pre-made templates you can customize.
We found that vector software gives you the most control. It allows for the cleanest cuts and etchings.
Key Design Principles for Laser Cutting
When designing, keep a few things in mind. These tips will help your ornament come out beautifully.
- Line Weight Matters: Thin lines are for cutting, thicker lines for engraving. Your software will let you define these.
- Closed Paths: Ensure all shapes you want to cut are fully closed loops. A gap in a line means the laser won’t know where to stop.
- Minimize Overlapping Lines: Too many lines on top of each other can cause the laser to cut multiple times in the same spot, weakening your material.
- Kerf Compensation: The laser beam has a width, called “kerf.” It removes a tiny bit of material. For very precise parts, you might need to adjust your design slightly to account for this. Think of it like a tiny pencil lead removing material as it draws.
- Ventilation in Design: If your design has many small, enclosed areas, consider adding tiny “ventilation” holes. This helps gas escape during cutting and reduces scorching.
Selecting Your Materials
The material you choose is as important as your design. Different materials behave differently under the laser.
Popular Laser-Friendly Materials
You have a lot of choices! Which material fits your vision?
- Wood: Plywood (birch, maple, basswood) is a favorite. It’s affordable, cuts well, and engraves with a nice contrast. Hardwoods like cherry or walnut also work, but can be more expensive.
- Acrylic: Comes in many colors and finishes (clear, frosted, opaque). It cuts very cleanly and polishes itself during the cut, giving a smooth edge. It’s perfect for a modern look.
- MDF (Medium-Density Fiberboard): Cheaper than plywood, it offers a smooth surface for painting. However, it can produce more smoke and odors.
- Cardboard/Paper: Great for prototypes or delicate, lightweight ornaments. Cuts very fast.
- Leather: Can be cut and engraved for unique, rustic ornaments. Be mindful of the smell!
We recommend starting with ⅛ inch or ¼ inch thick wood plywood or acrylic. These are generally easier to work with.
Material Safety and Considerations
Not all materials are safe for laser cutting. Some can release toxic fumes or even catch fire. Never cut PVC or vinyl, as it releases chlorine gas (CDC provides clear guidelines on chemical exposures). Always research your material beforehand. Ensure your laser cutter has proper ventilation too!
Here’s a quick comparison of common materials:
| Material | Ease of Cutting | Engraving Quality | Typical Cost |
|---|---|---|---|
| Plywood (Birch) | Excellent | Good Contrast | Medium |
| Acrylic | Excellent | Frosted/Clear | Medium to High |
| MDF | Good | Light Etch | Low |
| Cardstock | Very Easy | Minimal | Very Low |
This table helps you pick the right material for your ornament’s look and feel.
Preparing Your Laser Cutter
Your machine needs to be ready to go. Proper setup prevents mistakes and ensures clean cuts.
Setting Up Parameters (Speed, Power, Frequency)
This is where the magic happens, but also where frustration can begin if you get it wrong. Every material needs specific settings for speed, power, and frequency.
- Speed: How fast the laser head moves. Faster speeds mean lighter cuts or engravings.
- Power: The intensity of the laser beam. More power means deeper cuts or darker engravings.
- Frequency (DPI/PPI): How many pulses per inch the laser makes. Higher frequency often means smoother edges or more detailed engravings.
We found that starting with the manufacturer’s recommended settings for your material is a smart move. Then, do test cuts on scrap material. A test grid with varying settings can save you a lot of material and time.
Focusing the Laser and Bed Setup
A properly focused laser beam is crucial. If it’s out of focus, your cuts will be sloppy, and your engravings will look faded.
- Manual Focus: Many entry-level lasers require you to manually adjust the lens height.
- Auto-Focus: Higher-end machines often have this feature, which makes life much easier.
Always ensure your material is flat on the laser bed. Use magnets or clamps if needed. An uneven surface will lead to inconsistent cuts and engravings.
Executing the Laser Cut
You’ve designed, selected, and prepped. Now it’s time to cut!
Monitoring the Process
Do not walk away from your laser cutter while it’s running. Why not? A laser can burn, and materials can sometimes flare up. Stay nearby and observe carefully. Watch for signs of fire, poor cutting, or issues. This vigilance is key for both safety and quality.
Ensure your ventilation is working too. Smoke and fumes need to be extracted from your workspace. We can’t stress safety enough when working with lasers, as detailed by workplace safety organizations.
Troubleshooting Common Issues
What if something goes wrong? Don’t panic. Many issues have simple fixes.
- Incomplete Cuts: Increase power or decrease speed. Check your focus.
- Burn Marks/Excessive Scorching: Decrease power or increase speed. Check if your air assist is on (it blows air to reduce flames).
- Fuzzy Engravings: Check your focus. Increase frequency or reduce speed.
- Part Not Falling Out: Did you remember to make sure your design paths were perfectly closed? Maybe your power wasn’t quite enough for that material.
Often, a small tweak to your settings makes all the difference. Keep a log of your successful settings for different materials.
Finishing Your Ornaments
The laser has done its work. Now, how do you make your ornaments shine?
Cleaning and Assembly
Laser cutting often leaves some residue, especially on wood. A light sanding with fine-grit sandpaper (220 grit or higher) can remove smoke stains and smooth edges. For acrylic, a quick wipe with isopropyl alcohol can remove any film.
If your ornament has multiple pieces, this is the time to assemble them. Wood glue or super glue works for most materials. We found that practicing assembly before applying glue helps you get it right the first time.
Painting, Staining, or Sealing
Now for the fun part: making your ornament truly unique!
- Painting: Acrylic paints work wonderfully on wood and can even be used on some acrylics. Use masking tape for crisp lines if you’re doing complex patterns.
- Staining: For wood ornaments, stain can highlight the natural grain and give a rich, deep color.
- Sealing: A clear coat of lacquer, polyurethane, or clear spray paint will protect your ornament and give it a polished look. This is especially good for ornaments that will be handled a lot or stored for years.
Final Touches
Add a ribbon, string, or hook for hanging. Consider adding a personalized message on the back with a fine-tip paint pen. These little details make a big impact.
Ornament Creation Checklist
Stay on track with this simple checklist:
- Design created and optimized for laser (vectorized, closed paths).
- Material chosen, checked for laser safety, and laid flat.
- Laser cutter cleaned, calibrated, and focused.
- Correct speed, power, and frequency settings applied.
- Scrap material test cut performed and evaluated.
- Ornament cut and engraved with constant monitoring.
- Ornaments cleaned (sanded, wiped) and assembled.
- Finished with paint, stain, or sealant as desired.
- Hanging mechanism (ribbon/hook) attached.
Conclusion
You’ve now got a solid roadmap for creating beautiful laser-cut ornaments. We covered everything from digital design and material selection to safe laser operation and artistic finishing. Remember, practice makes perfect. Experiment with different materials and settings. Your first ornaments might not be flawless, but each attempt brings you closer to mastering this rewarding craft.
So, gather your inspiration, fire up your design software, and prepare to transform simple materials into personalized treasures. What unique ornament will you create first?
Frequently Asked Questions
What’s the best laser cutter for a beginner making ornaments?
For beginners focusing on ornaments, a 40W CO2 laser cutter is often a great starting point. We found it offers a good balance of power for cutting common materials like wood and acrylic, without the complexity or high cost of industrial machines. Look for models with good community support.
How can I make my laser-cut ornaments look more professional?
Beyond clean cuts and engravings, consider edge finishing. Flame polishing works wonders for acrylic, giving it a glass-like sheen. For wood, apply a clear sealant or varnish after light sanding to enhance durability and provide a professional luster. Pay attention to packaging if selling your creations too.
Can I cut photos onto ornaments with a laser?
Yes, you can engrave photos onto materials like wood or acrylic. We found that converting your photo to a high-contrast black and white image (or a grayscale bitmap) often yields the best results. Test different power and speed settings on scrap material to capture the fine details.
How do I prevent “burn marks” or scorching on my wood ornaments?
To reduce scorching, ensure your air assist is on and correctly aimed at the cut line. We also found that applying masking tape to the wood surface before cutting helps protect it. Adjusting your laser settings to slightly lower power and higher speed can also minimize charring.
Where can I find free or inexpensive laser ornament design files?
Many online communities and marketplaces offer free or affordable SVG files suitable for laser cutting. Websites like Etsy, Thingiverse, and various laser cutter forums often have a wealth of designs. You can also find simple templates within design software to customize.
