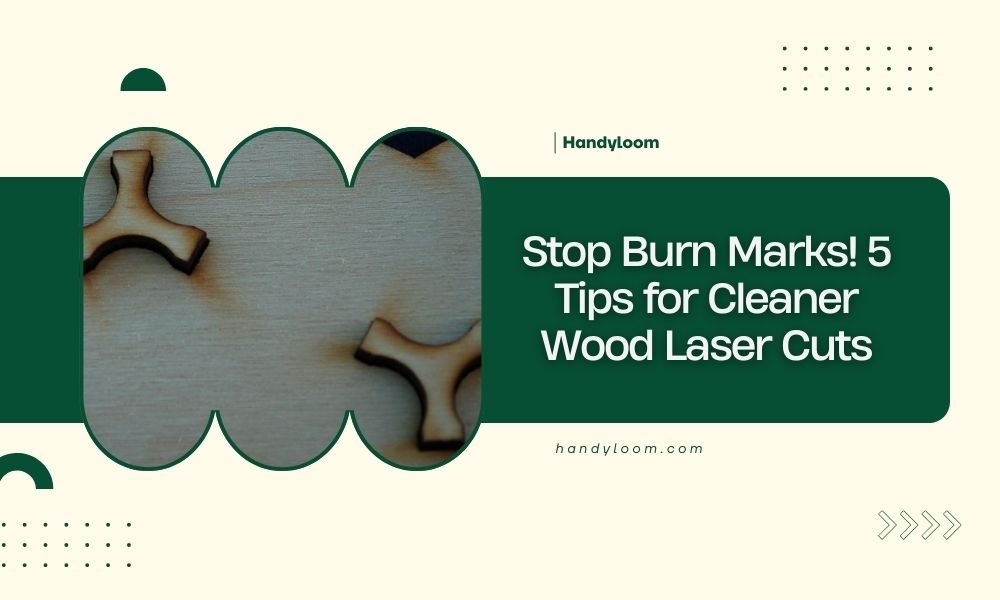
To stop burn marks on wood laser cuts, control your laser power (40-60% for most woods), increase cutting speed, and use proper air assist to blow away debris during cutting.
Clean wood laser cuts also require fresh masking tape on both sides of your material and regular cleaning of your laser lens to maintain consistent beam quality.
Why Do Burn Marks Happen in the First Place?
Think of laser cutting like cooking a steak. Too much heat for too long, and you get charred edges instead of a perfect cut.
Your laser beam creates intense heat that vaporizes wood fibers. When that heat lingers too long in one spot, it burns the surrounding material. The wood essentially gets “overcooked.”
Three main culprits cause this problem:
- Excessive laser power for your wood type
- Slow cutting speeds that let heat build up
- Poor air flow that doesn’t clear away hot debris
The Science Behind Wood Burning
Different woods have different burn points. Softwoods like pine start charring around 300°F, while hardwoods like oak can handle higher temps.
When you cut too slowly or use too much power, you’re essentially holding a magnifying glass over your material for too long.
Tip 1: Master Your Power Settings
Getting your power right is like finding the sweet spot on your car’s gas pedal. Too little and you won’t cut through. Too much and you’ll burn everything.
Start Low and Work Up
Begin with 40% power for most softwoods. For hardwoods, start around 60%. Run a small test cut first.
I found that many beginners crank up the power thinking it will give cleaner cuts. Actually, the opposite happens.
Wood-Specific Power Guidelines
| Wood Type | Starting Power % | Speed (mm/min) |
|---|---|---|
| Pine/Softwood | 35-45% | 800-1200 |
| Birch Plywood | 45-55% | 600-900 |
| Oak/Hardwood | 55-70% | 400-700 |
| MDF | 40-50% | 700-1000 |
Test Small Before Going Big
Cut a small square in the corner of your material first. Adjust your settings based on what you see.
No burn marks? You’re golden. Light browning? Drop power by 5%. Heavy charring? Drop power by 10% and increase speed.
Tip 2: Speed Up Your Cutting
Faster cutting means less time for heat to build up and burn your wood. It’s like quickly passing your hand through a candle flame versus holding it there.
Finding Your Sweet Spot Speed
Start with moderate speeds and increase gradually. Most woods cut cleanly between 600-1200 mm per minute.
Watch your cut quality as you speed up. If the laser starts leaving uncut sections, you’ve gone too fast.
Balance Speed with Power
Higher speeds often need slightly more power to maintain cut quality. It’s a balancing act.
Think of it like driving uphill. You need more gas to maintain the same speed.
Multiple Pass Strategy
For thick materials, try multiple fast passes instead of one slow, powerful pass.
Two passes at 60% power often give cleaner results than one pass at 90% power.
Tip 3: Use Air Assist Properly
Air assist is your best friend for clean cuts. It blows away hot debris and cooling gases that would otherwise burn your wood.
Set the Right Air Pressure
Most woods need 10-20 PSI of air pressure. Too little won’t clear debris. Too much can blow your thin materials around.
I found that consistent air pressure matters more than high pressure.
Position Your Air Nozzle
Keep your air nozzle close to the cutting area but not touching your material.
About 2-5mm away works well for most projects.
Check Your Air Flow Direction
Air should blow perpendicular to your cut line, not parallel to it.
Parallel air flow can push hot debris along your cut path, creating more burns.
Tip 4: Use Masking Tape Strategically
Masking tape acts like a protective shield for your wood surface. It takes the heat damage so your wood doesn’t have to.
Choose the Right Tape
Use low-tack masking tape designed for delicate surfaces. Regular painter’s tape works well too.
Avoid duct tape or high-adhesive tapes that might leave residue.
Apply Tape to Both Sides
Cover both the top and bottom of your wood. The bottom often gets more burn damage from reflected laser energy.
Smooth out air bubbles with a squeegee or credit card.
Remove Tape While Warm
Pull off the masking tape while your wood is still slightly warm from cutting.
Warm tape removes easier and leaves less residue.
When Tape Isn’t Enough
For problem woods that burn easily, try transfer tape or even thin veneer as a sacrificial layer.
Tip 5: Keep Your Equipment Clean
A dirty lens is like trying to focus sunlight through a muddy window. You get inconsistent power that leads to burns.
Clean Your Lens Regularly
Check your focusing lens before every major project. Wood cutting creates lots of smoke and debris.
Use lens cleaning solution and lint-free cloths. Clean in straight lines from center to edge.
Clear Your Air Path
Check that your air assist nozzle isn’t clogged with debris.
A blocked nozzle means poor air flow and more burn marks.
Maintain Your Exhaust System
Good exhaust removes smoke and hot gases from your cutting area.
Clean exhaust fans and check ductwork monthly for clogs.
Replace Consumables on Schedule
Worn nozzles, dirty mirrors, and old lenses all contribute to poor cut quality.
Keep spare parts on hand and replace them before they affect your work.
Troubleshooting Common Burn Issues
Even with perfect settings, you might still get occasional burn marks. Here’s how to diagnose what went wrong.
Burns Only on One Side
This usually means your laser beam isn’t perfectly perpendicular to your material.
Check your material is flat and your laser head is properly aligned.
Burns at Direction Changes
Your laser slows down at corners and curves, creating heat buildup.
Reduce power by 5-10% for designs with lots of direction changes.
Random Burn Spots
Check for material inconsistencies like knots, glue spots, or density changes.
These areas may need different settings or masking.
Seasonal Wood Changes
Wood moisture content changes with humidity and season.
You might need to adjust settings slightly between summer and winter.
Prevention Strategies That Work
The best burn marks are the ones that never happen. Here are some prevention tips from experienced laser cutters.
Test Every New Material
Even if you’ve cut “pine” before, different suppliers and batches cut differently.
Always run a small test with new materials.
Keep a Settings Log
Write down successful settings for each material and thickness you use.
This saves time and prevents repeated mistakes.
Factor in Wood Grain Direction
Cutting across grain often needs different settings than cutting with grain.
Cross-grain cuts typically need slightly more power.
When Burn Marks Still Happen
Sometimes you’ll still get light burn marks despite your best efforts. Don’t panic.
Light Sanding Solution
Fine sandpaper (220-320 grit) can remove light surface burns.
Sand lightly with the grain, not against it.
Wood Bleaching Option
Oxalic acid (wood bleach) can lighten stubborn burn marks.
Test on scrap material first and follow safety guidelines.
Conclusion
Clean wood laser cuts without burn marks come down to five key strategies: controlling your power settings, using appropriate cutting speeds, maintaining proper air assist, applying masking tape protection, and keeping your equipment clean.
Start with conservative settings and work your way up. Test small sections before committing to large projects. With practice, you’ll develop an intuitive feel for what each wood type needs.
Remember that every laser and every piece of wood is slightly different. Keep notes on what works and don’t be afraid to adjust your approach based on what you see.
What’s the most common mistake that causes burn marks on wood laser cuts?
Using too much laser power is the biggest culprit. Most beginners think more power equals better cuts, but excessive power creates heat buildup that burns the wood. Start with 40-50% power and increase gradually only if needed.
Can I remove burn marks after they’ve already appeared?
Yes, light burn marks can often be removed with fine sandpaper (220-320 grit) or wood bleach containing oxalic acid. Sand with the grain direction, not against it. For deep burns, you might need to sand and refinish the entire piece.
Should I use masking tape on both sides of my wood?
Absolutely. The bottom of your wood often gets worse burn marks than the top due to reflected laser energy bouncing off your cutting bed. Use low-tack masking tape on both surfaces for best protection.
How often should I clean my laser lens to prevent burns?
Check your lens before every major cutting session. Wood creates lots of smoke and debris that can coat your lens quickly. A dirty lens causes inconsistent power delivery and hotspots that burn your material.
Why do I get more burns when cutting curves and corners?
Your laser head slows down when changing directions, which allows heat to build up in those areas. Reduce your laser power by 5-10% for designs with lots of curves, corners, or intricate details to compensate for this slower cutting speed.