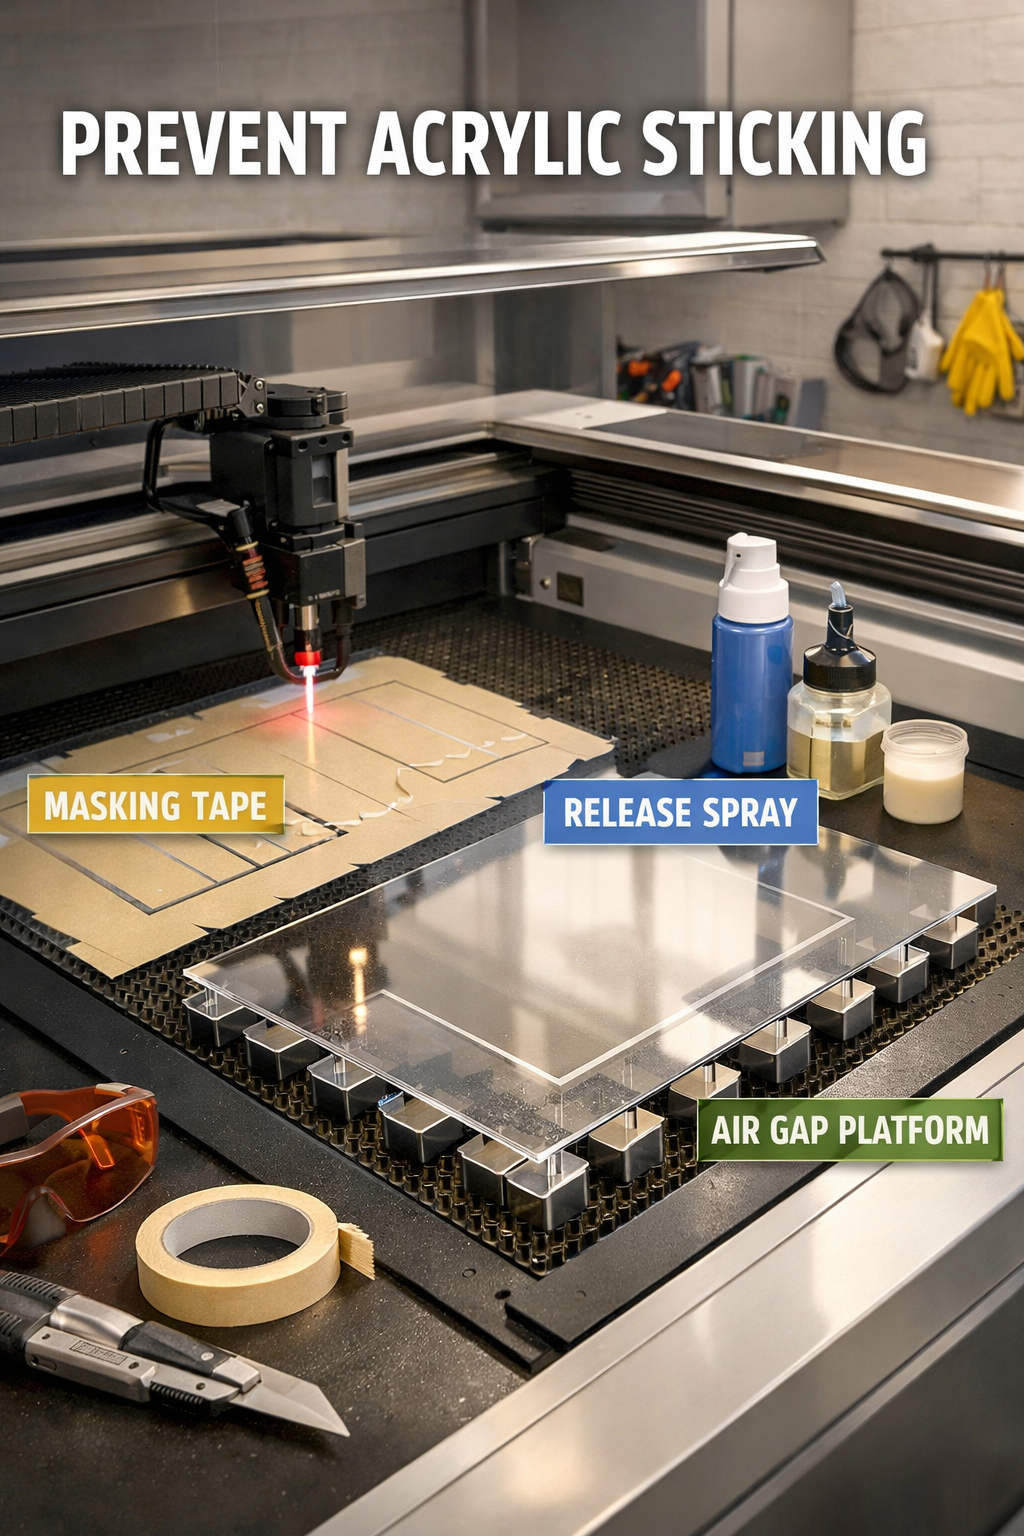
To prevent acrylic from sticking to the laser bed, use masking tape, apply release agents like soapy water, or create an air gap with honeycomb platforms.
The most effective methods include proper bed preparation, temperature control, and using protective barriers between your acrylic and the cutting surface.
Why Acrylic Sticks to Laser Beds in the First Place
You’ve probably experienced this frustrating moment. You finish cutting a beautiful acrylic piece, only to find it welded to your laser bed like concrete. What causes this annoying problem?
Heat is the main culprit. When your laser cuts through acrylic, it generates intense heat that melts the material. This melted acrylic can drip down and bond with your cutting bed, creating a stubborn mess.
The type of acrylic matters too. Cast acrylic tends to stick more than extruded acrylic because it contains different additives and has a different molecular structure.
Temperature and Bed Material Interactions
Metal beds conduct heat better than other materials. This means your acrylic stays hot longer, increasing the chance of sticking. Aluminum beds are particularly notorious for this issue.
I found that many laser cutting experts recommend keeping bed temperatures below 140°F when possible. Higher temperatures turn your cutting surface into a sticky trap.
Essential Preparation Steps Before Cutting
Prevention starts before you even turn on your laser. Think of bed prep like seasoning a cast iron pan – do it right, and everything slides off easily.
Clean Your Bed Properly
Start with a spotless cutting surface. Use isopropyl alcohol to remove any oils, dust, or residue from previous cuts. A clean bed gives you better control over what happens next.
Avoid harsh cleaners that might damage your bed surface. Gentle cleaning works better than aggressive scrubbing.
Check Your Acrylic Quality
Not all acrylic is created equal. High-quality acrylic with consistent thickness cuts cleaner and sticks less. Cheap acrylic often contains more additives that create sticky situations.
Remove any protective film before cutting. This film can melt and create an even stickier mess on your bed.
Top Methods to Prevent Sticking
Masking Tape Method
This is your best friend for preventing acrylic adhesion. Apply high-temperature masking tape directly to your laser bed before placing your acrylic.
Use tape rated for at least 300°F. Regular painter’s tape will fail and make your problem worse. I found that many professionals swear by Kapton tape for its heat resistance.
Overlap your tape pieces slightly to avoid gaps. Any exposed bed surface becomes a potential sticking point.
Water and Soap Solution
Mix a few drops of dish soap with water in a spray bottle. Lightly mist your cutting bed before placing your acrylic. The soap acts as a release agent.
Don’t oversoak the bed. Too much water can damage your laser or create electrical hazards. A light mist is all you need.
Air Gap Techniques
Create space between your acrylic and the bed using a honeycomb platform or pin table. This prevents direct contact and allows melted material to fall away safely.
The air gap also improves cut quality by allowing better airflow around your material. It’s like killing two birds with one stone.
Advanced Prevention Strategies
Temperature Control Methods
Monitor your bed temperature during cuts. Some laser systems let you actively cool the bed or reduce power settings to minimize heat buildup.
Take breaks between cuts if you’re doing production work. Let your bed cool down every few pieces to prevent heat accumulation.
Cutting Parameter Adjustments
Slower cutting speeds often create more heat and increase sticking. Find the sweet spot between cut quality and heat generation.
Multiple light passes sometimes work better than one heavy cut. This spreads the heat over time instead of creating intense hot spots.
Power and Speed Balance
Higher speed with appropriate power reduces dwell time and heat buildup. Think of it like quickly passing your hand through a candle flame versus holding it there.
| Material Thickness | Recommended Speed | Power Setting | Passes |
|---|---|---|---|
| 3mm Acrylic | 8-12 mm/s | 70-80% | 1-2 |
| 6mm Acrylic | 5-8 mm/s | 85-95% | 2-3 |
| 10mm Acrylic | 3-5 mm/s | 95-100% | 3-4 |
Commercial Products That Help
Release Sprays and Coatings
Several companies make specialized release agents for laser cutting. These products create a barrier between your material and the bed without affecting cut quality.
I found that silicone-based releases work well but can be messy. Water-based options clean up easier but may not last as long.
Sacrificial Bed Materials
Consider using disposable bed covers made from materials like cardboard or thin wood. When they get too sticky, you simply replace them.
This method costs more in materials but saves time on cleanup and bed maintenance.
What to Do When Acrylic Does Stick
Safe Removal Techniques
Don’t force stuck pieces off while they’re still hot. Let everything cool completely first. Hot acrylic is like taffy and will stretch rather than break free.
Use a plastic scraper instead of metal tools. Metal can scratch your bed surface and create rough spots that make future sticking worse.
Heat Application for Removal
Sometimes gentle reheating helps. Use a heat gun on low setting to soften the stuck acrylic. Work slowly and keep the heat moving to avoid damaging your bed.
Never use an open flame or excessive heat. You want to soften, not burn the material.
Chemical Removal Options
Acetone dissolves acrylic, but use it sparingly. Too much can damage certain bed materials. Test in a small area first.
Always work in a well-ventilated area when using chemical solvents. The fumes can be harmful in enclosed spaces.
Long-Term Bed Maintenance
Regular Inspection and Care
Check your bed surface regularly for scratches, dents, or buildup. Small problems become big headaches if you ignore them.
Sand out minor scratches with fine-grit sandpaper. Smooth surfaces release better than rough ones.
Replacement Considerations
Even the best-maintained beds eventually need replacement. Know when to call it quits and invest in a new surface.
Signs you need a new bed include permanent staining, deep scratches, warping, or consistent sticking despite proper preparation.
Common Mistakes to Avoid
Using Wrong Materials
Don’t use regular tape or inappropriate release agents. These can melt and make your problem much worse. Stick with materials rated for your laser’s operating temperature.
Ignoring Air Assist Settings
Proper air assist helps blow away melted material and reduces sticking. Too little air lets debris accumulate. Too much can disturb thin materials.
Rushing the Process
Taking shortcuts on bed prep usually backfires. The few minutes you save get eaten up by cleanup time later. Do it right the first time.
Troubleshooting Persistent Problems
When Standard Methods Fail
Some acrylic formulations are just stickier than others. If you consistently have problems with certain brands or colors, consider switching suppliers.
Environmental factors like humidity can affect how acrylic behaves. High humidity makes some materials more prone to sticking.
Equipment-Specific Issues
Different laser systems have unique characteristics. What works on one machine might not work on another. Document what works for your specific setup.
Bed material makes a difference too. Glass beds behave differently than aluminum or steel beds.
Conclusion
Preventing acrylic from sticking to your laser bed comes down to proper preparation and the right techniques. Masking tape, release agents, and air gaps are your best friends in this battle. Remember that prevention is always easier than cleanup.
Start with clean surfaces, control your heat, and don’t rush the process. With these methods, you’ll spend more time creating and less time scraping stuck acrylic off your bed. Your future self will thank you for taking these preventive steps.
Can I reuse masking tape after cutting acrylic?
No, masking tape should be replaced after each use. The heat from laser cutting can compromise the adhesive and reduce its effectiveness as a release barrier.
What’s the best bed temperature to prevent sticking?
Keep your bed temperature below 140°F when possible. Some laser systems allow active cooling, which helps maintain optimal temperatures during extended cutting sessions.
Does acrylic color affect how much it sticks?
Yes, different colored acrylics contain different additives and dyes that can affect their melting properties. Clear and white acrylics typically stick less than darker colors.
How often should I clean my laser bed?
Clean your bed after every few cuts or whenever you notice residue buildup. Regular cleaning with isopropyl alcohol prevents accumulation of sticky materials.
What should I do if acetone damages my laser bed?
Stop using acetone immediately and assess the damage. Minor surface dulling might not affect function, but deep etching or discoloration usually means you need a bed replacement.