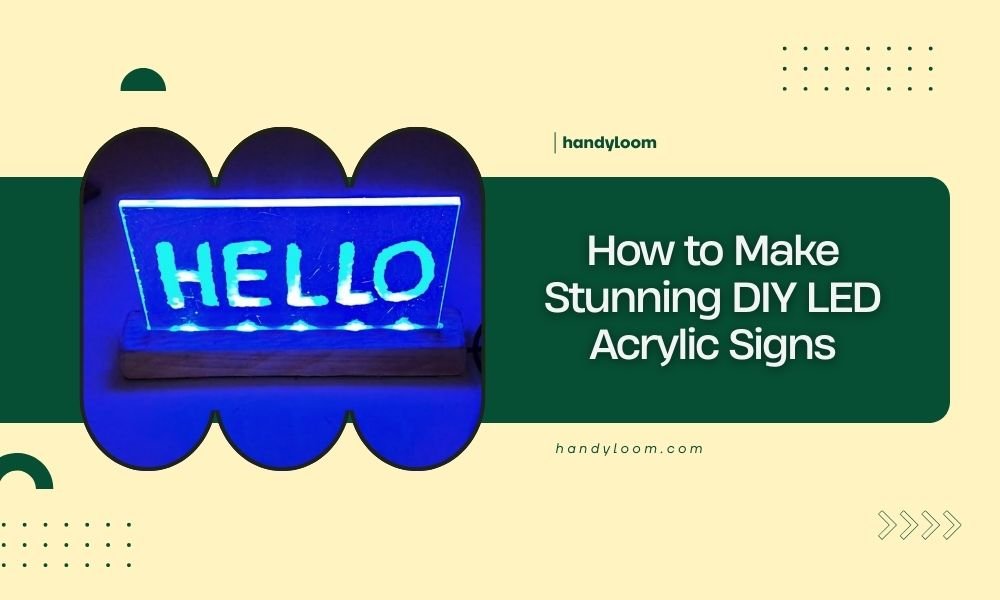
You can make stunning DIY LED acrylic signs by cutting clear acrylic with a laser cutter and installing LED strip lights along the edges to create an illuminated effect.
The process involves designing your sign, laser cutting the acrylic pieces, creating channels for LED strips, and wiring everything together for a professional-looking illuminated display.
What Are DIY LED Acrylic Signs
LED acrylic signs combine clear acrylic panels with LED lighting to create bright, eye-catching displays. The LEDs shine through the edges of the acrylic, making any engraved or etched designs glow beautifully.
These signs work great for businesses, home decor, or personal projects. You’ve probably seen them in store windows, restaurants, and offices. Now you can make your own at home.
Materials You’ll Need
Getting the right materials makes all the difference. Here’s what I found works best for most projects:
- Clear acrylic sheet (3-6mm thick works well)
- LED strip lights (12V or 24V versions)
- Power adapter for your LED strips
- Aluminum channel or wooden frame
- Wire connectors and electrical tape
- Sandpaper (various grits)
- Acrylic cement or adhesive
Choosing the Right Acrylic Thickness
Thicker acrylic spreads light more evenly. I found that 4-5mm gives the best balance between cost and light distribution. Thinner sheets work but create hot spots where LEDs are brightest.
LED Strip Selection
Pick LED strips based on your project size. Shorter strips need fewer LEDs per meter. Longer signs benefit from denser LED spacing for even lighting.
Tools Required for the Project
You’ll need access to specific tools to get professional results. Most maker spaces have these if you don’t own them:
- Laser cutter (CO2 laser works best)
- Soldering iron and solder
- Wire strippers
- Drill with various bit sizes
- Router (optional, for channels)
- Measuring tape and ruler
Laser Cutter Settings
Different acrylic types need different settings. Start with low power and multiple passes. This prevents melting and gives cleaner edges.
Step 1: Design Your Sign
Start with your design software. Vector graphics work best for laser cutting. Keep text and shapes simple for the best light distribution.
Think about where your LEDs will sit. Design your layout so important elements get good light coverage. Text near the LED edges will be brighter.
Software Options
Adobe Illustrator works great, but free options like Inkscape do the job too. Export your final design as SVG or DXF for laser cutting.
Design Tips for Better Lighting
Wider letter strokes spread light better. Thin lines might not light up evenly. Test your design on paper first to check proportions.
Step 2: Prepare the Acrylic
Clean your acrylic thoroughly before cutting. Dust and fingerprints can cause problems during laser cutting. Use a lint-free cloth and acrylic cleaner.
Remove protective film from areas you plan to engrave. Leave film on areas you want to stay pristine.
Measuring and Marking
Double-check all measurements before cutting. Acrylic isn’t cheap, and mistakes add up quickly. Mark your cut lines lightly with a pencil on the protective film.
Step 3: Laser Cut Your Design
Set your laser cutter to the right settings for your acrylic thickness. I found online that most 4mm acrylic cuts well at 80% power with 10mm/s speed, but test first.
Cut outer edges first, then internal features. This prevents small pieces from falling and getting damaged.
Safety During Cutting
Always supervise your laser cutter. Acrylic can catch fire if settings are wrong. Keep a fire extinguisher nearby and never leave the machine unattended.
Dealing with Cut Edge Quality
Good laser cuts should have clear, smooth edges. If you see cloudiness or rough spots, adjust your power or speed settings.
Step 4: Create LED Channels
Your LEDs need somewhere to sit. You can route channels directly into the acrylic or build an external frame. External frames are easier for beginners.
Make channels slightly wider than your LED strips. This gives you room for adjustments and prevents binding.
Routing Techniques
Use a router with a straight bit for consistent channels. Go slow to prevent chipping. Multiple shallow passes work better than one deep cut.
Frame Construction
Wooden or aluminum frames work well. Cut grooves to hold both the acrylic and LED strips. This approach lets you change LEDs later if needed.
Step 5: Install the LED Strips
Peel the adhesive backing and stick your LEDs in the channels. Press firmly but don’t stretch the strips. Stretched LEDs fail sooner.
Plan your wiring before you stick anything down. Think about where your power connection will go and how wires will run.
Wiring Multiple Strips
Connect strips in parallel, not series. This keeps voltage consistent across all LEDs. Use proper connectors instead of just twisting wires together.
Managing Heat
LEDs generate heat. Make sure air can flow around your installation. Trapped heat shortens LED life and can warp acrylic.
Step 6: Wire the Electrical System
Start with your power supply. Match voltage and amperage to your LED requirements. Too little power dims your lights. Too much can damage them.
Solder all connections for reliability. Use heat shrink tubing to protect joints. Loose connections cause flickering and failures.
Adding Controls
Simple on-off switches work fine. For more features, consider dimmer controllers or RGB controllers if you used color-changing strips.
Testing Your Connections
Test everything before final assembly. Check each LED section lights up properly. Fix any dark spots or flickering now.
Step 7: Final Assembly
Put everything together carefully. Don’t force pieces that don’t fit. Check that your acrylic sits properly in its channels or frame.
Secure all wiring so it won’t move or get pinched. Use cable ties or clips to keep everything neat.
Sealing and Weatherproofing
For outdoor signs, seal all electrical connections. Use weatherproof connectors and make sure water can’t reach your LEDs or power supply.
Common Problems and Solutions
Even with careful work, things can go wrong. Here are issues I found people run into most often:
| Problem | Cause | Solution |
|---|---|---|
| Uneven lighting | LED spacing or positioning | Reposition strips or add diffusion material |
| Dim sections | Voltage drop or loose connections | Check wiring and use proper wire gauge |
| Flickering | Poor power supply or connections | Upgrade power supply or fix connections |
| Hot spots | LEDs too close to acrylic | Add spacing or diffusion material |
Troubleshooting LED Issues
If some LEDs don’t light up, check for damaged sections. LED strips can be cut and repaired at designated points. Don’t try to fix damaged LEDs themselves.
Finishing Touches
Polish any rough edges on your acrylic. Use progressively finer sandpaper, ending with polishing compound. This helps light spread more evenly.
Clean everything one final time before your first power-up. Dust and fingerprints show up more once the LEDs are on.
Mounting Options
Plan how you’ll hang or mount your finished sign. Consider the weight and size when choosing mounting hardware. LED power supplies add weight too.
Maintenance and Care
LED acrylic signs need minimal maintenance. Clean the acrylic surface regularly with appropriate cleaner. Don’t use harsh chemicals that might cloud the plastic.
Check electrical connections yearly. Look for signs of corrosion or loose wires. Replace LED sections if they start dimming or changing color.
Expected Lifespan
Quality LED strips last 25,000-50,000 hours. That’s many years of normal use. The acrylic should last even longer if protected from impacts and harsh weather.
Cost Breakdown
Material costs vary by project size. A typical 12-inch sign costs $30-60 in materials. Larger signs or premium LEDs cost more.
The laser cutting service adds $20-40 for most projects. Some maker spaces charge by time, others by material size.
Safety Considerations
Work with electricity safely. Turn off power when making connections. Use properly rated components for your voltage and current needs.
Laser cutting creates fumes. Work in ventilated areas and use appropriate safety equipment. Many experts recommend respirators when cutting plastics.
Conclusion
Making DIY LED acrylic signs combines creativity with technical skills. The process takes patience, but results look professional when done right. Start with simple designs and work up to more complex projects as you gain experience.
The combination of laser-cut acrylic and LED lighting creates stunning visual effects that rival expensive commercial signs. With practice, you’ll develop techniques that make each project easier and better looking.
Can I use a regular saw instead of a laser cutter for the acrylic?
Yes, but laser cutting gives much cleaner edges that distribute light better. If you use a saw, sand and polish all cut edges thoroughly. Rough edges scatter light and create dark spots in your sign.
What’s the difference between 12V and 24V LED strips for this project?
24V strips have less voltage drop over long runs, making them better for large signs. 12V strips work fine for smaller projects and are often cheaper. Both need matching power supplies.
How do I make the light more even across the entire sign?
Add diffusion material between the LEDs and acrylic, or increase the distance between them. You can also use LED strips with more LEDs per meter for smoother light distribution.
Can I change colors or add animations to my LED sign?
Yes, use RGB LED strips with appropriate controllers. Programmable controllers let you create color changes, fading effects, and simple animations. This adds complexity but creates more dynamic displays.
What thickness of acrylic works best for outdoor signs?
Use 6mm or thicker acrylic for outdoor installations. Thicker material resists weather and impacts better. Make sure to seal all electrical connections and use weatherproof power supplies rated for outdoor use.