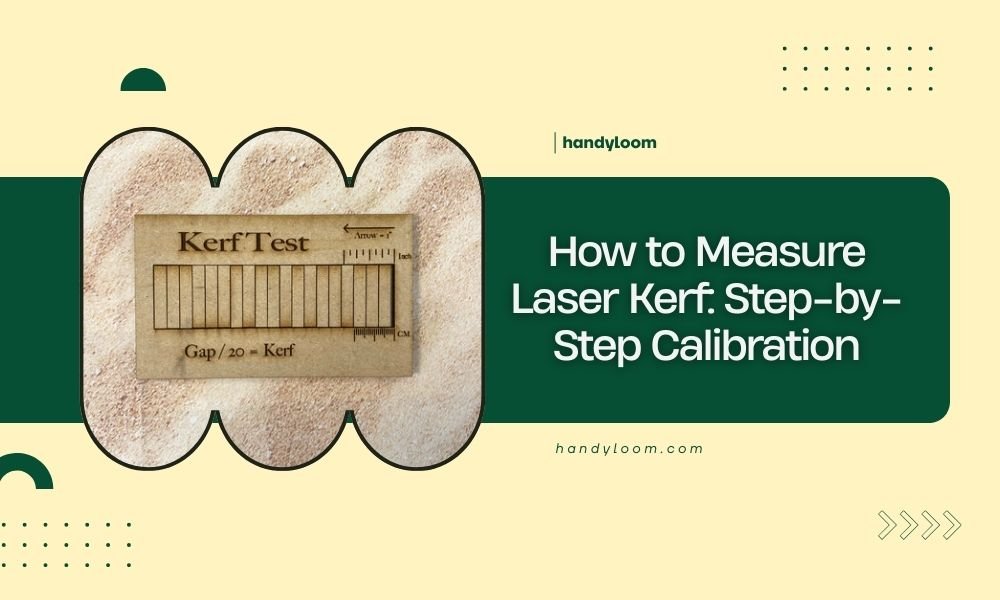
Measuring laser kerf requires cutting test squares and comparing their actual size to the original design dimensions – the difference divided by 2 equals your kerf width.
You can calibrate laser kerf accuracy by adjusting cut settings based on your measurements, then testing again until parts fit perfectly.
What Is Laser Kerf and Why Should You Care?
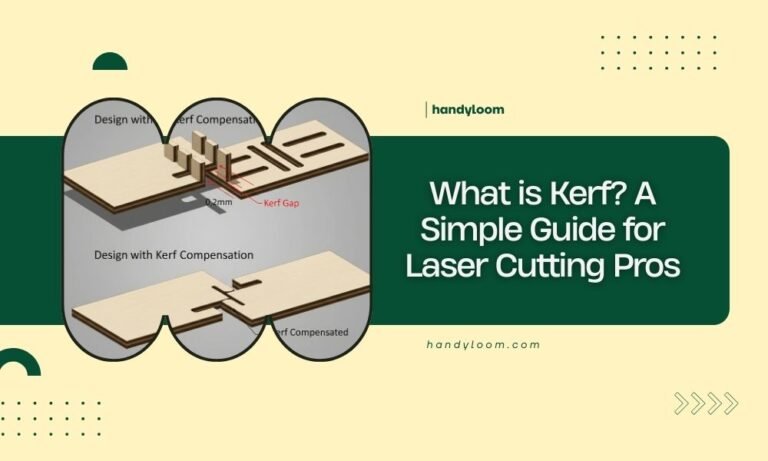
Think of kerf as the “bite” your laser takes out of material. When your laser cuts, it doesn’t slice along a perfect hairline. Instead, it removes a thin strip of material.
This matters more than you might think. If you’re making a puzzle with 50 pieces, even a tiny kerf error multiplies into parts that don’t fit together.
The Quick Test Method That Actually Works
I found that the most reliable approach uses simple test squares. You don’t need fancy equipment or complicated math.
Materials You’ll Need
- Scrap piece of your target material
- Digital calipers or ruler (0.1mm accuracy minimum)
- Design software (any vector program works)
- Calculator or phone
Creating Your Test Design
Design a simple 20mm x 20mm square. Why 20mm? It’s large enough to measure accurately but small enough to cut quickly.
Make the line thickness as thin as possible in your software. Most programs call this “hairline” or 0.001mm.
Step-by-Step Cutting Process
Setting Up Your First Test Cut
Place your test material on the laser bed. Make sure it sits flat – warped material gives false readings.
Use your normal cutting settings for this material type. Don’t change anything yet. We’re measuring what you currently get.
Running the Test
Cut your 20mm square. Let the material cool for a minute before handling. Hot cuts can be slightly smaller due to thermal expansion.
Taking Accurate Measurements
Measure both width and length of your cut square. Take three measurements of each dimension and average them.
Why multiple measurements? I discovered that laser cuts aren’t always perfectly uniform, especially on natural materials like wood.
Calculating Your Kerf Width
The Simple Math
Here’s the formula that works every time:
Kerf width = (Original dimension – Measured dimension) ÷ 2
Real Example
Let’s say your 20mm square measures 19.6mm after cutting:
- Difference: 20mm – 19.6mm = 0.4mm
- Kerf width: 0.4mm ÷ 2 = 0.2mm
You divide by 2 because the laser removes material from both sides of your cut line.
Testing Different Material Thicknesses
Why Thickness Matters
Thicker materials often produce wider kerf. The laser beam has more time to spread as it cuts deeper.
Creating a Kerf Chart
Test each material thickness you commonly use. I found online that many professionals keep simple charts like this:
| Material | Thickness | Kerf Width |
|---|---|---|
| Plywood | 3mm | 0.15mm |
| Plywood | 6mm | 0.2mm |
| Acrylic | 3mm | 0.1mm |
Adjusting Your Design for Perfect Fits
The Compensation Method
Once you know your kerf width, you can fix design dimensions before cutting.
For pieces that fit inside other pieces, add the kerf width to the inner piece dimensions.
Practical Example
You want a 10mm piece to fit snugly in a 10mm hole. With 0.2mm kerf:
- Design the hole at exactly 10mm
- Design the piece at 10.2mm (10mm + 0.2mm kerf)
- After cutting, both will measure close to 10mm
Fine-Tuning Your Laser Settings
Power and Speed Adjustments
Higher power typically creates wider kerf. Slower speeds can do the same.
If your kerf is too wide, try reducing power by 5-10% and test again.
Focus Distance Impact
Perfect focus gives the narrowest kerf. Check your focus before each kerf measurement session.
Multiple Pass Technique
Some materials cut cleaner with multiple light passes instead of one heavy pass. This often reduces kerf width too.
Common Measurement Mistakes
Measuring Too Soon
Hot materials can give wrong readings. Always let cuts cool to room temperature.
Wrong Measurement Points
Measure at the middle of each edge, not near corners where the laser might have paused or overlapped.
Ignoring Material Grain
Wood can cut differently along grain versus across grain. Test both directions if your project needs precision fits.
Advanced Calibration Techniques
The Interlocking Test
Create two pieces designed to fit together perfectly. This tests both your measurements and compensation calculations.
Tolerance Testing
Cut several pieces with slightly different compensations. This helps you find the perfect fit for your specific needs.
Material-Specific Considerations
Research from fabrication experts shows that different materials behave uniquely:
Wood Behavior
Natural wood can vary in density, changing kerf width even within the same piece.
Plastic Considerations
Some plastics melt slightly during cutting, which can affect final dimensions.
Troubleshooting Inconsistent Results
Checking Your Laser Condition
Dirty lenses or mirrors can create irregular kerf widths. Clean optics give more predictable results.
Bed Alignment Issues
An unlevel bed can cause focus variations across your cutting area. Check alignment regularly.
Environmental Factors
Humidity affects wood dimensions. Temperature changes can impact both material and laser performance.
Conclusion
Measuring laser kerf doesn’t have to be complicated. Start with simple test squares, measure carefully, and do the basic math. Your cuts will fit together much better once you account for kerf in your designs. Keep testing different materials and thicknesses to build your personal kerf database. With practice, you’ll predict and compensate for kerf automatically, making your projects more professional and satisfying.
How often should I re-measure laser kerf?
Re-measure whenever you change materials, adjust laser settings, or notice fit problems. Also check monthly if you use your laser frequently, as lens wear can gradually change kerf width.
Does laser power affect kerf width significantly?
Yes, higher power typically creates wider kerf because more material gets vaporized. A 10% power increase might add 0.05mm to your kerf width, depending on material type.
Can I use the same kerf measurement for all cut directions?
Not always – wood grain direction can change kerf width by 0.1mm or more. Test both parallel and perpendicular to grain if your project requires tight tolerances.
What’s the most accurate tool for measuring kerf?
Digital calipers with 0.01mm resolution work best for most hobbyists. Micrometers are more accurate but usually unnecessary unless you’re doing precision engineering work.
Why do my kerf measurements vary between identical cuts?
Material density variations, slight focus differences, or debris on your lens can cause this. Clean your optics, check focus consistency, and take measurements from multiple test cuts to get reliable averages.