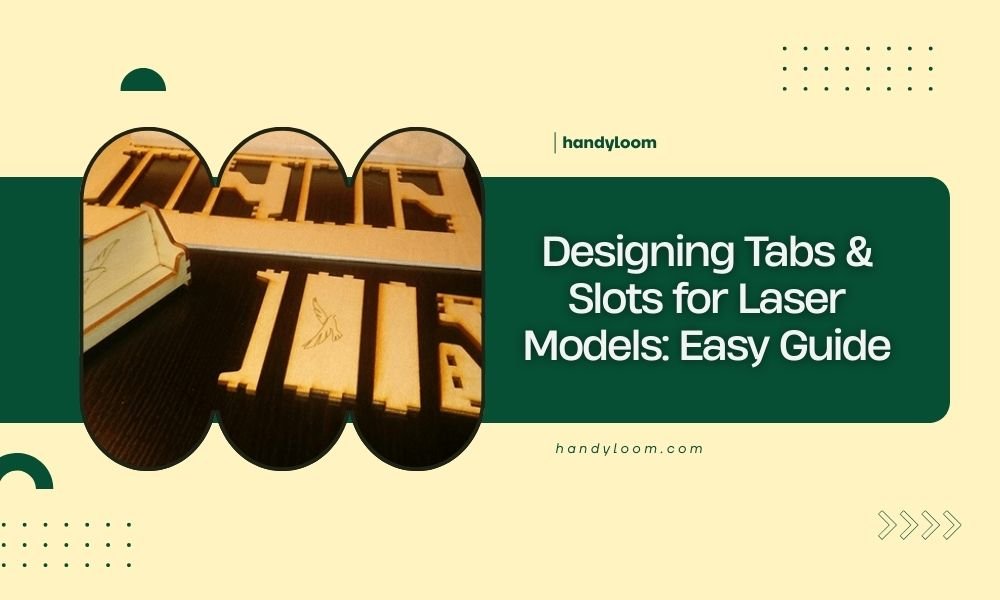
Designing tabs and slots for laser models requires precise measurements and proper joint spacing to create strong, interlocking connections between your cut pieces.
The key to successful tab and slot design is making tabs 10-15% smaller than their corresponding slots to account for laser kerf and material expansion during cutting.
Understanding Tab and Slot Basics
Think of tabs and slots like puzzle pieces. The tab is the protruding part that fits into the slot, which is the receiving opening. This connection method lets you build 3D models from flat laser-cut pieces without glue or screws.
I found that most beginners make their connections too tight or too loose. Getting the right fit takes practice and understanding your laser cutter’s behavior.
Why Tab and Slot Design Matters
Your laser beam removes material as it cuts, creating what we call “kerf.” This gap affects how your pieces fit together. Ignore kerf, and your model won’t assemble properly.
Good tab and slot design also distributes stress evenly across joints. This prevents breaking during assembly and makes your finished model more durable.
Measuring Your Laser Kerf
Before designing any tabs, you need to know your laser’s kerf width. This varies based on your laser power, speed, and material thickness.
Simple Kerf Test Method
Cut a small square from your material. Measure the square you drew in your design software. Then measure the actual cut piece with calipers. The difference is your kerf.
For example, if you designed a 20mm square but cut a 19.8mm square, your kerf is 0.2mm total, or 0.1mm per side.
Recording Kerf for Different Materials
Keep a simple chart of kerf measurements for each material you use. Wood, acrylic, and cardboard all behave differently under the laser beam.
I researched common kerf values and found that 3mm plywood typically has 0.1-0.15mm kerf per side, while 3mm acrylic ranges from 0.05-0.1mm per side.
Basic Tab Dimensions
Start with these proven ratios for your first designs. You can adjust them as you gain experience with your specific laser and materials.
Tab Width Guidelines
Make your tabs 2-3 times your material thickness. For 3mm plywood, use 6-9mm wide tabs. This provides enough surface area for a strong connection without making assembly difficult.
Avoid making tabs wider than necessary. Oversized tabs create stress points and can crack your material during assembly.
Tab Length Recommendations
Tab length should match your material thickness plus 0.5-1mm. This gives you enough engagement without the tab poking through the other side.
For 3mm material, make tabs 3.5-4mm long. This accounts for slight material thickness variations and ensures clean assembly.
Slot Sizing Formula
Here’s the math that makes everything work: Slot width = Tab width + (2 × kerf) + clearance allowance.
Your clearance allowance should be 0.1-0.2mm for tight fits or 0.3-0.5mm for loose fits that slide together easily.
| Material | Tab Width | Slot Width | Clearance |
|---|---|---|---|
| 3mm Plywood | 6mm | 6.4mm | 0.2mm |
| 3mm Acrylic | 6mm | 6.3mm | 0.1mm |
| 1.5mm Cardboard | 4mm | 4.5mm | 0.3mm |
Tab Placement Strategies
Where you put your tabs affects both strength and appearance. Smart placement makes assembly easier and your finished model look cleaner.
Avoiding Stress Concentration
Don’t place tabs near corners or other tabs. This creates weak points where your material might crack under stress.
Space tabs at least 10mm apart, or 3 times your material thickness, whichever is larger.
Tab Orientation Best Practices
Align tabs perpendicular to the grain direction in wood materials. This prevents splitting along the grain lines during assembly.
For acrylic and other uniform materials, you have more flexibility in tab orientation.
Symmetry and Balance
Use an odd number of tabs when possible. This creates better visual balance and distributes forces more evenly across the joint.
Three or five tabs work well for most applications. Single tabs often fail under stress, while too many tabs make assembly frustrating.
Common Design Mistakes
I came across several recurring problems when researching tab and slot failures. Learning from these mistakes saves you time and material.
Ignoring Material Properties
Wood expands and contracts with humidity changes. Design your clearances slightly larger for wooden models that might experience temperature swings.
Acrylic stays more stable but can crack if you force ill-fitting joints. Test fit before final assembly.
Forgetting Assembly Order
Design your tab placement so you can actually assemble the model. Sometimes tabs that look perfect on screen create impossible assembly sequences.
Sketch out your assembly steps before cutting. Can you reach all the joints? Do any parts block others during assembly?
Inconsistent Tolerances
Using the same clearance for all joints in a model creates problems. Joints that bear weight need tighter fits than decorative connections.
Structural joints should have 0.1-0.2mm clearance. Non-critical connections can use 0.3-0.5mm for easier assembly.
Testing and Iteration
Always cut test pieces before committing to a full model. This saves material and prevents frustration with poor-fitting joints.
Simple Test Joint Design
Create a simple L-shaped test with one tab and slot. Cut several versions with different clearances to find your sweet spot.
Test how the joint feels during assembly. Does it slide together smoothly? Does it hold firmly without glue?
Documenting What Works
Keep notes about successful combinations. Record material type, thickness, kerf measurements, and final clearances that worked well.
This reference saves time on future projects and helps you maintain consistent quality.
Advanced Design Techniques
Once you master basic tabs and slots, these techniques add strength and visual appeal to your models.
Tapered Tabs
Make tabs slightly wider at the base and narrower at the tip. This creates a wedge effect that tightens as you push the joint together.
Use a 1-2 degree taper angle. Too much taper makes assembly difficult and can split the material.
Rounded Tab Corners
Sharp corners concentrate stress and can cause cracking. Add small radius curves to tab corners for stronger, longer-lasting joints.
A 0.5mm radius works well for most applications without affecting joint strength.
Captive Tab Systems
Design tabs that lock in place once inserted. This prevents accidental disassembly and creates more permanent connections.
Add small barbs or expanding sections to your tabs. These catch inside the slot and resist backing out.
Software Tools and Tips
Most vector design programs can handle tab and slot creation, but some make it easier than others.
Parametric Design Benefits
Use software that lets you define tab dimensions as variables. When you need to adjust clearances, you change one number instead of redrawing everything.
Programs like Fusion 360, Inkscape with extensions, or specialized laser cutting software offer parametric tab generation.
Automated Tab Placement
Some programs automatically calculate tab spacing and placement. These tools save time but always double-check their output before cutting.
Manual placement gives you more control over strength and appearance, especially for complex models.
Conclusion
Designing effective tabs and slots comes down to understanding your materials, measuring your laser’s behavior, and testing your designs before committing to full cuts. Start with the basic formulas and ratios I’ve shared, then adjust based on your specific needs and preferences.
Remember that every laser cutter behaves differently, and materials can vary between suppliers. Keep detailed notes about what works for your setup, and don’t be afraid to iterate on your designs. The time you spend perfecting your tab and slot technique will pay off in stronger, better-fitting models that assemble smoothly every time.
What’s the best clearance for beginners learning tab and slot design?
Start with 0.3-0.4mm total clearance for your first projects. This forgiving tolerance lets you learn assembly techniques without fighting tight joints, then you can reduce clearance as your skills improve.
How many tabs should I use on each joint?
Use 3-5 tabs for joints longer than 50mm, and 1-2 tabs for shorter connections. Odd numbers create better balance, and spacing tabs 15-20mm apart prevents stress concentration in most materials.
Can I use the same tab dimensions for all materials?
No, different materials require different approaches. Wood needs larger clearances due to expansion, acrylic can use tighter tolerances, and cardboard often needs looser fits to prevent tearing during assembly.
Why do my tabs break during assembly?
Tab breakage usually comes from making them too thin, placing them too close to corners, or forcing mismatched tolerances. Make tabs 2-3 times your material thickness and ensure proper clearance calculations.
Should I design tabs on the inside or outside of my model pieces?
Place tabs on the less visible side when possible, typically the inside faces. This creates cleaner external appearance while maintaining strong joints. Consider your assembly sequence when deciding tab orientation.