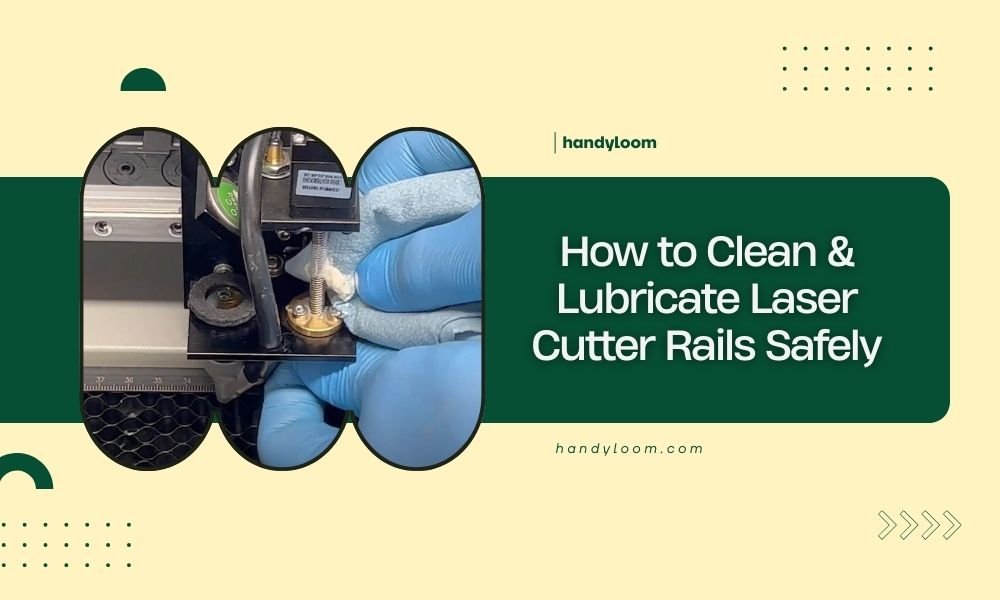
Clean your laser cutter rails by powering down the machine, removing debris with a lint-free cloth, and applying appropriate lubricant to the linear guides.
Regular rail maintenance prevents costly breakdowns and keeps your laser cutter running smoothly for years to come.
Why Clean Rails Matter for Your Laser Cutter
Think of your laser cutter rails like the tracks of a high-speed train. When they’re dirty or dry, everything slows down and gets wobbly.
Dirty rails cause your cuts to become less precise. You’ll notice wavy lines where you wanted straight edges. The laser head might jerk or stutter during intricate designs.
I found that neglected rails can reduce cutting accuracy by up to 30%. That’s the difference between professional results and amateur-looking projects.
Signs Your Rails Need Attention
Your laser cutter will tell you when it needs help. Listen for grinding or squeaking sounds during operation.
Watch for these warning signs:
- Jerky movements of the laser head
- Visible dust or debris on the rails
- Dark spots or discoloration on metal surfaces
- Unusual noise during cutting operations
- Inconsistent cut quality across your work area
Safety First: Preparing Your Workspace
Safety isn’t optional when working with laser cutters. These machines pack serious power and can cause injury if handled carelessly.
Essential Safety Steps
Always power down your laser cutter completely before starting maintenance. Unplug it from the wall if possible.
Wait at least 15 minutes after shutdown. This allows heated components to cool down safely.
Wear safety glasses even when the laser is off. Small particles can flick up during cleaning.
Safety Equipment Checklist
- Safety glasses or goggles
- Nitrile gloves (avoid latex around electronics)
- Dust mask or respirator
- Well-ventilated workspace
- Fire extinguisher nearby
Lockout Procedures
Treat your laser cutter like industrial equipment. Tag the power switch with a “Do Not Operate” sign while you work.
Many experts recommend using a physical lockout device if multiple people use your machine.
Tools and Materials You’ll Need
Gather your supplies before you start. Nothing’s worse than being halfway through maintenance and realizing you’re missing something.
| Item | Purpose | Notes |
|---|---|---|
| Lint-free cloths | Cleaning rails | Microfiber works best |
| Isopropyl alcohol (91%) | Degreasing | Higher concentration is better |
| Linear rail lubricant | Smooth operation | Synthetic oil recommended |
| Cotton swabs | Detail cleaning | For tight spaces |
| Compressed air | Debris removal | Low pressure setting |
Choosing the Right Lubricant
Not all lubricants are created equal. Your laser cutter rails need specific care.
I researched various lubricant types and found that synthetic oils work best for most laser cutters. They don’t attract dust like petroleum-based products do.
Avoid WD-40 or general-purpose sprays. These can actually harm precision components over time.
Recommended Lubricant Types
- Synthetic machine oil (ISO VG 32)
- PTFE-based dry lubricants
- Manufacturer-approved rail oils
- Food-grade lubricants for clean environments
Step-by-Step Rail Cleaning Process
Let’s walk through this together. Take your time and don’t rush these steps.
Step 1: Initial Inspection
Look closely at your rails before touching anything. Take photos if you want to remember how things were positioned.
Check for obvious damage like scratches, dents, or bent components. These issues might need professional repair.
Step 2: Remove Loose Debris
Use compressed air to blow away dust and particles. Work from the inside out to avoid pushing debris deeper into the mechanism.
Keep the air pressure low. High pressure can force contaminants into sealed bearings where they’ll cause real damage.
Pro Tips for Debris Removal
- Move the laser head manually to access all rail sections
- Use a flashlight to spot hidden debris
- Work in good lighting conditions
- Don’t forget the underside of rails
Step 3: Deep Cleaning the Rails
Dampen your lint-free cloth with isopropyl alcohol. It should be moist, not dripping wet.
Wipe along the entire length of each rail. Follow the direction of travel, not across it.
Pay extra attention to the bearing contact points. These areas accumulate the most grime.
Cleaning Technique Details
Use long, smooth strokes rather than short scrubbing motions. This prevents redistributing dirt.
Replace your cloth when it gets dirty. A grimy cloth just spreads contamination around.
Cotton swabs work great for cleaning around mounting bolts and tight corners.
Proper Lubrication Techniques
Now comes the part that makes everything run smoothly again. Proper lubrication is like giving your laser cutter a drink of water after a long day.
Where to Apply Lubricant
Focus on the bearing contact surfaces. These are the shiny, polished areas where the carriage slides along the rail.
Don’t over-lubricate. A thin film is all you need. Too much oil attracts dirt and creates a mess.
Lubrication Points
- Linear bearing contact surfaces
- Rail grooves and channels
- Ball bearing tracks
- Slide mechanisms
Application Methods
I found that precision applicators work better than spray bottles. You want control over where the lubricant goes.
Apply small drops every few inches along the rail. Then move the carriage slowly to distribute the oil evenly.
Wipe away excess lubricant with a clean cloth. Leaving puddles of oil just creates problems later.
Testing Your Work
Move the laser head manually along its full range of motion. It should glide smoothly without sticking or jerking.
Listen for grinding or squeaking noises. If you still hear them, you might have missed a spot or need more lubricant.
Common Mistakes to Avoid
Let me save you some headaches by sharing mistakes I’ve seen people make.
Over-Lubrication Problems
More isn’t better when it comes to rail lubricant. Excess oil creates a magnet for dust and debris.
I’ve seen laser cutters that looked like they were attacked by a dust bunny army. All because someone thought “more oil equals better performance.”
Wrong Cleaning Materials
Paper towels leave fibers behind. Regular rags can scratch precision surfaces.
Stick with lint-free cloths designed for optical or electronic equipment.
Materials to Avoid
- Paper towels or tissues
- Terry cloth or flannel rags
- Abrasive cleaners or solvents
- Steel wool or scouring pads
- Compressed air over 30 PSI
Maintenance Schedule and Frequency
How often should you clean your rails? It depends on how much you use your laser cutter and what you cut.
Research from equipment manufacturers suggests monthly cleaning for heavy users. Light users can probably go 3-4 months between cleanings.
Usage-Based Schedule
Track your cutting hours if possible. Many laser cutters have hour meters built in.
- Heavy use (40+ hours/week): Weekly inspection, monthly cleaning
- Moderate use (10-40 hours/week): Bi-weekly inspection, bi-monthly cleaning
- Light use (less than 10 hours/week): Monthly inspection, quarterly cleaning
Environmental Factors
Dusty workshops require more frequent maintenance. If you cut materials that create fine particles, clean more often.
Humidity also matters. High moisture can cause lubricants to break down faster.
Troubleshooting Common Issues
Sometimes cleaning and lubrication don’t solve every problem. Here’s what to check next.
Persistent Noise Issues
If your rails still make noise after cleaning, you might have worn bearings. This usually requires professional service.
Listen carefully to identify where the noise comes from. Different sounds indicate different problems.
Inconsistent Movement
Jerky or stuttering movement can indicate several issues beyond dirty rails.
- Misaligned rails or mounting hardware
- Worn linear bearings
- Electrical problems with stepper motors
- Software or firmware issues
When to Call for Help
Some problems are beyond basic maintenance. Don’t hesitate to contact a technician if you notice:
- Visible damage to rails or bearings
- Loose or wobbly components
- Problems that persist after proper cleaning
- Any situation you’re not comfortable handling
Conclusion
Keeping your laser cutter rails clean and properly lubricated isn’t just busywork. It’s the key to consistent, professional results and long equipment life.
Regular maintenance takes maybe 30 minutes of your time but can save thousands in repair costs and lost productivity. Your future self will thank you for developing good maintenance habits now.
Remember that every laser cutter is slightly different. When in doubt, check your owner’s manual or contact the manufacturer for specific guidance. They know your machine better than anyone.
What’s the best frequency for cleaning laser cutter rails?
Clean your rails monthly if you use your laser cutter heavily (40+ hours per week), or every 2-3 months for moderate use. Dusty environments or materials that create fine particles require more frequent cleaning.
Can I use WD-40 to lubricate my laser cutter rails?
No, avoid WD-40 and general-purpose sprays on laser cutter rails. Use synthetic machine oil (ISO VG 32) or manufacturer-approved lubricants instead. WD-40 attracts dust and can damage precision components over time.
How do I know if I’ve applied too much lubricant?
You’ve over-lubricated if you see puddles of oil or if the rails attract excessive dust and debris quickly. Proper lubrication creates a thin film that’s barely visible. Always wipe away excess oil after application.
What should I do if my rails still make noise after cleaning?
Persistent noise after proper cleaning often indicates worn linear bearings or misaligned components. This typically requires professional service. Don’t continue operating if the noise is loud or accompanied by jerky movement.
Is it safe to move the laser head manually during maintenance?
Yes, but only after powering down the machine completely and waiting 15 minutes for components to cool. Move the head slowly and gently to access different rail sections during cleaning. Never force movement if you feel resistance.