To clean acrylic after laser engraving without scratches, use warm soapy water with a microfiber cloth, moving in straight lines rather than circles.
Avoid abrasive cleaners and always remove the protective film before cleaning to prevent residue buildup on your laser-engraved acrylic surface.
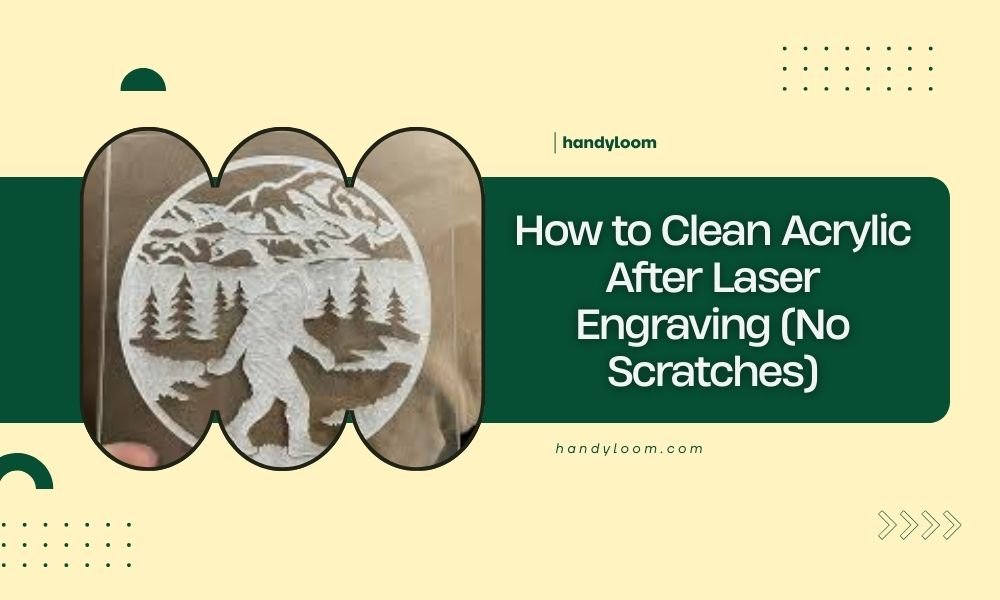
Ever stared at your freshly laser-engraved acrylic piece only to notice smudges, residue, or fingerprints ruining the crisp lines? You’re not alone. Getting that crystal-clear finish takes the right approach.
I’ve researched the best methods craftspeople use to keep their acrylic projects looking professional. Let me walk you through exactly how to clean your pieces without causing any damage.
Why Proper Cleaning Matters for Laser-Engraved Acrylic
Laser engraving creates microscopic changes on the acrylic surface. These tiny alterations can trap dirt and oils more easily than smooth plastic.
Wrong cleaning methods can cause permanent cloudiness or fine scratches. Once you damage the surface, there’s no going back to that pristine look.
The good news? Acrylic responds beautifully to gentle care. Treat it right, and your engravings will stay sharp for years.
What You’ll Need for Safe Cleaning
Gather these supplies before you start:
- Warm water (not hot)
- Mild dish soap
- Clean microfiber cloths
- Soft-bristled brush (optional)
- Compressed air (for detailed areas)
Skip the paper towels. They’re rougher than they seem and can leave tiny scratches on acrylic surfaces.
Tools to Avoid Completely
These common household items can ruin your project:
- Abrasive cleaners or powders
- Ammonia-based window cleaners
- Acetone or strong solvents
- Rough sponges or steel wool
- Paper towels or tissues
Step-by-Step Cleaning Process
Ready to get your acrylic sparkling? Follow these steps in order for best results.
Step 1: Remove Protective Film First
Many acrylic sheets come with a protective plastic film. Always peel this off before cleaning.
If the film tears or leaves residue, don’t worry. We’ll handle that in the next steps.
Dealing with Stubborn Film Residue
Sometimes the protective film leaves sticky bits behind. Gently rub with your finger in a circular motion. The residue should roll up and come off.
For persistent spots, use a tiny amount of dish soap on your finger. Never use harsh solvents here.
Step 2: Rinse with Warm Water
Hold your piece under lukewarm running water. This removes loose dust and debris that could scratch the surface during cleaning.
Keep the water pressure gentle. You don’t want to force particles into the engraved areas.
Step 3: Apply Soapy Water Solution
Mix a few drops of mild dish soap in a bowl of warm water. Think baby shampoo consistency – very gentle.
Dip your microfiber cloth in the solution and wring it until it’s just damp, not dripping.
The Right Wiping Technique
Here’s where many people go wrong. Always wipe in straight lines, not circles.
Start from one edge and move to the other in smooth, even strokes. This prevents swirl marks and keeps any microscopic scratches uniform.
Step 4: Clean Engraved Details
Laser-engraved areas need special attention. Debris loves to hide in those fine lines and curves.
Use a soft-bristled brush (like an old clean toothbrush) with your soapy water. Brush gently along the engraved lines, not against them.
Using Compressed Air
For intricate designs with deep engraving, compressed air works wonders. Hold the can upright and use short bursts.
The air pushes out particles your cloth can’t reach. Just don’t get too close – keep the nozzle at least 6 inches away.
Drying Without Damage
How you dry your acrylic matters just as much as how you clean it.
Air Drying Method
The safest approach? Let gravity do the work. Stand your piece upright and let it air dry.
Place it somewhere dust-free. A clean towel on your workspace works well as a base.
Hand Drying Technique
In a hurry? You can hand dry, but be careful. Use a clean, dry microfiber cloth with the same straight-line motion you used for cleaning.
Don’t press hard. Let the cloth barely touch the surface and glide across it.
Common Cleaning Mistakes to Avoid
I’ve found that these errors cause most acrylic damage during cleaning.
Using Too Much Pressure
Acrylic scratches easier than glass. Treat it like you’re cleaning a soap bubble – with the lightest possible touch.
If something won’t come off with gentle pressure, use more soap or let it soak longer. Never scrub harder.
Cleaning in Direct Sunlight
Hot surfaces dry cleaning solution too quickly. This leaves soap residue that creates streaks and cloudiness.
Always clean acrylic in shade or indoors at room temperature.
The Temperature Factor
Water that’s too hot can stress acrylic and cause cracking. Stick to lukewarm – comfortable to your hand.
Cold water won’t dissolve oils and soap as well. Room temperature to slightly warm hits the sweet spot.
Removing Specific Types of Residue
Different cleanup jobs need different approaches. Here’s what works for common problems.
Laser Cutting Smoke Residue
That gray film from laser cutting? It’s actually melted plastic particles. Regular soap and water handle it well.
For heavy buildup, let the soapy water sit on the surface for 2-3 minutes before wiping.
Fingerprints and Oils
Skin oils show up easily on clear acrylic. The dish soap method works perfectly here.
For stubborn prints, breathe lightly on the surface (like fogging a mirror) then wipe immediately with your microfiber cloth.
Preventing Future Fingerprints
Handle clean acrylic by the edges when possible. Wear cotton gloves for detailed work.
Some craftspeople keep a microfiber cloth handy and give pieces a quick wipe after each handling.
Special Considerations for Different Acrylic Types
Not all acrylic cleans exactly the same way. Here’s what to know about variations.
Cast vs. Extruded Acrylic
Cast acrylic (the higher quality type) handles cleaning better than extruded. Both use the same cleaning method, but cast acrylic forgives small mistakes more easily.
Extruded acrylic needs extra gentleness since it’s more prone to stress cracking.
Colored and Tinted Acrylic
Colored pieces hide minor scratches better than clear acrylic. But the cleaning process stays the same – gentle soap, straight-line wiping, careful drying.
Dark colors show water spots more easily, so thorough drying becomes extra important.
When Professional Help Makes Sense
Sometimes DIY cleaning isn’t enough. Here’s when to consider professional restoration.
Deep Scratches or Cloudiness
If your acrylic looks permanently foggy or has scratches you can feel with your fingernail, home cleaning won’t fix it.
Plastic restoration services can polish out minor damage. Search for “acrylic restoration” or “plastic polishing” in your area.
Valuable or Irreplaceable Pieces
Got a one-of-a-kind engraved piece worth hundreds of dollars? Professional cleaning might cost $20-50 but could save you from a costly mistake.
Many trophy shops and sign makers offer acrylic cleaning services.
Maintaining Your Clean Acrylic
Keep your laser-engraved acrylic looking great with these ongoing care tips.
Storage Best Practices
Store pieces vertically when possible, separated by soft cloth or foam. Stacking acrylic pieces directly on top of each other invites scratches.
Keep storage areas dust-free and away from direct sunlight, which can cause yellowing over time.
Regular Maintenance Schedule
Display pieces need weekly dusting with a microfiber cloth. Pieces in storage can go months between cleanings.
Always clean before important displays or photography. Even minor smudges show up clearly in bright lighting.
Troubleshooting Common Issues
What if things don’t go as planned? Here are solutions for typical problems.
Streaks After Cleaning
Streaks usually mean soap residue or dirty cloth. Rinse thoroughly with clean water and dry with a fresh microfiber cloth.
Sometimes tap water minerals cause streaks. Try distilled water for your final rinse.
Static Buildup Attracting Dust
Clean acrylic often develops static electricity that pulls dust like a magnet. Anti-static sprays made for plastic help, but test on a hidden area first.
Higher humidity in your workspace also reduces static buildup naturally.
The Dryer Sheet Trick
Some people swear by lightly rubbing a used dryer sheet over clean acrylic to reduce static. The residual fabric softener creates an anti-static coating.
I found mixed results with this method. It works but can leave its own residue that attracts different types of dirt.
Conclusion
Cleaning laser-engraved acrylic doesn’t have to be stressful. Stick to gentle soap, microfiber cloths, and straight-line motions. Take your time and let the mild cleaning solution do most of the work.
Remember that prevention beats correction every time. Handle your pieces carefully, store them properly, and clean them regularly with the right technique.
Your laser-engraved acrylic projects represent hours of careful work. They deserve cleaning methods that protect your investment and keep them looking professional for years to come.
What’s the best soap for cleaning laser-engraved acrylic?
Regular dish soap like Dawn or Joy works perfectly. Avoid anything with added moisturizers, antibacterial agents, or citrus oils. Baby shampoo is another gentle option that won’t damage acrylic surfaces.
Can I use a regular glass cleaner on my acrylic pieces?
No, most glass cleaners contain ammonia which can cause stress cracks in acrylic over time. Stick to mild soapy water solutions for safe cleaning that won’t damage your laser-engraved work.
How often should I clean my laser-engraved acrylic displays?
Dust weekly with a dry microfiber cloth and deep clean with soapy water monthly for displayed pieces. Stored pieces only need cleaning when you notice visible dirt or before bringing them out for display.
What should I do if I accidentally scratch my acrylic while cleaning?
Stop cleaning immediately and assess the damage. Very light scratches might polish out with plastic polish, but deep scratches usually require professional restoration or piece replacement. Prevention is always better than repair.
Is it safe to put laser-engraved acrylic in the dishwasher?
Never put acrylic in the dishwasher. The high heat can warp, crack, or permanently cloud the material. The strong detergents and water pressure can also damage the engraved details. Always hand wash with gentle methods.