Aligning CO2 laser mirrors requires adjusting each mirror in sequence, starting from the tube and working toward the cutting head, using burn tests on masking tape to check beam alignment at each position.
Proper mirror alignment ensures your CO2 laser cuts cleanly and prevents expensive damage to your laser components – a misaligned beam can burn through your cutting head or create uneven cuts.
What Happens When Your Mirrors Are Misaligned
You’ll know your mirrors need attention when cuts become uneven or weak. Sometimes the laser barely scratches material it used to slice through easily.
Misaligned mirrors waste laser power. Instead of focusing all energy into a tight beam, scattered light creates weak, inconsistent cuts. Your projects suffer and you waste time troubleshooting.
Essential Tools You Need
Gather these items before starting your alignment:
- Masking tape (cheap painter’s tape works great)
- Small screwdriver or hex key set
- Safety glasses rated for your laser wavelength
- Flashlight or phone light
- Small piece of cardboard or paper
Safety First: Protect Your Eyes
CO2 laser beams are invisible but extremely dangerous. Always wear proper safety glasses. Never look directly at the beam path or reflective surfaces during operation.
Work in good lighting so you can see adjustment screws clearly. Poor visibility leads to mistakes.
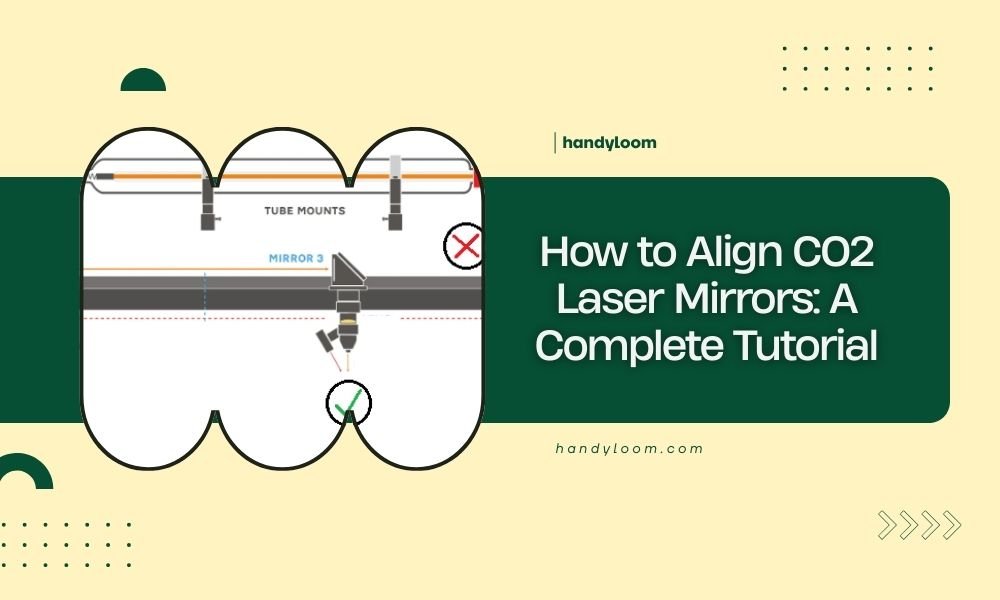
Understanding Your Laser’s Mirror System
Most CO2 lasers use three mirrors. Mirror 1 sits closest to the laser tube. Mirror 2 redirects the beam horizontally. Mirror 3 (often called the head mirror) sends the beam down through your focusing lens.
How Beam Path Works
Think of mirrors like a relay race. Each mirror must pass the beam perfectly to the next one. If any mirror is slightly off, the error compounds down the line.
The beam travels from your laser tube, bounces off Mirror 1, travels to Mirror 2, then bounces to Mirror 3, and finally goes through your focusing lens to cut material.
Step-by-Step Mirror Alignment Process
I researched alignment techniques used by laser technicians and found this sequence works best. Always align mirrors in order – never skip around.
Step 1: Align Mirror 1 (Closest to Laser Tube)
Place masking tape over Mirror 2. Position your laser head at the far corner from Mirror 1. Fire a very short pulse (1-2 milliseconds) at low power.
Check where the burn mark appears on the tape. It should hit dead center of Mirror 2.
Adjusting Mirror 1
If the burn mark is off-center, adjust Mirror 1’s screws slightly. Most mirrors have three adjustment screws – two for positioning and one for tension.
Make tiny adjustments. Turn screws just 1/8 turn at a time. Test after each adjustment.
Testing Different Positions
Move your laser head to the opposite corner. Fire another test pulse. The burn mark should still hit center of Mirror 2.
If the mark shifts position, continue adjusting Mirror 1 until burns hit center from both corners.
Step 2: Align Mirror 2
Remove tape from Mirror 2. Place fresh tape over Mirror 3. Position laser head close to Mirror 2, then fire a test pulse.
The burn should appear in the center of Mirror 3’s tape.
Adjusting Mirror 2
Use the same small adjustment technique. Turn screws gradually and test frequently.
Move the laser head to the farthest position from Mirror 2. Fire another test pulse. Both close and far positions should burn center of Mirror 3.
Step 3: Align Mirror 3 (Head Mirror)
Remove tape from Mirror 3. Place tape over the focusing lens opening (bottom of cutting head).
Fire test pulses from different head positions. The burn should always appear in the exact center of the lens opening.
Final Head Adjustments
Mirror 3 adjustments affect your final cut quality most directly. Take extra time getting this perfect.
Test from all four corners of your cutting area. Center burns from every position mean proper alignment.
Common Alignment Problems and Solutions
Beam Hitting Mirror Edge
This damages mirrors quickly. If burns appear near mirror edges, your previous mirror needs major adjustment.
Go back one step and realign more carefully. Rush jobs lead to expensive mirror replacement.
Inconsistent Burn Marks
If burn intensity varies between positions, check for loose mirror mounts. Tighten mounting screws (not adjustment screws) slightly.
Vibration during cutting can shake loose mirrors out of alignment.
Power Setting Issues
Use consistent low power for all test burns. I found 10-15% power works well for alignment tests.
High power can damage mirrors during alignment. Low power gives clear marks without risk.
Maintaining Perfect Alignment
Check alignment monthly if you use your laser daily. Casual users can check every few months.
Signs You Need Realignment
- Cuts are weaker on one side of material
- Edge quality varies across cutting area
- Small details don’t cut completely
- Engraving depth is uneven
Quick Alignment Check
Cut a small square from each corner of your bed. Compare cut quality. Uneven results mean alignment has drifted.
This takes two minutes but can save hours of frustration later.
Preventing Alignment Loss
Keep your laser on a stable surface. Vibration from nearby equipment can shake mirrors loose over time.
Clean mirrors gently with proper lens cleaning solution. Dirty mirrors scatter light and reduce cutting power.
| Mirror Position | Test Location | Target | Common Issues |
|---|---|---|---|
| Mirror 1 | Far corners | Center of Mirror 2 | Beam hitting edge |
| Mirror 2 | Near and far | Center of Mirror 3 | Inconsistent burns |
| Mirror 3 | All four corners | Center of lens opening | Uneven cut quality |
Troubleshooting Alignment Issues
When Alignment Won’t Hold
Loose mounting hardware causes alignment to drift. Check all mirror mount screws for tightness.
Worn adjustment screws can’t hold position. Replace adjustment hardware if threads are stripped.
Temperature Effects
Metal expansion from temperature changes can shift alignment slightly. Many experts recommend warming up your laser for 10-15 minutes before precision work.
Cold shops can cause temporary alignment issues that resolve as equipment warms.
Professional Help
Some alignment problems need professional service. If mirrors are physically damaged or mounts are bent, don’t attempt repairs yourself.
Replacement mirrors must match your laser’s specifications exactly. Wrong mirrors can damage your laser tube.
Conclusion
Proper mirror alignment transforms your CO2 laser from frustrating to fantastic. The process takes patience, but results speak for themselves through clean, consistent cuts.
Start with Mirror 1 and work systematically toward your cutting head. Small adjustments and frequent testing prevent big problems. Monthly alignment checks keep your laser performing at its best.
Remember that good alignment is like tuning a musical instrument – it needs regular attention but rewards you with perfect performance.
How often should I check my CO2 laser mirror alignment?
Check alignment monthly for daily users, every 2-3 months for occasional users. Watch for signs like uneven cuts or weak performance that indicate alignment has drifted between scheduled checks.
Can I align mirrors with the laser tube turned off?
No, you need the actual laser beam to check alignment accuracy. Visual alignment alone isn’t precise enough. Always use proper safety equipment and low power test pulses for alignment procedures.
What happens if I skip Mirror 1 and start with Mirror 2?
Starting out of sequence creates compounding errors that make proper alignment impossible. Mirror 1 must be correct before Mirror 2 can be aligned properly, and so on down the beam path.
Why does my alignment change after a few weeks?
Vibration, temperature changes, and normal settling of mechanical components cause gradual alignment drift. Keeping your laser on a stable surface and allowing warm-up time helps minimize drift between alignments.
Should I replace all mirrors at the same time?
Replace mirrors individually as needed unless multiple mirrors show damage. New mirrors require the same alignment process regardless of whether you replace one or all three at once.