

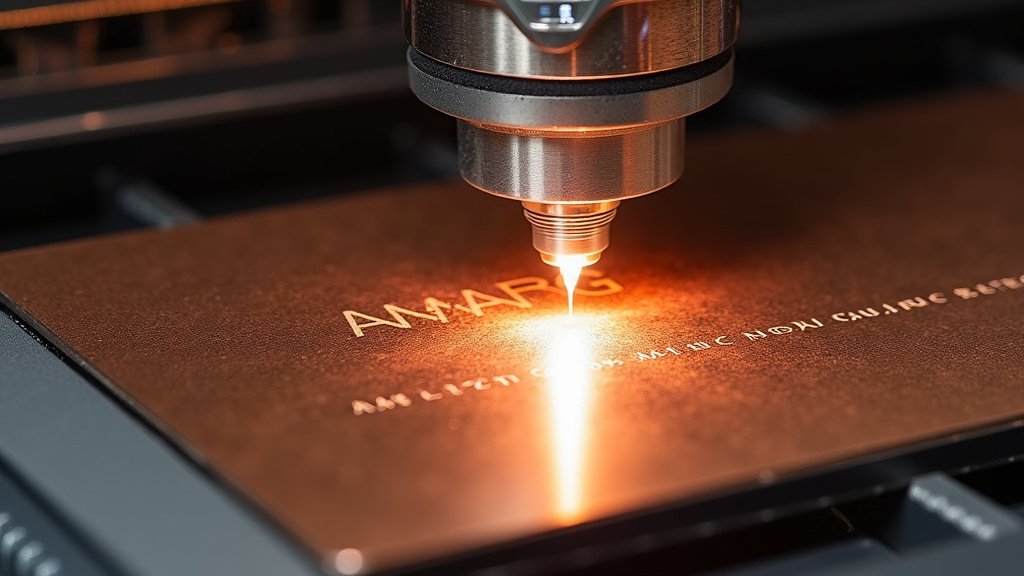
The easiest way to laser engrave copper involves using a fiber laser system to alter the material’s surface. This process creates a permanent mark without needing any special coatings. You can achieve various effects, from deep engraving to simple annealing, depending on your laser settings.
Working with copper can be a fun challenge for many laser enthusiasts. Copper is a highly reflective material, which means it absorbs laser energy differently than other metals. Setting up your machine correctly is key to getting crisp, clean results every time.
- Fiber lasers are best for copper.
- No special coatings are needed.
- Adjust settings for different effects.
- Copper’s reflectivity needs care.
- Achieve permanent, clean marks.
Let’s walk through exactly how to laser engrave copper, step by step, ensuring you get fantastic results for your projects.
Getting Started with Laser Engraving Copper
Engraving copper might seem a bit tricky at first, but with the right setup, you’ll be creating beautiful pieces in no time. The key is understanding how copper reacts to laser light. Its high reflectivity means it prefers a specific type of laser.
Understanding Copper’s Unique Properties
Have you ever noticed how shiny copper is? That shine reflects a lot of light, including laser light. This reflectivity is why CO2 lasers, common for wood and acrylic, struggle with copper. They just can’t transfer enough energy to the metal.
Copper is also an excellent conductor of heat. This means heat disperses quickly throughout the material. For engraving, you need concentrated heat to alter the surface effectively.
The Right Tool: Why Fiber Lasers Reign Supreme
When it comes to laser engraving copper, fiber lasers are your best bet. We found that fiber lasers produce a wavelength of light that copper absorbs much more efficiently than CO2 lasers do (National Institute of Standards and Technology).
This efficient absorption means fiber lasers can create a permanent mark on copper surfaces without coatings. You get a much cleaner and more controllable result.
Comparing Fiber and CO2 Lasers for Metal
Let’s briefly look at why one works and the other doesn’t for copper engraving. It’s all about the laser’s wavelength meeting the material’s absorption characteristics.
| Laser Type | Wavelength | Copper Absorption | Best For |
|---|---|---|---|
| Fiber Laser | ~1064 nm | High | Metals (copper, steel, aluminum) |
| CO2 Laser | ~10,600 nm | Low | Non-metals (wood, acrylic, leather) |
As you can see, the fiber laser’s wavelength aligns perfectly for interacting with metallic surfaces like copper. Many experts agree that choosing the right tool is half the battle won.
Preparing Your Copper for Engraving
Before you even power on your laser, a little prep work goes a long way. Clean copper gives you the best canvas for your engraving. Think of it like painting – you wouldn’t paint on a dirty surface, would you?
Cleaning the Copper Surface
You want your copper to be free of oils, dirt, and oxides. These contaminants can interfere with the laser absorption, leading to inconsistent marks.
- Wipe the copper with isopropyl alcohol.
- Use a clean, lint-free cloth.
- Make sure it’s completely dry before proceeding.
- For heavily oxidized copper, a light polish might be needed first.
A clean surface ensures the laser energy hits the copper directly, making your settings more predictable and your results super crisp.
Securing Your Workpiece
Movement during engraving is a big no-go. Even a tiny shift can ruin your design. Use clamps, jigs, or a magnetic base to hold your copper piece firmly in place. Stability is key for precision.
Imagine trying to draw a straight line on a wobbly table. It just won’t work, right? The same principle applies here. Your copper needs to be rock-solid.
Critical Laser Settings for Copper Engraving
This is where the magic happens. Proper laser settings are paramount for engraving copper effectively. Too little power, and you get no mark; too much, and you might cause damage or excessive melting. It’s a delicate balance.
Power, Speed, and Frequency Explained
These three settings are your main controls for laser engraving. Understanding them is like knowing how to adjust the heat, cooking time, and stirring intensity for a perfect dish.
- Power: This controls the laser beam’s intensity. Higher power removes more material or creates a darker mark.
- Speed: How fast the laser head moves across the material. Slower speeds allow more time for the laser to interact with the copper.
- Frequency: The number of laser pulses per second. Higher frequencies create finer, more continuous lines.
We’ve found that a good starting point for copper often involves high power and moderate speed. You’ll then adjust the frequency depending on the desired effect.
Achieving Different Engraving Effects
Copper is versatile. You can achieve various looks: dark marks, deep engravings, or even light surface annealing. Your settings dictate the aesthetic.
Deep Engraving (Material Removal)
For a noticeable depth, you generally need higher power and slower speeds. This allows the laser to ablate, or vaporize, more material.
You might need multiple passes to get the desired depth. Think of it like carving; you don’t remove everything in one go. Slow and steady wins the race for depth.
Surface Marking (Annealing/Discoloration)
If you want a dark, permanent mark without significant material removal, you’ll engage in a process called annealing. This involves heating the surface momentarily to change its chemical composition.
Annealing typically uses moderate power, higher speed, and often a higher frequency. This creates a quick, intense heat pulse that discolors the surface without digging in. It’s like leaving a sun tan on the metal (Journal of Materials Processing Technology).
Material Thickness and Focus Adjustment
Your copper’s thickness matters for focus. The laser beam needs to be precisely focused on the surface for optimal energy transfer. Always measure your material accurately.
Many systems have auto-focus features, but manual adjustment is still common. An out-of-focus beam will lead to a weaker, wider, and less defined mark. It’s a bit like having blurry vision – you can’t see the details clearly.
Safety Considerations for Laser Engraving Copper
Working with lasers, especially powerful fiber lasers, requires strict adherence to safety protocols. Your eyes and skin are precious, so protect them!
Essential Personal Protective Equipment (PPE)
Never operate a laser without the right gear. Seriously, don’t even think about it.
- Laser safety glasses: Specific to the wavelength of your fiber laser. Always wear them.
- EnCLOSED system: Many fiber lasers are Class 1, meaning they are fully enclosed, but treat any open system with extreme caution.
- Proper ventilation: Engraving copper creates fumes. Have an extractor fan or air filtration system.
- Fire extinguisher: Always good to have nearby, just in case.
We found that many laser accidents happen due to complacency. Stay vigilant and follow all safety guidelines. Your health is not worth risking for a cool engraving.
Work Area Ventilation
When you engrave copper, tiny particles and fumes are created. Inhaling these can be harmful. A good ventilation system is not optional; it’s a necessity.
Ensure your workspace is well-ventilated, or use a dedicated fume extractor. This keeps your air clean and your lungs happy.
Troubleshooting Common Engraving Issues
Even with the right knowledge, you might encounter issues. Don’t worry, that’s part of the learning process. Most problems have straightforward solutions.
Inconsistent or Faint Marks
Are your marks looking uneven or barely visible? This is super common and usually points to a few culprits.
- Incorrect focus: Recheck your focus distance.
- Insufficient power: Increase your laser power slightly.
- Too fast speed: Decrease the engraving speed.
- Dirty surface: Clean the copper thoroughly again.
- Wavelength mismatch: Are you sure you’re using a fiber laser?
Sometimes, it’s just a matter of adjusting one small setting. Be patient, make small changes, and test frequently.
Excessive Melting or Burring
If your copper looks more melted than engraved, or you see rough edges, your laser might be working too hard. It’s like cooking a steak on too high a heat – it burns before it cooks through.
- Too much power: Reduce the laser power.
- Too slow speed: Increase the engraving speed.
- Incorrect frequency: Adjust the frequency for a finer interaction.
- Over-focused beam: A slightly defocused beam can sometimes help.
Making small adjustments to your power and speed is usually the fastest way to dial this in. You’re aiming for precision, not destruction.
Conclusion
You’re now equipped with the knowledge to confidently laser engrave copper. Remember, fiber lasers are your best friend for this material due to its unique reflectivity. Prioritize preparation by cleaning and securing your copper, then adjust your power, speed, and frequency settings to achieve your desired effect.
Always put safety first with proper PPE and ventilation. If issues arise, a systematic approach to troubleshooting will get you back on track. With practice, you’ll master this versatile metal. Go create some amazing copper pieces!
Frequently Asked Questions
Can I use a CO2 laser to engrave copper if I use a coating?
While some specialized coatings exist that might allow a CO2 laser to mark copper, it’s generally not recommended for true engraving. The results are often inconsistent and not as permanent or aesthetically pleasing as what a fiber laser achieves directly.
What kind of designs work best for copper engraving?
Copper looks fantastic with intricate, detailed designs due to its smooth surface and the crisp marks a fiber laser can produce. Text, logos, and geometric patterns all stand out beautifully. You can also get interesting effects with photographic engravings using specialized software.
Does engraving affect copper’s electrical conductivity?
Small surface engravings typically have a negligible effect on copper’s overall electrical conductivity, especially in thicker pieces. If you’re removing significant material for a specific electrical application, it’s wise to test the impact.
How can I make the engraved marks on copper stand out more?
For better contrast, you can sometimes apply a darkening agent or enamel paint into the engraved areas and then wipe away the excess from the surface. The laser annealing process naturally creates dark marks, but this method can further enhance depth and visibility.
Is there a specific type of copper that engraves better than others?
Generally, pure copper (like C11000) or high-purity copper alloys will engrave very well with fiber lasers. The presence of other metals in an alloy can sometimes affect the exact settings needed, but the fundamental process remains the same.
