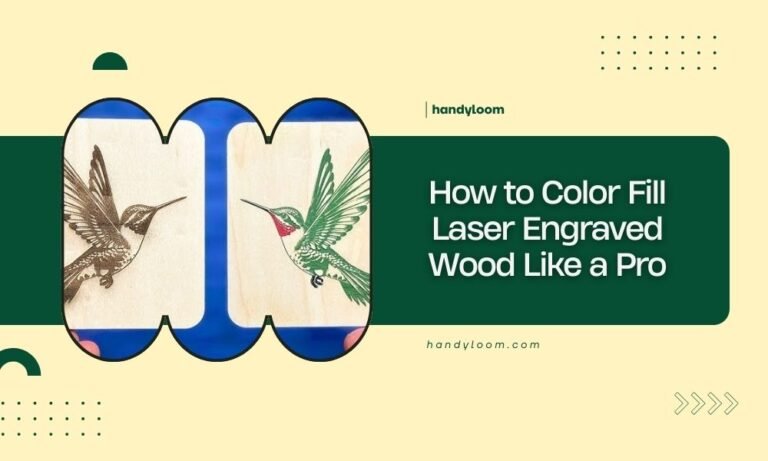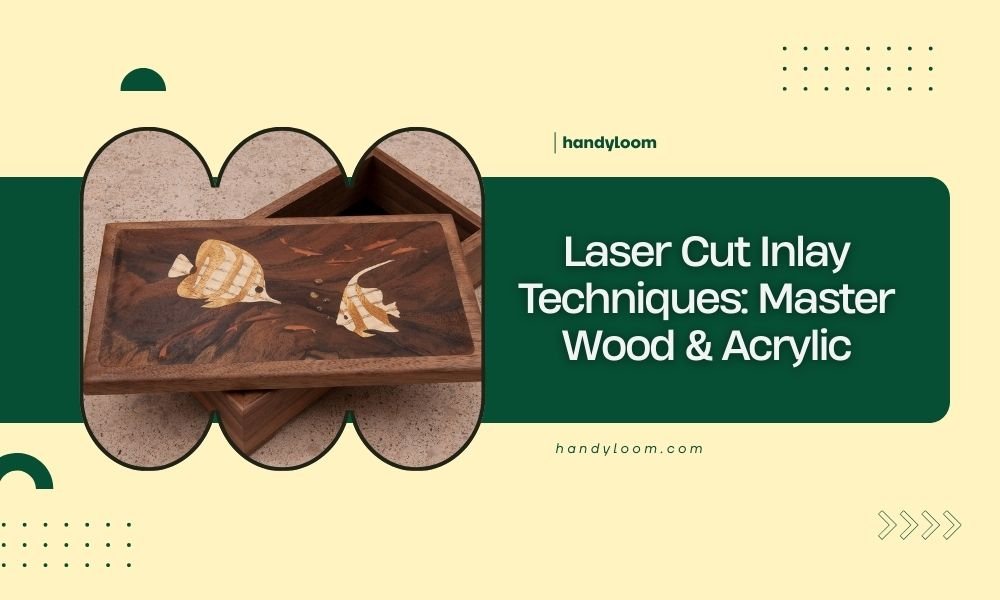
Laser cut inlay techniques combine precision cutting with creative design to embed materials like wood and acrylic seamlessly into each other.
You can master these techniques by understanding proper kerf compensation, material selection, and alignment methods for professional results.
What Are Laser Cut Inlay Techniques
Think of inlay work like a jigsaw puzzle where pieces fit together perfectly. One material gets cut out to create a pocket. Another material gets cut to fit snugly inside that pocket.
Laser cutting makes this ancient craft much easier. You get clean edges and precise fits every time. No hand tools needed.
How Inlays Work
The process starts with two materials. Wood and acrylic work great together because they cut cleanly and look beautiful side by side.
Your laser cuts a design out of the base material. Then it cuts the same design from the inlay material. The inlay piece should fit perfectly into the base cutout.
Why Choose Laser Cutting for Inlays
Traditional inlay work takes hours of careful hand cutting. Laser cutting does the same job in minutes with better accuracy.
You can repeat the same design dozens of times. Each piece will match perfectly. Try doing that with a chisel and saw!
Essential Materials for Wood and Acrylic Inlays
Material choice makes or breaks your inlay project. Some combinations work beautifully. Others create problems.
Best Woods for Inlay Work
Hardwoods give you the cleanest cuts and strongest results. I found that maple, cherry, and walnut work exceptionally well for beginners.
- Maple provides light color contrast
- Cherry offers warm red tones
- Walnut creates dramatic dark accents
- Birch plywood works well for practice
Avoid softwoods like pine. They burn easily and create fuzzy edges that ruin tight fits.
Selecting Acrylic for Inlays
Cast acrylic cuts much better than extruded acrylic. The edges come out cleaner and clearer.
Thickness matters too. Match your acrylic thickness to your wood thickness exactly. Even small differences show up in the final piece.
Color Combinations That Work
High contrast looks best. Clear acrylic in dark wood creates an elegant effect. Bright colored acrylic in light wood makes bold statements.
I researched successful projects online and found that subtle color differences often get lost. Go bold or go home.
Understanding Kerf Compensation
Here’s where beginners usually mess up. Your laser beam has width. It removes material as it cuts. This removal is called kerf.
If you ignore kerf, your inlay pieces won’t fit together properly. They’ll be too loose or too tight.
Measuring Your Laser’s Kerf
Cut a test piece first. Make a simple rectangle in scrap material. Measure the actual cut size versus your design size.
The difference is your kerf width. Write this number down. You’ll need it for every project.
Applying Kerf Compensation
For the base material, make your cutout slightly larger than designed. Add half the kerf width to each side.
For the inlay piece, make it slightly smaller. Subtract half the kerf width from each side.
This creates the perfect interference fit. Your pieces will slide together with gentle pressure.
Design Considerations for Perfect Fits
Not all designs work well for inlays. Some shapes are much easier than others.
Simple Shapes Work Best
Start with basic geometric shapes. Circles, squares, and simple curves are forgiving. Complex shapes with tiny details often break during fitting.
Avoid sharp internal corners. They create stress points that crack under pressure.
Wall Thickness Guidelines
Keep walls at least 2mm thick around your cutouts. Thinner walls break easily during handling.
This rule applies to both the base material and the inlay design itself. Delicate details look nice but don’t survive the process.
Grain Direction Matters
Wood grain affects strength. Design your cuts so the grain runs across weak points, not along them.
Long thin pieces should have grain running lengthwise. This prevents breaking during installation.
Step-by-Step Cutting Process
The cutting order affects your final results. Follow these steps for best success.
Prepare Your Materials
Clean both materials thoroughly. Dust and oils affect laser cutting quality. A quick wipe with alcohol works well.
Check material thickness with calipers. Variations mess up your fit calculations.
Cut the Base Material First
Always cut your pocket before cutting the inlay piece. This lets you test fit and adjust if needed.
Use multiple light passes instead of one heavy pass. This reduces burning and gives cleaner edges.
Test Fit Before Final Cuts
Cut your inlay piece slightly oversized first. Test the fit in your base pocket.
If it’s too big, make small adjustments to your design. Recut until you get the perfect fit.
Assembly and Finishing Techniques
Getting the pieces cut is only half the battle. Assembly requires patience and the right approach.
Dry Fitting First
Never use glue on your first assembly attempt. Parts might bind up partway in.
Work the inlay piece into place slowly. Rock it gently from side to side if it sticks.
Gluing Methods
Use thin CA glue for most projects. It flows into tight spaces and sets quickly.
Apply glue to the pocket, not the inlay piece. This prevents squeeze-out on visible surfaces.
Clamping Strategies
Even pressure across the entire surface works best. Use cauls (flat boards) to distribute clamp pressure.
Don’t over-clamp. Too much pressure can crack delicate parts or squeeze out too much glue.
Common Problems and Solutions
Every beginner runs into the same issues. Here’s how to fix them quickly.
Loose Fits
If your inlay rattles in the pocket, the kerf compensation was too aggressive. Use thicker CA glue to fill small gaps.
For larger gaps, cut a new inlay piece with less compensation.
Tight Fits
Parts that won’t go together fully need sanding. Use fine sandpaper on the inlay piece edges.
Sand lightly and test frequently. It’s easy to remove too much material.
Burned Edges
Reduce power or increase cutting speed. Multiple light passes often work better than one heavy pass.
Clean cut edges with fine sandpaper if burning does occur. This also helps with fit issues.
| Problem | Likely Cause | Quick Fix |
|---|---|---|
| Loose fit | Too much kerf compensation | Thick CA glue or recut |
| Tight fit | Not enough kerf compensation | Light sanding on inlay |
| Burned edges | Too much power | Lower power, multiple passes |
| Chipped acrylic | Wrong cutting speed | Slower speed, masking tape |
Advanced Inlay Techniques
Once you master basic inlays, these advanced methods open up new possibilities.
Multi-Level Inlays
Stack different thicknesses to create depth effects. Cut pockets at different depths in your base material.
This technique creates shadow boxes and dimensional art pieces that really pop.
Multiple Material Inlays
Combine wood, acrylic, and other materials in the same project. Each material needs its own cutting settings.
Plan your design so each material type can be cut efficiently in one setup.
Gradient Effects
Use different colored acrylics or wood species to create smooth color transitions. This works great for landscape scenes.
Cut each color section separately, then assemble like a puzzle.
Conclusion
Laser cut inlay techniques transform ordinary wood and acrylic into stunning decorative pieces. Master the basics of kerf compensation and material selection first. Then practice with simple designs before moving to complex projects.
Remember that perfect fits come from careful measurement and test cuts. Don’t rush the process. Take time to dial in your settings for each material combination. Your patience will show in the final results.
Start with practice pieces using scrap materials. Once you nail the technique, you can create amazing custom signs, decorative panels, and artistic pieces that combine the best of both materials.
What’s the best thickness for beginner inlay projects?
Start with 1/8 inch (3mm) materials for both wood and acrylic. This thickness is forgiving for fit adjustments and strong enough to handle without breaking during assembly.
Can you use different thicknesses for the base and inlay materials?
Yes, but plan for it in your design. The inlay can be thinner than the pocket depth, creating a recessed effect. Thicker inlays create raised surfaces that can look very striking.
How tight should the fit be between materials?
Aim for a snug fit that requires gentle pressure to assemble. You should be able to push pieces together by hand without tools, but they shouldn’t fall apart when handled.
What happens if acrylic cracks during cutting?
Cracking usually means your cutting speed is too fast or you’re not using enough air assist. Slow down the cut speed and apply masking tape to both sides of the acrylic before cutting.
Do you need special glue for wood-to-acrylic joints?
Regular CA glue works well for most projects. For outdoor pieces or high-stress applications, use structural adhesives designed for dissimilar materials like 3M DP420 or similar two-part adhesives.