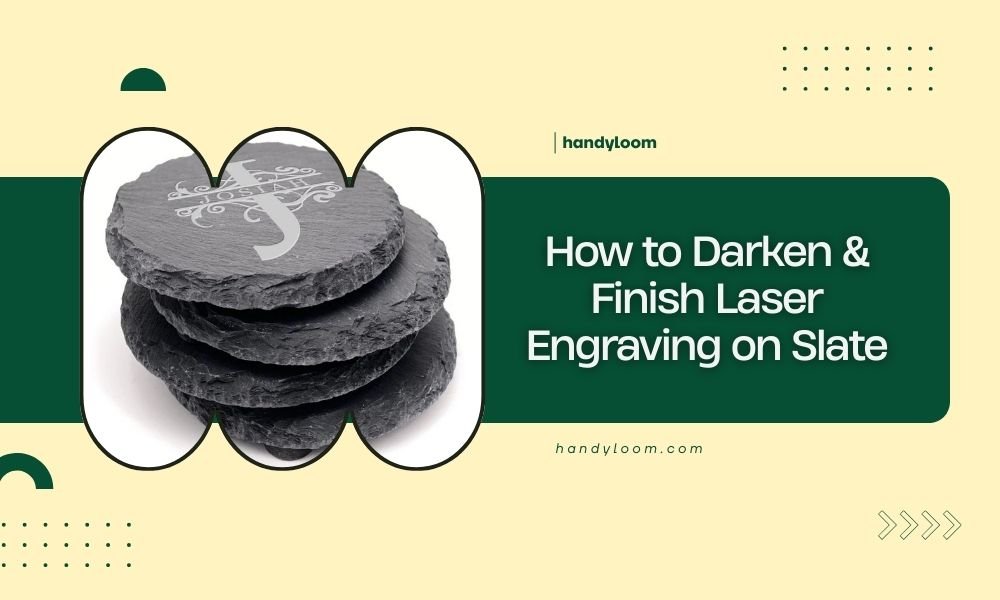
Darkening laser engraving on slate requires heat application, specialized products, or hand-filling techniques to make the engraved areas more visible and durable.
The most effective methods include using a torch to oxidize the slate surface, applying contrast paints, or filling grooves with acrylic paint or chalk.
Quick Methods to Darken Your Slate Engraving
You’ve just finished laser engraving your slate piece, but the results look faint and hard to read. Don’t worry – this happens to most people when they first work with slate.
The good news? You can fix this problem in minutes using items you probably already have at home.
Heat Application Method
Heat creates the darkest, most professional-looking results on slate. When you apply controlled heat to laser-engraved areas, the slate surface oxidizes and turns much darker.
Grab a small butane torch or heat gun. Hold it 6-8 inches away from your slate surface. Move the flame slowly across the engraved areas for 2-3 seconds per section.
You’ll see the engraving darken almost immediately. The key word here is “slowly” – rushing this step can crack your slate.
Safety Tips for Heat Treatment
Always wear safety glasses when using a torch on slate. Work in a well-ventilated area to avoid breathing any particles.
Keep a damp cloth nearby in case you need to cool the slate quickly. Some slate types can get surprisingly hot during this process.
Paint and Pigment Techniques
Not comfortable with torches? Paint offers excellent control and comes in any color you want.
Acrylic Paint Fill Method
Acrylic paint works great because it sticks well to slate and dries quickly. Choose high-quality craft paint for the best results.
Apply paint directly into the engraved grooves using a small brush. Fill each line completely, then use a damp cloth to wipe away excess paint from the slate surface.
Let it dry for 15-20 minutes. You’ll have crisp, clean lines that pop against the slate background.
Color Selection Tips
White and gold create the most dramatic contrast on dark slate. Silver works well too, especially for elegant designs.
For outdoor projects, stick with whites and metallics. These colors resist fading better than bright colors under UV exposure.
Chalk and Pastels
Regular sidewalk chalk gives you a quick temporary fill. Rub chalk directly into the grooves, then wipe the surface clean with a dry cloth.
This method works perfectly for testing designs before you commit to permanent fills.
Professional Finishing Products
Want results that last for years? Professional products give you the most durable finishes.
Rub ‘n Buff Metallic Wax
This product has become popular among laser engravers for good reason. It creates beautiful metallic finishes that bond well with slate.
Apply a small amount with your finger or a soft cloth. Work it into the grooves, then buff away the excess. The result looks like inlaid metal.
Application Best Practices
Clean your slate with rubbing alcohol before applying any professional products. This removes oils and dust that can prevent proper bonding.
Work in thin layers rather than trying to get full coverage in one application. Multiple thin coats always look better than one thick coat.
Enamel Paint Markers
Paint markers give you precision control for detailed work. Look for permanent enamel-based markers designed for stone surfaces.
These work especially well for text and fine details where brushes might be too clumsy.
Natural Darkening Methods
Some people prefer methods that don’t add foreign materials to their slate projects.
Oil Treatment
Mineral oil can darken engraved areas slightly while bringing out the natural slate colors. Apply with a soft cloth and let it soak in for several hours.
This method works best on lighter colored slates. The results are subtle but natural-looking.
Food-Safe Options
If you’re making coasters or serving pieces, stick with food-grade mineral oil. Avoid using motor oils or industrial lubricants on items that might contact food.
Common Mistakes to Avoid
I’ve seen people make the same errors over and over when darkening slate engravings. Here are the big ones to watch out for.
Too Much Heat Too Fast
Slate can crack if you heat it unevenly or too quickly. Always move your heat source continuously rather than focusing on one spot.
If you see any white stress marks appearing, stop immediately and let the slate cool completely.
Using the Wrong Paint Type
Water-based paints sometimes don’t stick well to slate surfaces. Acrylic and enamel paints generally give better results than latex or tempera paints.
Paint Preparation Issues
Skipping the cleaning step causes more problems than any other mistake. Slate often has a thin layer of dust or natural oils that prevent paint from sticking properly.
Sealing and Protection
After you’ve darkened your engraving, you might want to protect your work from wear and weather.
Clear Protective Coatings
Matte acrylic sealers work well for most indoor projects. They protect the darkened areas without adding unwanted shine.
For outdoor pieces, look for UV-resistant polyurethane coatings. These cost more but last much longer under sun exposure.
When Not to Seal
Skip sealers on items that need to breathe, like plant markers or garden stones. Some sealers can trap moisture and cause problems over time.
Troubleshooting Common Issues
What happens when things don’t go as planned? Here are solutions for the most common problems.
Uneven Coverage
If your darkening looks blotchy, you probably rushed the application. Clean off what you can and start over with thinner applications.
Paint Bleeding Outside Lines
This usually means your paint was too thin or you applied too much pressure. Use less paint and work more slowly next time.
Fading Over Time
Outdoor pieces face tough conditions. Reapply darkening treatments annually for the best appearance.
Indoor pieces should stay dark for years with minimal maintenance.
| Method | Durability | Difficulty | Best For |
|---|---|---|---|
| Heat Treatment | Permanent | Medium | Natural look |
| Acrylic Paint | Long-lasting | Easy | Bright colors |
| Metallic Wax | Very long | Easy | Elegant finish |
| Chalk | Temporary | Very easy | Testing designs |
Conclusion
Darkening laser engraving on slate doesn’t have to be complicated. Start with simple methods like chalk or acrylic paint to get comfortable with the process. Once you’re confident, try heat treatment for the most professional results.
Remember that practice makes perfect. Your first few attempts might not look exactly how you imagined, but each project teaches you something new. Keep experimenting with different techniques until you find the methods that work best for your style and projects.
Can you darken slate engraving without using heat?
Yes, you can use acrylic paint, metallic wax, chalk, or oil treatments to darken engravings without any heat application. These methods are safer for beginners and give you more control over the final appearance.
How long does painted slate engraving last outdoors?
Quality acrylic or enamel paint typically lasts 2-3 years outdoors before needing touch-ups. UV-resistant sealers can extend this to 4-5 years. Heat-treated engravings last indefinitely since they change the slate itself.
What’s the safest method for food-contact slate items?
For cheese boards or serving pieces, use food-grade mineral oil or leave the engraving natural. Avoid paints, waxes, or chemical treatments on any slate that will contact food directly.
Why does my slate crack during heat treatment?
Cracking happens when slate heats unevenly or too quickly. Always keep your torch moving and maintain 6-8 inches distance. Some slate types are more sensitive to thermal shock than others.
Can you remove darkening treatments if you don’t like the results?
Paint and wax can usually be removed with appropriate solvents or scraping. Heat treatment changes the slate permanently and cannot be reversed. Always test your chosen method on a small hidden area first.