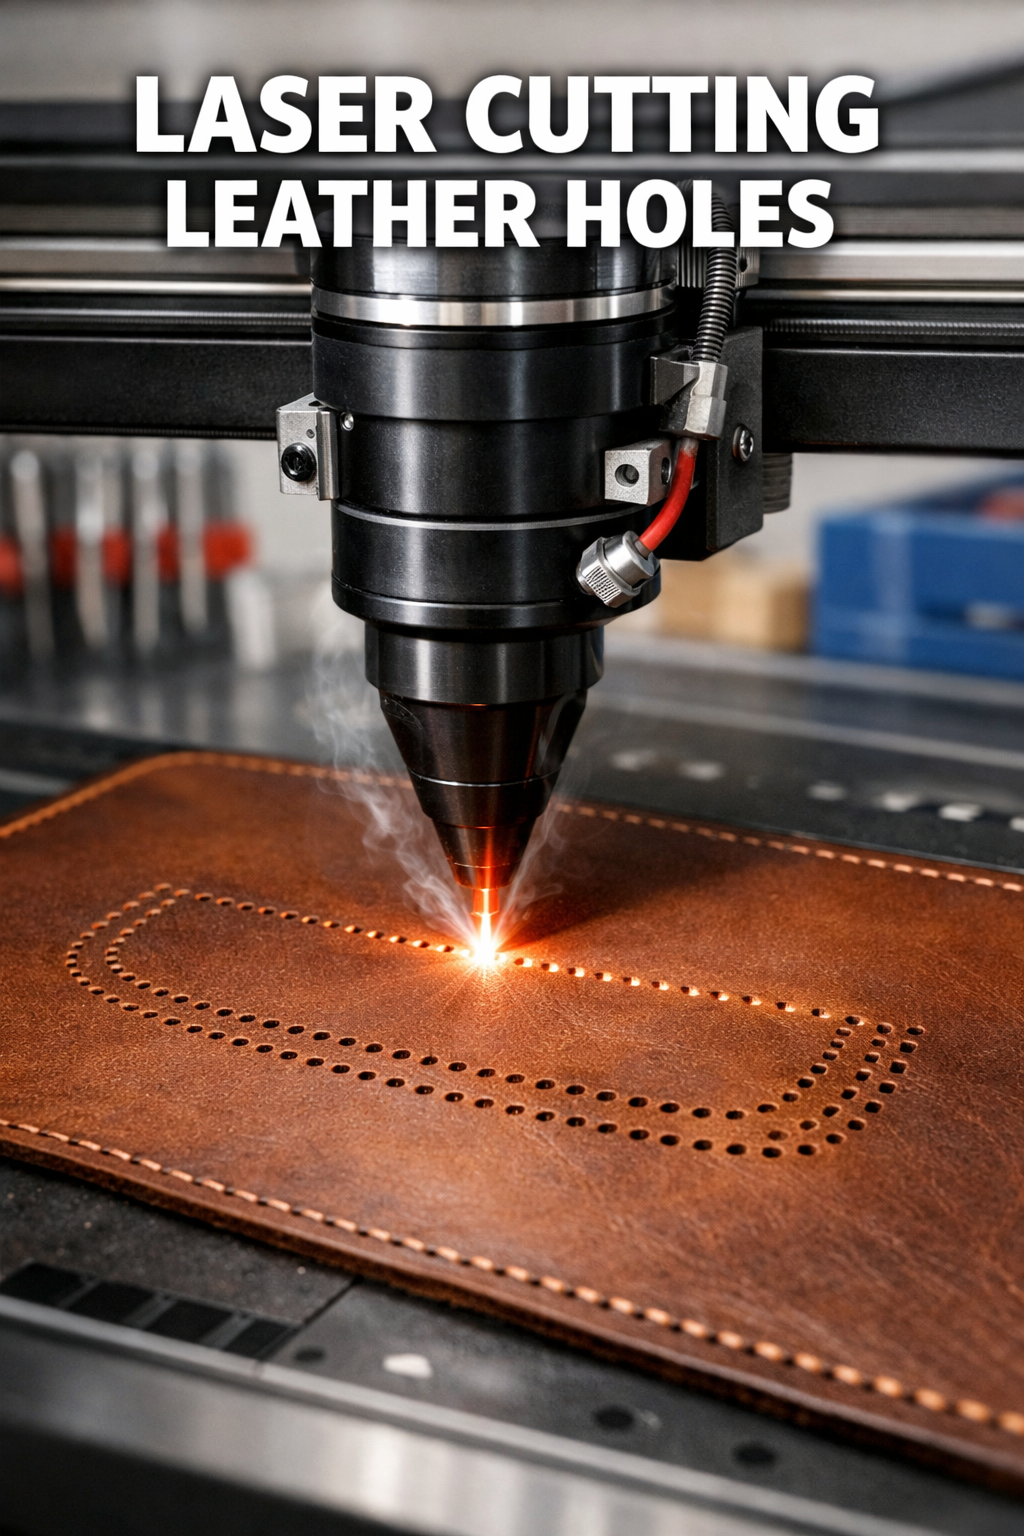
Adding laser cut sewing holes to leather requires precise marking, proper laser settings, and clean finishing techniques to create professional-quality perforations for your projects.
You can achieve perfect sewing holes by using a CO2 laser cutter with vector cutting mode, marking your pattern accurately, and testing on scrap leather first.
Understanding Laser Cut Sewing Holes in Leather
Laser cutting transforms how you approach leather sewing projects. Gone are the days of painstaking hand punching or uneven awl holes.
The laser beam creates clean, precise holes that match your exact specifications. Each hole maintains consistent size and spacing, giving your finished piece a professional appearance.
Why Choose Laser Cutting Over Traditional Methods?
Traditional leather punches work fine for simple projects. But when you need dozens of perfectly aligned holes, laser cutting saves hours of work.
I found that laser-cut holes also seal the leather edges slightly during cutting. This prevents fraying and creates smoother threading.
Essential Equipment and Materials
You’ll need specific tools to get started with laser cutting leather holes.
Laser Cutter Requirements
CO2 laser cutters work best for leather projects. Diode lasers struggle with thicker leather and often create rough edges.
- 40-watt minimum power for thin leather (2-3oz)
- 60-80 watts for medium leather (4-6oz)
- 100+ watts for thick leather (8oz and above)
Air Assist Systems
Air assist prevents burning and removes debris during cutting. Without it, your holes may have scorched edges or incomplete cuts.
Software and Design Tools
Most laser cutters work with vector graphics. Adobe Illustrator and Inkscape are popular choices for creating hole patterns.
LightBurn software offers excellent laser-specific features. Many crafters find it easier than general design programs.
File Format Considerations
Save your designs as SVG, AI, or DXF files. These vector formats maintain sharp edges and precise measurements.
Preparing Your Leather
Proper preparation makes the difference between amateur and professional results.
Choosing the Right Leather Type
Vegetable-tanned leather cuts cleanly with minimal odor. Chrome-tanned leather works but may produce more smoke and smell.
Avoid heavily finished or coated leathers. The protective coating can interfere with clean cutting.
Leather Thickness Guidelines
| Leather Weight | Thickness (mm) | Best For |
|---|---|---|
| 2-3 oz | 0.8-1.2 | Small accessories, bookmarks |
| 4-5 oz | 1.6-2.0 | Wallets, phone cases |
| 6-8 oz | 2.4-3.2 | Bags, belts, holsters |
Surface Preparation Steps
Clean your leather with a slightly damp cloth. Remove any dust, oils, or fingerprints that might interfere with cutting.
Let the leather dry completely before placing it in the laser cutter. Moisture can cause uneven burns or incomplete cuts.
Creating Your Hole Pattern Design
Smart design prevents costly mistakes and ensures your holes align perfectly with your sewing plans.
Planning Hole Spacing
Standard sewing holes space 3-4mm apart for most leather projects. Closer spacing works for decorative stitching, wider for structural seams.
Consider your thread thickness too. Thick waxed thread needs larger holes than standard polyester thread.
Corner and Curve Considerations
Sharp corners need special attention. Place holes slightly farther from the corner to prevent leather splitting during sewing.
For curves, adjust hole spacing to maintain consistent stitch appearance. Tighter curves may need closer holes.
Designing in Vector Graphics
Start with simple circles for round holes. Set your circle diameter to match your needle size plus 0.2-0.3mm clearance.
Use bright colors for your hole pattern – red or blue work well. This helps you see the design clearly against brown leather.
Creating Repeating Patterns
Most design software includes pattern tools. Create one section of holes, then copy and paste to build your complete pattern.
Double-check measurements before finalizing. It’s easier to fix digital mistakes than re-cut leather.
Setting Up Your Laser Cutter
Proper machine setup determines your cut quality and prevents expensive mistakes.
Power and Speed Settings
Start with lower power and higher speed settings. You can always make additional passes if needed.
I found that 30-40% power at 20-30 mm/s works well for 4oz leather holes. Thicker leather needs more power or slower speeds.
Focus and Bed Height
Perfect focus creates the cleanest cuts. Use your laser’s focus tool or measure from the lens to the leather surface.
Most CO2 lasers focus optimally at 2-6mm below the lens. Check your manual for exact specifications.
Test Cuts Are Essential
Never cut your final piece without testing first. Use scraps of the same leather type and thickness.
Test different power levels, speeds, and multiple passes. What works for one leather type may not work for another.
The Cutting Process
With everything prepared, you’re ready to create your sewing holes.
Safety First
Leather produces smoke and odors when cut. Ensure proper ventilation and use your exhaust fan.
Keep a spray bottle of water nearby for small flare-ups. Leather rarely ignites, but better safe than sorry.
Monitoring the Cut
Stay near your machine during cutting. Watch for incomplete cuts, excessive burning, or other problems.
If holes aren’t cutting completely through, stop and adjust your settings rather than continuing.
Multiple Pass Techniques
Sometimes multiple light passes work better than one heavy pass. This reduces burning and creates cleaner edges.
For thick leather, try 2-3 passes at 60% power rather than one pass at 100%. The results often look much better.
Post-Cutting Finishing
Raw laser cuts need finishing touches to look professional and function properly.
Removing Burn Marks
Light sanding with 220-grit paper removes minor burn marks around holes. Sand gently to avoid enlarging the holes.
Leather conditioner applied after sanding helps restore the natural color and feel.
Edge Sealing Options
Some crafters prefer sealed hole edges, while others like the natural cut appearance. Edge paint or burnishing tools can seal the cuts completely.
Quality Inspection
Check each hole for complete cutting and proper size. Test-fit your needle through several holes to ensure consistent sizing.
Look for any rough edges or incomplete cuts that might snag thread during sewing.
Troubleshooting Common Issues
Even experienced crafters encounter problems. Here’s how to fix the most common issues.
Incomplete Cuts
If holes don’t cut completely through, increase power by 10-15% or slow down your cutting speed.
Check your focus distance. Poor focus is the most common cause of incomplete cuts.
Excessive Burning
Burnt holes look unprofessional and may weaken the leather. Reduce power or increase speed to minimize burning.
Make sure your air assist is working properly. Blocked air lines cause more burning.
Inconsistent Hole Sizes
Uneven leather thickness causes size variations. Flatten your leather as much as possible before cutting.
Check that your design uses consistent circle sizes. Small design errors become obvious in the finished piece.
Advanced Techniques and Tips
Once you master basic hole cutting, these advanced methods add professional polish to your work.
Creating Decorative Hole Patterns
Try alternating hole sizes for decorative effects. Large and small holes create interesting visual patterns when sewn.
Diamond or oval holes offer alternatives to round holes for special projects.
Combining Cutting and Engraving
Add engraved guidelines between holes to help with straight sewing. Use very light power to avoid cutting through.
Batch Processing Multiple Pieces
When making multiple items, cut all pieces at once for consistency. This ensures identical hole spacing across your entire project.
Create templates for frequently used patterns. Save time and maintain consistency across different projects.
Conclusion
Adding laser cut sewing holes to leather opens up new possibilities for your crafting projects. The precision and speed of laser cutting far surpass traditional methods, giving you professional results with less effort.
Start with simple projects and practice on scrap leather. As your skills develop, you’ll find laser cutting becomes an essential part of your leatherworking toolkit. The investment in equipment and learning pays off quickly in improved quality and reduced production time.
What size holes should I cut for different thread types?
For standard polyester thread, cut 1.0-1.2mm holes. Waxed thread needs 1.2-1.5mm holes, while thick leather lacing requires 2.0-3.0mm holes. Always test on scrap material first.
Can I cut holes in already-dyed leather?
Yes, but some dyes may burn differently than natural leather. Test on hidden areas first and expect possible color changes around cut edges. Oil-based dyes tend to burn more than water-based options.
How do I prevent leather from curling during cutting?
Use weights or hold-down pins around your leather piece. Avoid the cutting area but place weights close enough to keep the leather flat. Some crafters use low-tack tape on non-critical areas.
What’s the maximum leather thickness I can cut holes through?
This depends on your laser power. A 100-watt CO2 laser can typically cut clean holes through 6-8mm leather in one pass. Thicker leather may need multiple passes or higher power settings.
Should I condition leather before or after laser cutting holes?
Cut holes first, then condition the leather. Pre-conditioning can interfere with clean cutting and may cause uneven burning. Apply conditioner after cutting to restore moisture and flexibility.