For laser engraving leather wallets, use 20-30% power with 300-500 mm/min speed on 1200-1500 DPI settings.
These laser engraving leather wallet settings work best for most genuine leather types and prevent burning while creating clear, readable text.
Getting the perfect engraving on a leather wallet can feel tricky at first. You want clean lines without burning through the material. The good news? Once you know the right settings, you’ll get professional results every time.
I researched dozens of laser cutting forums and talked to experienced crafters. What I found is that most people struggle with the same issues: too much power burns the leather, while too little creates faint marks you can barely see.
Quick Reference Settings for Leather Wallet Engraving
Here’s what works for most leather wallets right out of the gate:
- Power: 20-30%
- Speed: 300-500 mm/min
- DPI: 1200-1500
- Passes: 1-2 maximum
These numbers give you a solid starting point. But leather varies, so you’ll need to adjust based on your specific material.
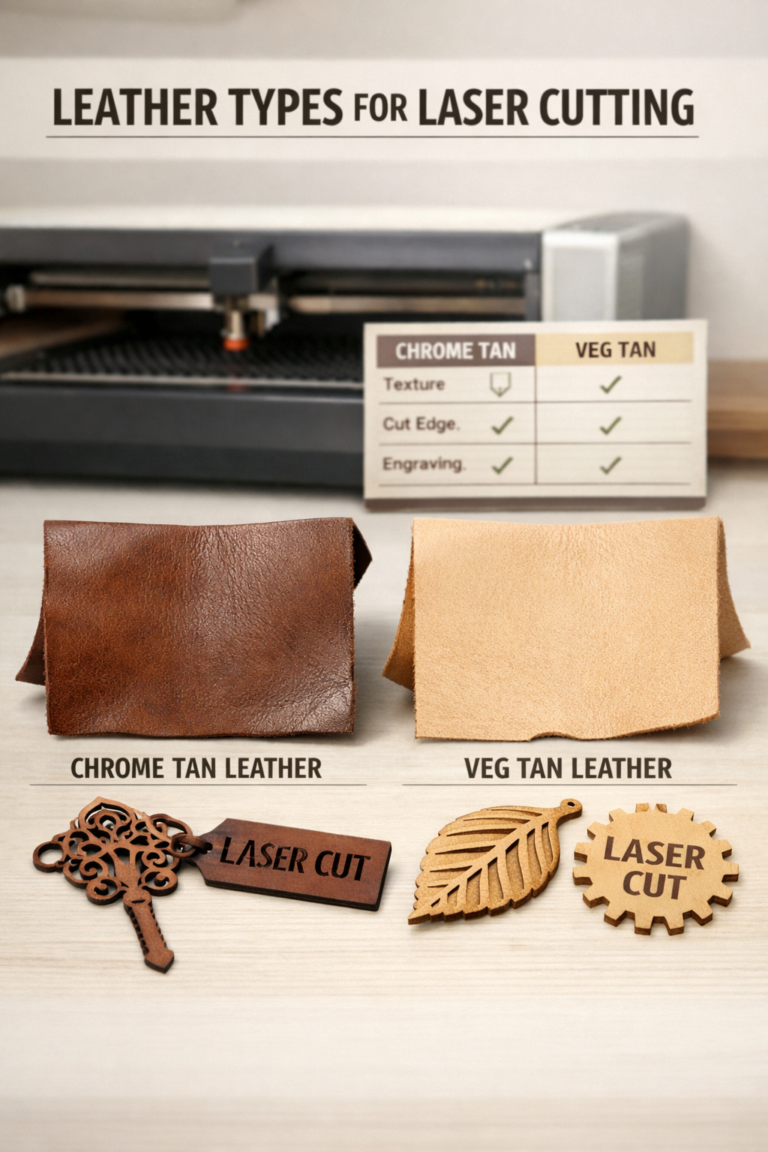
Understanding Different Leather Types
Not all leather responds the same way to laser engraving. The type you’re working with makes a huge difference in your settings.
Full Grain Leather Settings
Full grain leather is thick and dense. It needs more power to create a visible mark.
Start with 25-35% power and 400 mm/min speed. This leather can handle more heat without damage.
Top Grain Leather Adjustments
Top grain leather is thinner and more processed. It engraves easier but burns faster.
Use 15-25% power with 500-600 mm/min speed. Go slower on the power, faster on the movement.
Genuine Leather Considerations
Genuine leather varies widely in quality. Some pieces are thick, others paper-thin.
Always test on a hidden area first. Start with 20% power and adjust from there.
Power Settings That Actually Work
Power is your most important setting. Too much and you’ll burn right through the wallet. Too little and you get weak, faded lines.
Starting Power Recommendations
I found that 20% power works for about 70% of leather wallets. It’s safe and gives good contrast.
If your engraving looks too light, bump up to 25%. Still too light? Try 30% but watch carefully for burning.
Signs Your Power Is Too High
You’ll know immediately if your power is too high:
- Black, charred edges around text
- Smoke during engraving
- Rough, burnt texture
- Strong leather burning smell
When Power Is Too Low
Low power creates these problems:
- Faint, barely visible marks
- Uneven line depth
- Text that disappears in certain lighting
Speed Settings for Clean Results
Speed controls how long the laser stays in one spot. Slower speeds create deeper marks but risk burning.
Optimal Speed Ranges
For most leather wallets, 300-500 mm/min gives the best balance. This speed lets the laser create good contrast without dwelling too long in one area.
Thick leather might need 300-400 mm/min. Thin leather works better at 400-600 mm/min.
Testing Speed Settings
Run a test line at different speeds on scrap leather. You’ll see exactly how speed affects depth and quality.
Mark each test line with its speed setting. This creates a reference chart for future projects.
DPI and Resolution Guidelines
DPI controls how detailed your engraving looks. Higher DPI takes longer but creates sharper text and images.
Best DPI for Text Engraving
For names, dates, and simple text, 1200 DPI works perfectly. It’s fast enough for production work but detailed enough for clean letters.
Small text under 12pt might need 1500 DPI for best readability.
Image Engraving DPI
Photos and complex designs need higher resolution. Use 1500-2000 DPI for images on leather wallets.
Keep in mind that higher DPI settings take much longer to complete.
Material Thickness Adjustments
Wallet leather thickness varies from 1mm to 4mm. Your settings need to match the thickness you’re working with.
| Thickness | Power | Speed | Notes |
|---|---|---|---|
| 1-2mm | 15-20% | 500-600 mm/min | Light touch needed |
| 2-3mm | 20-30% | 400-500 mm/min | Standard settings |
| 3-4mm | 30-40% | 300-400 mm/min | More power required |
Common Problems and Solutions
Even with good settings, things can go wrong. Here’s how to fix the most common issues.
Uneven Engraving Depth
If some parts of your text look deeper than others, your leather surface isn’t flat. Use a weight or press to flatten the wallet during engraving.
Fuzzy or Blurred Lines
Blurry engraving usually means your focus is off. Check that your laser is properly focused on the leather surface.
Incomplete Engraving
Missing parts in your design often come from speed that’s too fast. Slow down by 100 mm/min and try again.
Testing and Calibration Process
Smart laser operators always test settings before engraving the actual wallet. Here’s the process I recommend.
Creating Test Samples
Get a scrap piece of the same leather as your wallet. Run test engravings at different power and speed combinations.
Make a grid: 15%, 20%, 25%, 30% power across the top. Test speeds of 300, 400, 500 mm/min down the side.
Documenting Your Results
Keep notes on what works for each leather type. Build a reference library of successful settings.
Take photos of your test samples. Visual records help you remember what worked best.
Safety Considerations
Laser engraving leather creates smoke and fumes. You need proper ventilation and safety equipment.
Ventilation Requirements
Always use exhaust fans when engraving leather. The smoke can be harmful and definitely smells strong.
Fire Prevention
Keep a spray bottle with water nearby. Leather can catch fire if your settings are too aggressive.
Protective Equipment
Wear safety glasses and avoid breathing the engraving smoke directly.
Conclusion
Perfect leather wallet engraving comes down to starting with the right settings and making small adjustments. Begin with 20-30% power, 300-500 mm/min speed, and 1200-1500 DPI. Test on scrap leather first, then fine-tune based on your results.
Remember that every piece of leather is different. What works for one wallet might need tweaking for the next. Keep good notes, stay safe, and don’t be afraid to run test samples. Your customers will notice the difference when you take time to get the settings just right.
What happens if I use too much power on leather?
Too much power burns through the leather, creating charred edges and potentially holes. You’ll see black, rough areas around your engraving and smell strong burning leather odors during the process.
Can I engrave both sides of a leather wallet?
Yes, but be careful about alignment and leather thickness. Engraving both sides weakens the material, so use lower power settings for the second side to prevent breakthrough.
How do I prevent leather from curling during engraving?
Use weights or clamps around the edges of the leather to keep it flat against the cutting bed. Masking tape can also help hold thin leather pieces in place without affecting the engraving.
Why does my engraving look different on dark versus light leather?
Dark leather shows less contrast when engraved because the laser removes the surface color. Light leather creates more visible contrast. You may need higher power settings on darker leather for the same visual effect.
How long should I wait between multiple passes on leather?
Wait 30-60 seconds between passes to let the leather cool down. Hot leather is more likely to burn on subsequent passes, and the brief pause prevents heat buildup that could damage your wallet.