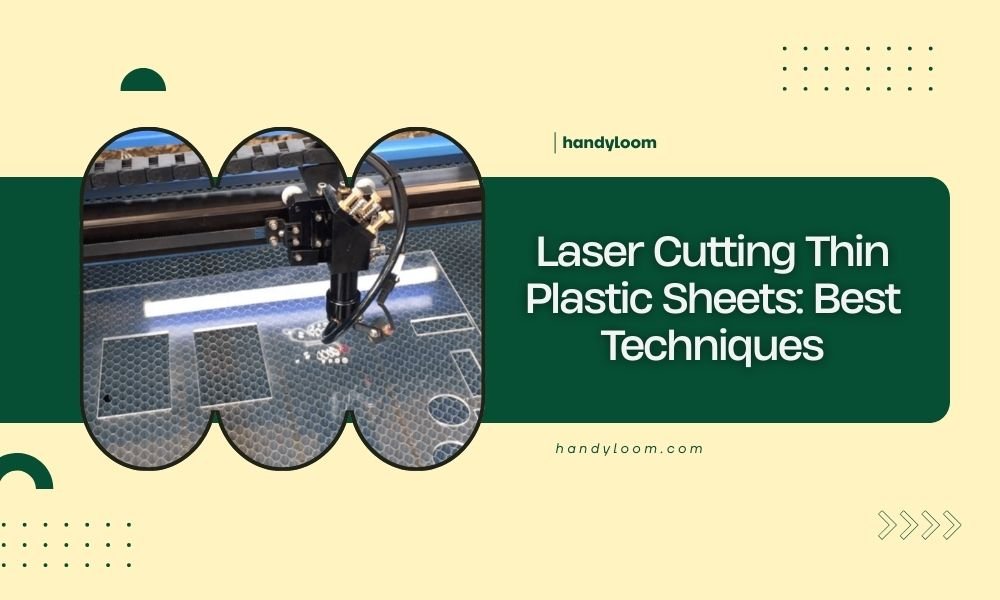
Laser cutting thin plastic sheets requires proper settings, material preparation, and ventilation to achieve clean cuts without melting or warping.
The best techniques for laser cutting thin plastic sheets include using lower power settings, higher speeds, and air assist to prevent heat buildup.
Understanding Thin Plastic Sheet Properties
Your success with laser cutting thin plastic sheets starts with knowing your material. Different plastics behave completely differently under the laser beam.
Acrylic and PETG cut beautifully with smooth, polished edges. PVC releases dangerous chlorine gas and should never be cut. Polystyrene can melt easily if you use too much heat.
Best Plastic Types for Laser Cutting
I found that these plastic types work best for laser cutting:
- Acrylic (PMMA) – gives crystal clear, flame-polished edges
- PETG – cuts cleanly without toxic fumes
- Polystyrene – good for detailed work but needs careful settings
- Delrin (POM) – strong and precise cuts
- ABS – workable but can produce slight odor
Plastics to Avoid Completely
Some plastics are dangerous or impossible to laser cut well. Never attempt these:
- PVC – releases deadly chlorine gas
- Polycarbonate – produces toxic fumes and poor cuts
- HDPE and LDPE – melt instead of cutting cleanly
Essential Equipment Setup
Your laser cutter needs proper preparation before you start cutting thin plastic sheets. The right setup prevents most common problems.
Power and Speed Settings
Thin plastic sheets need gentle treatment. High power creates too much heat and melts the edges.
Start with these baseline settings for 1-3mm thick sheets:
| Material | Power (%) | Speed (mm/min) | Passes |
|---|---|---|---|
| Acrylic 1-2mm | 40-60 | 800-1200 | 1 |
| PETG 1-2mm | 35-50 | 1000-1400 | 1 |
| Polystyrene 1mm | 25-40 | 1200-1600 | 1 |
Testing Your Settings First
Always run test cuts on scrap material. Cut small squares with different power and speed combinations. This saves you from ruining your good material.
Air Assist Configuration
Air assist is your best friend when cutting thin plastic. It blows away melted material and cools the cut zone.
Set your air pressure between 10-15 PSI for thin sheets. Too much air can blow lightweight sheets around. Too little lets molten plastic build up.
Positioning the Air Nozzle
Keep the air nozzle 2-3mm above your plastic sheet. This distance gives good airflow without creating turbulence.
Material Preparation Techniques
Proper material prep makes the difference between perfect cuts and frustrating failures. Thin plastic sheets need special handling.
Securing Lightweight Sheets
Thin plastic sheets want to curl, shift, and move during cutting. You need to keep them perfectly flat.
Use these methods to hold your material steady:
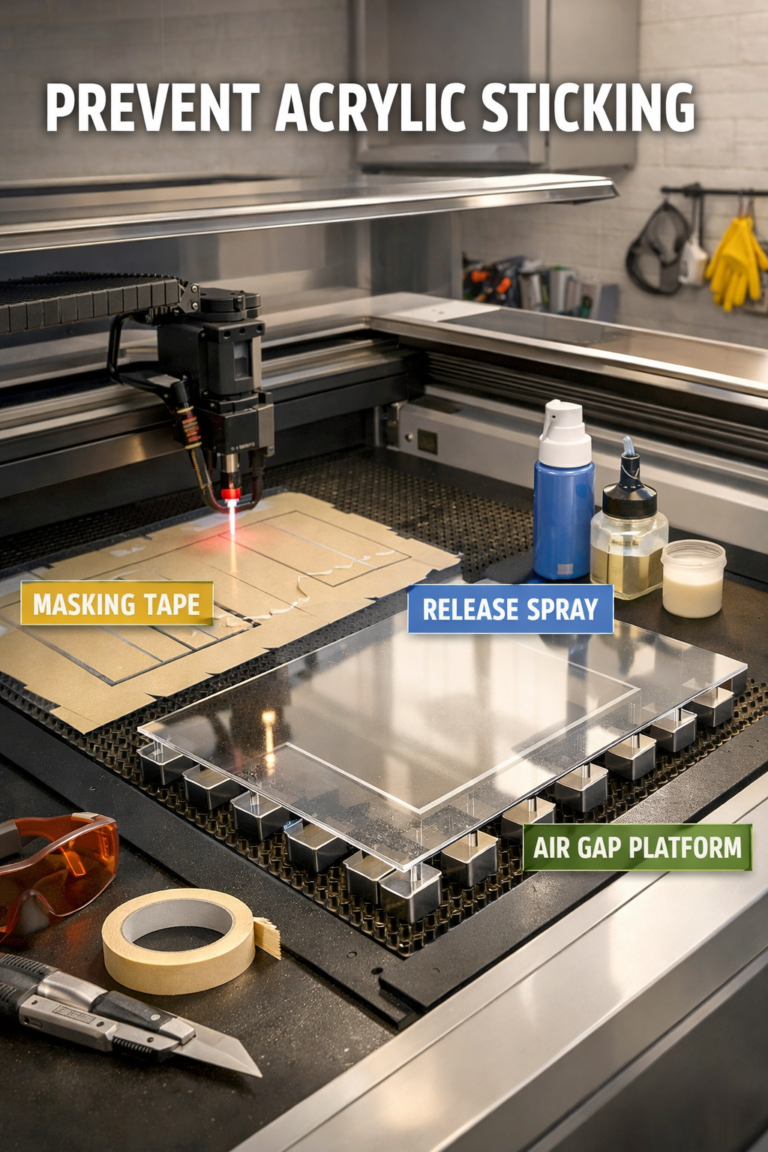
- Masking tape on corners (not in cut path)
- Magnetic hold-downs if you have a steel bed
- Honeycomb bed with slight vacuum suction
- Weight pins around the edges
The Sandwich Method
For very thin sheets under 1mm, try the sandwich technique. Place your plastic between two pieces of cardboard. Cut through all three layers, then separate them.
Surface Protection
Protective film or masking helps prevent scratches and reduces cleanup. Many plastic sheets come with protective film already applied.
Leave the film on during cutting when possible. It also helps prevent flame polishing on edges if you want a matte finish.
Cutting Process Best Practices
Once your setup is ready, follow these steps for consistent results every time.
Starting Your Cuts
Begin cutting at a corner or edge when possible. Starting cuts in the middle of thin material can cause cracking.
Use a slow start if your laser software supports it. This prevents the initial power spike from burning the entry point.
Cut Order Strategy
Plan your cutting sequence carefully. Cut inside details first, then outer shapes. This keeps the material stable longer.
Managing Heat Buildup
Heat is the enemy of clean plastic cuts. Too much heat causes melting, warping, and ugly edges.
Watch for these warning signs of overheating:
- Melted or rounded cut edges
- Material warping during cutting
- Plastic sticking to the laser bed
- Discolored areas around cuts
Cooling Between Passes
If you need multiple passes, let the material cool between them. Wait 30-60 seconds for thin sheets to release built-up heat.
Troubleshooting Common Problems
Even with perfect setup, you might run into issues. Here’s how to fix the most common problems.
Melted or Rough Edges
Rough, melted edges mean you’re using too much power or moving too slowly. The laser is heating the plastic faster than it can cut cleanly.
Try these solutions:
- Reduce power by 10-15%
- Increase cutting speed by 20-30%
- Check that air assist is working properly
- Clean your lens – dirty optics create hot spots
Getting Flame-Polished Edges
Sometimes you want those smooth, polished edges on acrylic. Remove any protective film and use slightly higher power with medium speed.
Incomplete Cuts
When your laser doesn’t cut all the way through, don’t just crank up the power. That often makes things worse.
Instead, try these adjustments:
- Slow down cutting speed by 15-20%
- Add a second pass at lower power
- Check focus – out of focus beams won’t cut deep enough
- Make sure material is completely flat
Dealing with Warped Material
Thin plastic sheets sometimes arrive warped or curl during storage. You can often flatten them with gentle heat from a hair dryer and some weights.
Safety Considerations
Laser cutting plastic creates fumes and potential fire hazards. Your safety setup needs to be solid.
Ventilation Requirements
All plastic cutting needs good ventilation. Even safe plastics like acrylic produce fumes you shouldn’t breathe.
Make sure your exhaust fan moves air away from you and outside the building. Never vent plastic fumes into another room.
Fire Prevention
Keep a spray bottle of water nearby when cutting plastic. Thin materials can ignite if power settings are too high.
Never leave your laser unattended during cutting. Thin plastic burns fast if something goes wrong.
Advanced Techniques
Once you master basic plastic cutting, these advanced methods can improve your results even more.
Multi-Pass Cutting
Sometimes multiple light passes work better than one heavy pass. This technique gives you more control over edge quality.
Use 40-50% of your normal power and make 2-3 passes. Let the material cool between passes to prevent heat buildup.
Ramping Techniques
Some laser software lets you ramp power up and down during cuts. This prevents burning at corners where the laser slows down.
Combining Cut and Engrave
You can engrave details before cutting your final shape. Just remember that engraving heats the material, so let it cool before cutting.
Conclusion
Laser cutting thin plastic sheets becomes straightforward once you understand the key principles. Start with conservative power settings, use proper air assist, and always test on scrap material first. The difference between success and frustration often comes down to taking time with your setup and preparation. Remember that each plastic type behaves differently, so keep notes on what settings work best for your materials. With practice, you’ll consistently produce clean, professional cuts that make your projects shine.
What thickness of plastic is considered “thin” for laser cutting?
Thin plastic sheets for laser cutting typically range from 0.5mm to 3mm thick. Materials under 1mm require special handling techniques like the sandwich method, while sheets over 3mm need different power and speed settings entirely.
Can I cut multiple thin plastic sheets at once to save time?
Cutting multiple thin sheets stacked together usually produces poor results. The laser beam spreads as it penetrates deeper, creating tapered cuts. It’s better to cut sheets individually for clean, precise edges.
Why do my thin plastic cuts have a yellow or brown tint?
Yellow or brown edges indicate heat damage from excessive laser power or slow cutting speeds. Reduce your power setting by 15-20% and increase speed slightly. Also check that your air assist is working properly to cool the cut zone.
How do I prevent thin plastic from curling after laser cutting?
Curling happens when one side of the cut heats more than the other. Use consistent air assist, avoid multiple passes over the same area, and let cut pieces cool on a flat surface with light weights if needed.
What’s the best way to clean residue from laser-cut plastic edges?
For most plastics, isopropyl alcohol on a soft cloth removes cutting residue effectively. For acrylic, flame polishing with a small torch can create crystal-clear edges, but this requires practice and proper safety precautions.