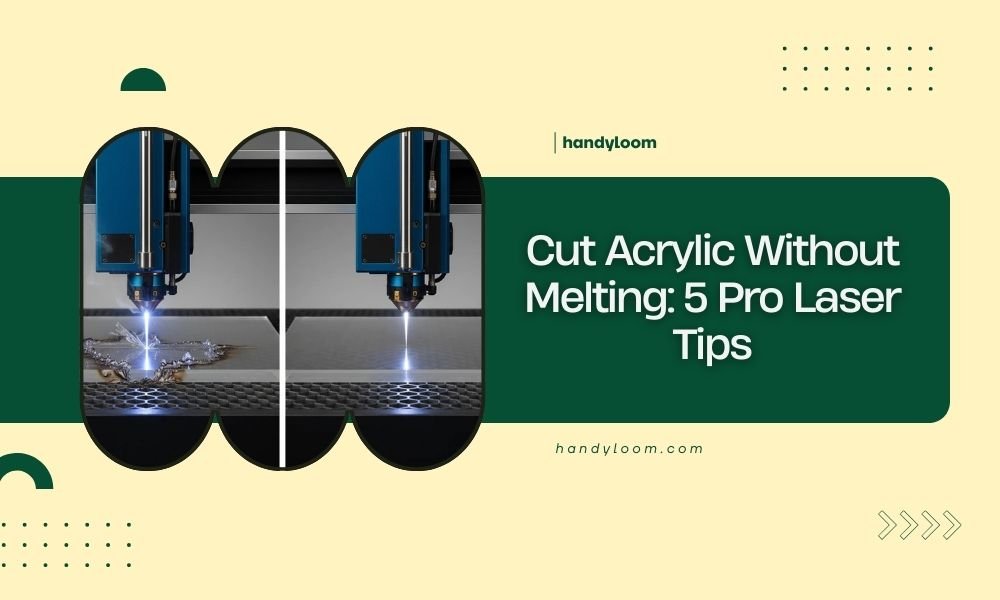
You can cut acrylic without melting by using low power settings, high cutting speeds, and proper air assist to keep the material cool during laser cutting.
The key is balancing your laser parameters and using masking tape to protect the surface while maintaining consistent feed rates throughout the cut.
Why Acrylic Melts During Laser Cutting
Acrylic melts because it’s a thermoplastic material. When your laser beam hits it, the material heats up fast. Too much heat creates those annoying melted edges that ruin your project.
Think of it like cooking bacon. Low and slow gives you crispy perfection. High heat gives you a burnt mess. Your acrylic works the same way.
Heat Buildup Causes
Several things make acrylic overheat during cutting. Slow cutting speeds trap heat in one spot too long. High power settings pump too much energy into the material.
Poor air flow lets heat build up around the cut line. Dirty lenses focus heat unevenly. Each problem makes melting worse.
Pro Tip 1: Master Your Power Settings
Start with 40-60% power for most acrylic thicknesses. I found that many laser operators use way too much power thinking it cuts faster.
Lower power means cleaner edges. Your laser still cuts through, just with less heat damage.
Power Guidelines by Thickness
| Acrylic Thickness | Recommended Power | Expected Results |
|---|---|---|
| 1/8 inch | 35-45% | Clean cuts, minimal melting |
| 1/4 inch | 45-55% | Smooth edges, good finish |
| 1/2 inch | 55-65% | Requires multiple passes |
Testing Your Settings
Run test cuts on scrap pieces first. Start low and work up until you get clean cuts. Write down your winning settings for future projects.
This saves time and materials later. Plus you avoid those “oops” moments on expensive acrylic sheets.
Pro Tip 2: Speed Up Your Cutting
Fast cutting speeds prevent heat buildup. Aim for 15-25 mm/second for most acrylic projects.
When your laser moves quickly, it doesn’t sit in one spot long enough to melt the edges. It’s like quickly passing your finger through a candle flame versus holding it there.
Finding the Sweet Spot
Too fast and you won’t cut through completely. Too slow and you get melted edges. The sweet spot depends on your laser power and acrylic thickness.
I researched online forums and found most successful cuts happen between 18-22 mm/second for standard projects.
Speed Adjustment Tips
- Increase speed if you see melted edges
- Slow down if the cut doesn’t go all the way through
- Keep speed consistent throughout the entire cut
- Avoid sudden speed changes that create heat spots
Pro Tip 3: Use Proper Air Assist
Air assist blows away hot debris and cools the cutting area. Without it, melted plastic sticks to your edges and creates rough finishes.
Set your air pressure to medium-high settings. Too little air won’t cool effectively. Too much air can blow debris back onto your material.
Air Flow Benefits
Good air flow removes smoke and fumes from the cut line. This keeps your laser beam focused and prevents heat from reflecting back onto the acrylic.
Clean air flow also prevents flame-polishing effects that some people want but others need to avoid for their projects.
Compressor Requirements
Your air compressor should provide steady pressure throughout the cut. Inconsistent air flow creates uneven cooling and patchy results.
Most experts recommend 15-20 PSI for acrylic cutting. Higher pressure works for thicker materials but watch for excessive debris blowback.
Pro Tip 4: Apply Masking Tape
Masking tape protects your acrylic surface from heat damage and debris. It also makes removal of protective film easier after cutting.
Use painter’s tape or specialized laser masking tape. Apply it smoothly without bubbles or wrinkles that could affect cut quality.
Tape Application Method
Cover both sides of your acrylic sheet. Start from one edge and roll the tape down slowly to avoid air bubbles.
Overlap tape edges slightly to prevent gaps where debris could stick to your material.
Removal Process
Remove tape immediately after cutting while it’s still warm. Hot tape comes off easier and leaves less residue.
Pull tape at a 45-degree angle for clean removal. Going too fast or too slow can leave sticky residue behind.
Pro Tip 5: Multiple Pass Technique
For thick acrylic, use multiple passes instead of cranking up the power. Each pass removes a little material without overheating.
Two or three light passes often give better results than one heavy pass. You maintain control and prevent melting.
Pass Planning Strategy
Plan your passes before starting. First pass should cut about halfway through. Second pass completes the cut.
Keep the same speed and power for each pass. Changing settings between passes can create uneven cuts.
Registration Tips
Don’t move your material between passes. Even tiny shifts create stepped edges that look unprofessional.
Use your laser’s repeat function if available. This ensures identical passes every time.
Material Preparation Matters
Clean acrylic cuts better than dirty acrylic. Dust and fingerprints absorb laser energy and create hot spots.
Remove protective film only from the cut lines if possible. This reduces cleanup time while protecting most of the surface.
Storage Conditions
Store acrylic in cool, dry places. Hot or humid storage can make materials more prone to melting during cutting.
Room temperature acrylic cuts more predictably than cold or hot materials.
Troubleshooting Common Problems
Melted edges usually mean too much power or too slow speed. Rough cuts often indicate dull lenses or poor air assist.
Inconsistent cut depth suggests uneven material thickness or warped sheets.
Quick Fixes
- Clean your lenses if cuts look fuzzy
- Check material flatness if some areas don’t cut through
- Reduce power if you smell strong plastic burning
- Increase air flow if you see flame polishing
When to Stop
Stop immediately if you see flames or excessive smoke. This means your settings are too aggressive for the material.
Let everything cool down before adjusting settings and trying again.
Conclusion
Cutting acrylic without melting comes down to balance. Lower power, higher speeds, good air flow, protective tape, and multiple passes when needed.
These five pro tips work together to give you clean, professional cuts every time. Start with conservative settings and adjust based on your results.
Remember to test on scraps first. Every laser and acrylic combination behaves slightly differently. Once you find your sweet spot, document those settings for future projects.
What’s the best laser power setting for 1/4 inch acrylic?
Start with 45-55% power and adjust based on your results. Most 1/4 inch acrylic cuts cleanly in this range without melting edges.
How fast should I cut acrylic to prevent melting?
Aim for 18-22 mm/second for most acrylic thicknesses. This speed prevents heat buildup while maintaining cut quality.
Can I cut acrylic without air assist?
Air assist is essential for clean acrylic cuts. Without it, melted debris sticks to edges and creates rough finishes that require extensive cleanup.
Why does my acrylic have flame-polished edges?
Flame polishing happens when settings are too hot or air flow is insufficient. Reduce power slightly and increase air pressure to eliminate this effect.
Should I remove protective film before laser cutting?
Remove film only from cut lines if possible, or use masking tape over the film for extra protection. This reduces post-cutting cleanup time.