Kerf adjustment for laser cut wood joints requires compensating for the material thickness removed by the laser beam, typically 0.1-0.3mm depending on your laser settings and wood type.
You can achieve perfect fitting joints by measuring your actual kerf width and adjusting your design dimensions inward by half the kerf measurement on each connecting surface.
What Is Kerf and Why Does It Matter for Wood Joints?
Think of kerf as the “bite” your laser takes out of the wood. When your laser cuts, it doesn’t just split the material cleanly. It vaporizes a thin strip of wood along the cut line.
This missing material creates gaps in your joints. A mortise and tenon that looks perfect on screen becomes loose and wobbly in real life. Sound familiar?
How Kerf Affects Different Joint Types
Box joints suffer the most from kerf issues. Each finger becomes slightly smaller than designed. The gaps add up fast.
Mortise and tenon joints get loose fits. Your tenon shrinks while the mortise stays the same size.
Living hinges work fine with kerf. The flexibility compensates for small dimensional changes.
Measuring Your Laser’s Kerf Width
You need to know your exact kerf before adjusting anything. Here’s how I found the best method works.
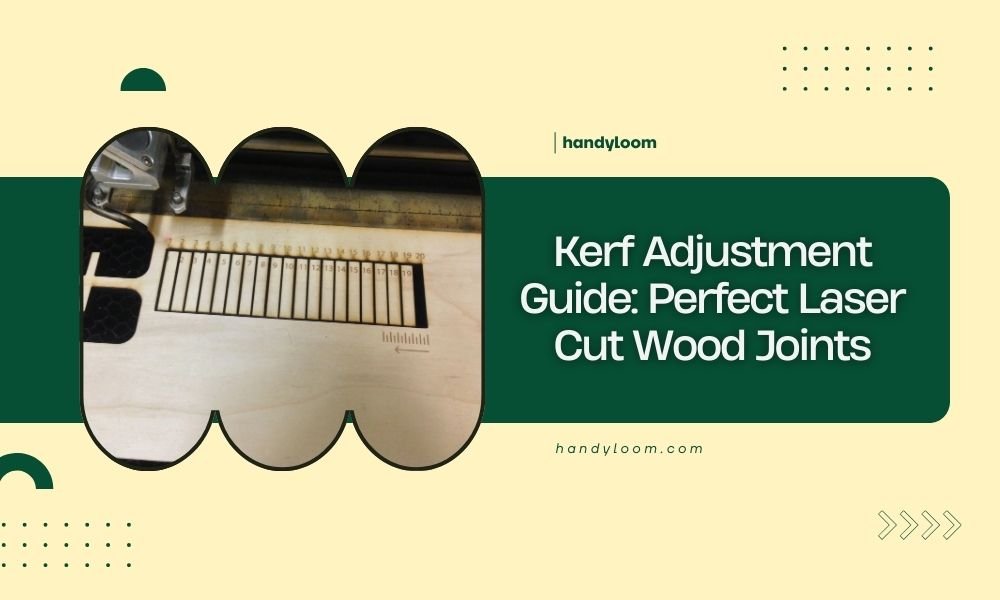
The Square Test Method
Cut a 20mm square from your wood material. Use the same settings you’ll use for your project.
Measure the actual square with calipers. Subtract this from 20mm. That difference is your kerf width.
For example: 20mm – 19.85mm = 0.15mm kerf width.
The Line Test Alternative
Draw a 50mm line in your design software. Cut it and measure the gap width directly.
This method works better with thicker materials where the kerf is easier to measure.
Kerf Compensation Strategies
Once you know your kerf width, you have several ways to fix your joint dimensions.
Manual Design Adjustment
Add half the kerf width to parts that need to fit into slots. Remove half the kerf width from slots that receive parts.
If your kerf is 0.2mm, make tenons 0.1mm larger and mortises 0.1mm smaller.
Software Kerf Compensation
Many laser cutting programs offer automatic kerf compensation. You input your kerf width and the software adjusts all cuts.
Be careful with this approach. It affects every line, including decorative elements you might not want changed.
Popular Software Options
LightBurn offers path offset tools. You can select specific cuts to adjust.
Fusion 360 includes kerf compensation in its CAM workspace.
Inkscape users can use the “Inset” and “Outset” functions for manual compensation.
Material-Specific Kerf Variations
Different woods create different kerf widths with identical laser settings.
Hardwood vs Softwood Differences
Hardwoods like maple typically produce smaller kerf widths. The dense fibers resist vaporization.
Softwoods like pine create wider kerfs. The laser burns through faster and wider.
Plywood Considerations
Plywood kerf varies by grade and glue type. Baltic birch gives consistent results.
Cheap plywood with gaps between layers can create irregular kerf patterns.
Testing Your Kerf Adjustments
Don’t jump straight into your final project. Test pieces save time and materials.
Creating Test Joint Samples
Cut small versions of your planned joints first. A 25mm test piece uses minimal material.
Try different compensation amounts. Start with your calculated kerf, then adjust up or down by 0.05mm increments.
Joint Fit Classifications
Too loose: Parts fall apart or wiggle significantly.
Perfect: Light hand pressure assembles parts with no wiggle.
Too tight: You need excessive force or parts won’t fit at all.
| Wood Type | Typical Kerf (3mm thickness) | Compensation Starting Point |
|---|---|---|
| Baltic Birch Plywood | 0.15-0.20mm | +0.08mm to tenons |
| Maple | 0.10-0.15mm | +0.05mm to tenons |
| Pine | 0.20-0.30mm | +0.10mm to tenons |
Common Kerf Adjustment Mistakes
I’ve researched the most frequent problems crafters face when adjusting for kerf.
Over-Compensating New Materials
Each wood species behaves differently. Your maple settings won’t work for oak.
Always run test cuts when switching materials, even within the same wood family.
Ignoring Power and Speed Changes
Higher power creates wider kerfs. Slower speeds do the same thing.
Keep detailed notes linking your laser settings to kerf measurements for each material.
Setting Documentation Tips
Record material type, thickness, power percentage, and cutting speed for every test.
Include ambient temperature and humidity when possible. These affect laser performance.
Advanced Kerf Techniques
Once you master basic kerf compensation, these advanced methods improve your results.
Directional Kerf Considerations
Laser beams aren’t perfectly cylindrical. They can create slightly different kerf widths depending on cut direction.
For precision joints, keep all mating surfaces oriented the same way on your cutting bed.
Multi-Pass Kerf Control
Multiple light passes sometimes create narrower kerfs than single heavy passes.
This technique works well for thick hardwoods where single-pass cuts create excessive charring.
Multi-Pass Benefits
Reduced heat buildup means less wood expansion during cutting.
Cleaner edges require less sanding before assembly.
Better dimensional accuracy on thick materials.
Troubleshooting Kerf Problems
When your joints still don’t fit right, work through these solutions systematically.
Inconsistent Kerf Width
Check your laser’s focus. Poor focus creates irregular kerf patterns.
Clean your laser lens and mirrors. Dirty optics scatter the beam and widen kerf unpredictably.
Seasonal Kerf Variations
Wood moisture content affects laser cutting. Wet wood creates steam that widens the kerf.
Store your wood in a consistent environment before cutting. Many experts recommend 48-hour acclimation periods.
Humidity Control Solutions
Use a dehumidifier in your workshop during humid months.
Seal cut edges quickly to prevent moisture absorption between cutting and assembly.
Project-Specific Kerf Strategies
Different projects need different approaches to kerf compensation.
Furniture Projects
Structural joints need tight fits. Err on the side of slightly too tight rather than loose.
Plan for post-cut sanding to fine-tune fit. Remove 0.02-0.05mm with light sanding.
Decorative Items
Visual appeal matters more than structural strength. Slightly loose joints often look fine.
Consider using wood glue to fill small gaps from kerf miscalculations.
Conclusion
Perfect laser cut wood joints start with understanding your kerf width and how to compensate for it. Measure your kerf accurately using test cuts, adjust your designs by half the kerf width on mating surfaces, and always test before committing to final pieces. Different woods and laser settings create different kerf widths, so keep detailed records of what works for each combination. With practice, you’ll develop an intuitive feel for kerf compensation that makes your joints fit perfectly every time.
How often should I re-measure my laser’s kerf width?
Re-measure kerf every time you change materials, adjust laser settings, or after cleaning your optics. I also recommend monthly checks even with consistent settings, as laser tubes gradually lose power over time and create narrower kerfs.
Can I use the same kerf compensation for different thicknesses of the same wood?
No, kerf width changes with material thickness. Thicker materials typically produce wider kerfs because the laser beam has more time to spread heat laterally. Always test each thickness separately.
What’s the best joint type for beginners learning kerf compensation?
Start with simple lap joints or basic mortise and tenon connections. These joints are forgiving and easy to adjust with sandpaper if your kerf compensation is slightly off. Avoid box joints until you’ve mastered simpler connections.
Should I compensate for kerf on both pieces of a joint?
Only compensate the piece that fits inside another piece. Make tenons larger by half the kerf width, but leave mortises at their designed size. Compensating both pieces doubles your adjustment and creates loose joints.
How do I handle kerf compensation for curved cuts in joints?
Curved cuts often require different compensation than straight cuts because the laser beam angle changes relative to the material surface. Create test pieces with both straight and curved elements, then adjust each type separately based on actual fit results.