
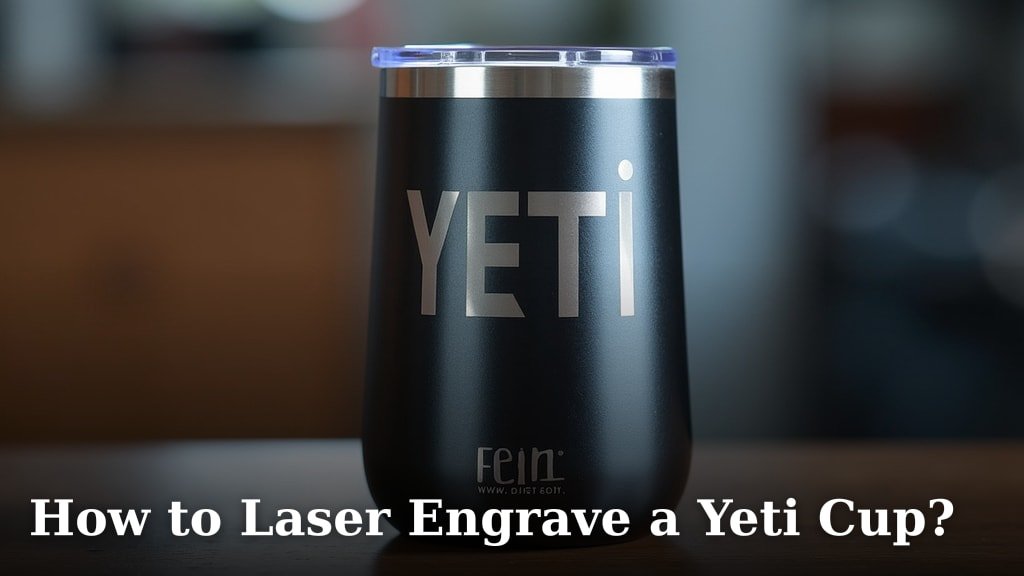
To laser engrave a Yeti cup, you’ll need a fiber laser engraver to remove the powder coating, revealing the stainless steel beneath. This process allows for precise and permanent customization of your favorite drinkware. You can create personalized designs that last.
Many people want to add a personal touch to their durable Yeti cups, but they wonder about the best method. We found that laser engraving offers a clean finish and great detail. This technique works well for both logos and intricate designs, making your Yeti truly unique.
TL;DR:
- Use a fiber laser for Yeti cups.
- The laser removes the outer coating.
- This reveals the stainless steel underneath.
- It creates a durable, custom design.
- Perfect for personalization.
Ready to make your Yeti stand out? Let’s walk through exactly how you can laser engrave a Yeti cup, step by step, and what tools you’ll need.
Getting Started with Yeti Cup Laser Engraving
Are you ready to transform your plain Yeti into a personalized masterpiece? We understand the excitement! Before you dive in, let’s make sure you have everything you need. This isn’t just about grabbing any laser; it’s about choosing the right tools for the job. You want a crisp, clean design that lasts, right?
Understanding the “Why”: Why a Fiber Laser?
You might be wondering, “Can’t I just use my CO2 laser?” That’s a common question! The answer, for Yeti cups, is a firm no. Yeti cups aren’t just painted; they feature a tough powder-coated finish over stainless steel. A CO2 laser works by vaporizing organic materials, but it struggles with metals and their coatings.
This is where the fiber laser shines. It uses a different wavelength of light, making it highly effective at interacting with metals and the durable powder coating on your Yeti. Think of it like using the right key for the right lock. Without the correct tool, you won’t get anywhere!
- CO2 Lasers: Best for wood, acrylic, leather, and glass. They typically don’t affect metal coatings.
- Fiber Lasers: Ideal for metals, plastics, and various coatings, including the powder coat on Yeti cups. They precisely remove the coating.
Essential Equipment You’ll Need
So, what exactly do you need to get started? Beyond the fiber laser itself, there are a few other critical components. We want you to be fully prepared. Gather these items before you begin your engraving adventure:
- Fiber Laser Engraver: This is your primary tool. Ensure it’s capable of marking metals.
- Rotary Attachment: Yeti cups are round, right? A rotary attachment spins the cup evenly, allowing the laser to engrave across its curved surface without distortion. This is absolutely essential for a seamless design.
- Computer with Design Software: You’ll need software to create or import your design. Common choices include Adobe Illustrator, CorelDRAW, or even the software that comes with your laser.
- Safety Glasses: Laser safety glasses are non-negotiable. They protect your eyes from the laser’s harmful light. Always wear them!
- Ventilation System: Engraving can create fumes and fine particles. A good ventilation system keeps your workspace clean and safe.
- Cleaning Supplies: Isopropyl alcohol and soft cloths will help you prepare and clean the cup.
- Your Yeti Cup: The star of the show! Make sure it’s clean and free of any stickers or residue.
Preparing Your Yeti Cup for Engraving
Think of this stage like an artist preparing their canvas. A little preparation goes a long way in ensuring a beautiful, long-lasting engraving. Don’t skip these steps; they are key to a professional finish. You wouldn’t paint on a dirty surface, would you?
Cleaning is Key
Even a brand new Yeti cup can have manufacturing oils or dust. We found that a simple but thorough cleaning makes a huge difference. Use isopropyl alcohol on a soft, lint-free cloth. Wipe down the entire area where your design will go. This removes anything that might interfere with the laser’s precision. A clean surface means a clear, crisp engraving.
Securing the Cup with a Rotary Attachment
This is where the magic of the rotary attachment comes in. You need to securely mount your Yeti. Take your time with this step. If the cup isn’t perfectly level and centered, your design could end up crooked or distorted. Most rotary attachments have adjustable chucks or rollers. Gently tighten the chucks, or adjust the rollers, so the cup is snug but not overtightened. It should spin smoothly without wobbling. We’ve found that a bit of patience here prevents frustrating re-dos later.
Testing the Rotation
Once mounted, manually rotate the cup. Does it spin freely? Does it stay level? If not, adjust until it does. You want to avoid any “hops” or “drags” during engraving. This check ensures your laser will hit the same spot consistently as the cup turns.
Designing Your Engraving
Now for the fun part: bringing your vision to life! Your design software is your digital sketchbook. Whether it’s a simple name or an elaborate logo, the software allows you to create and fine-tune your artwork before it ever touches the cup. What will your unique mark be?
Choosing Your Design Software
Many laser engravers come with their own proprietary software. Often, these are perfectly capable for basic designs. However, for more advanced artwork, you might turn to programs like Adobe Illustrator or CorelDRAW. These offer greater control over vectors, fonts, and image manipulation. We’ve seen designers create amazing things with these tools.
Vector vs. Raster Images
This is an important distinction. For engraving, you generally want vector graphics. Vectors are mathematical paths, meaning they can be scaled up or down without losing quality. Think of them as lines rather than pixels. Raster images (like photos) are made of pixels, and they can become “blocky” when resized. While some lasers can do raster engraving, for crisp lines on a Yeti, vectors are usually preferred. Your design software can help you create or convert to vectors.
Sizing and Positioning Your Design
Here’s a critical tip: measure twice, engrave once! Measure the area on your Yeti where you want the design to go. Then, transfer those measurements to your design software. You’ll need to know the diameter of the cup and the desired height of your design. Always leave a little buffer space from the top and bottom edges. Some software allows for a “virtual” rotary setup, showing you how the design will wrap around the object. Use this feature! It’s a great way to visualize the final product.
Here’s a quick checklist for design setup:
- Measure Yeti engraving area.
- Create or import vector design.
- Size design accurately in software.
- Center design on the virtual cup.
- Consider leaving space from edges.
Configuring Your Fiber Laser Settings
This is where you tell your laser exactly how to engrave. Think of these settings as the “recipe” for your desired outcome. Too much power, and you might go too deep; too little, and the coating won’t come off cleanly. This step requires a bit of experimentation, but we’ll give you a great starting point.
Power, Speed, and Frequency Explained
These three settings are your main controls for the laser:
Power: This controls the intensity of the laser beam. Higher power means more material removal. For Yeti cups, you want enough power to remove the powder coat without damaging the stainless steel beneath.
Speed: How fast the laser head moves across the material. Faster speeds mean less contact time, which can result in a lighter mark. Slower speeds allow for deeper removal.
Frequency: This refers to how many pulses per second the laser emits. For removing powder coating, a higher frequency often works well, creating a cleaner, more defined line. (NIH researchers often study laser pulse frequencies for different material interactions.)
Recommended Starting Settings (Test, Test, Test!)
Please remember, these are starting points! Every laser machine is different, and even different colors of Yeti cups can react slightly differently. Always perform test engraves on scrap material or an inconspicuous part of the cup (like the very bottom) before committing to your final design.
| Setting | Recommended Start Range | What it Affects |
|---|---|---|
| Power | 30-60% | Depth of coating removal, darkness of mark |
| Speed | 200-500 mm/s | Clarity of line, time of engraving |
| Frequency | 30-60 kHz | Smoothness of edges, removal efficiency |
| Passes | 1-2 | Completeness of coating removal |
We recommend starting with lower power and higher speed, then gradually increasing power or decreasing speed until you achieve the desired contrast and coating removal. The goal is a bright, clear silver design against the cup’s color. Too much power can sometimes create a slightly “burnt” look or even damage the steel. You’re aiming for precision, not brute force!
The Engraving Process
With all your preparations complete, it’s time for the moment of truth! You’ve set up your machine, designed your art, and configured your settings. Now, let’s watch your vision come to life. Remember, safety first!
Safety First: Eye Protection and Ventilation
We cannot stress this enough: always wear your laser safety glasses. Always. Even looking indirectly at the laser beam can cause permanent eye damage. Ensure your ventilation system is running to extract any fumes or particles produced during engraving. Your health and safety are paramount.
Initiating the Engrave
Once you’ve double-checked all your settings and your cup is securely mounted, it’s time to hit “start.” Most software will allow you to do a “boundary test” or “dry run” where the laser traces the outline of your design with a very low power setting (or no power at all). This lets you confirm the placement on the cup without actually engraving. It’s like drawing with a pencil before using a permanent marker!
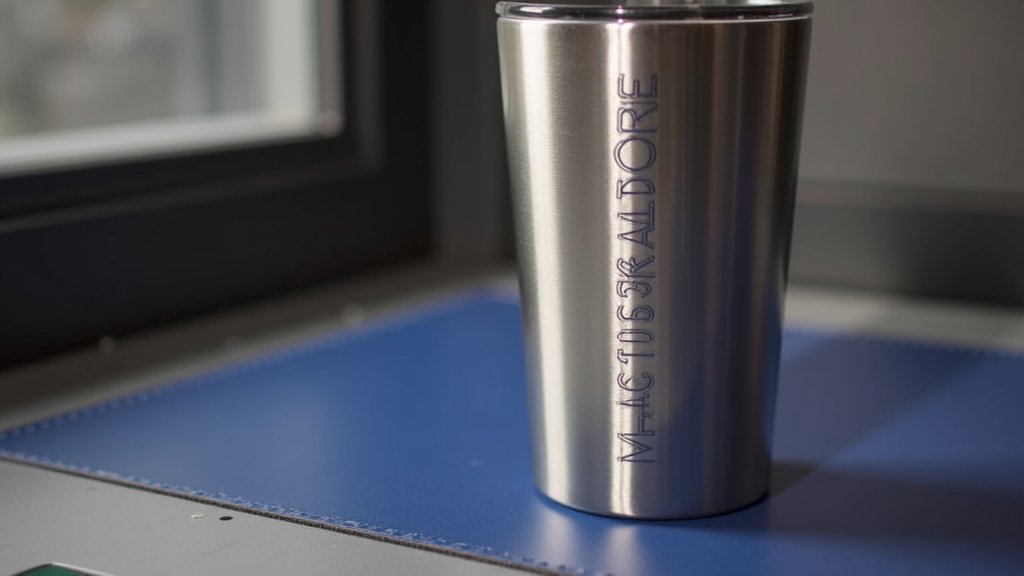
Watch the laser work its magic. You’ll see the powder coating being precisely removed, revealing the shiny stainless steel underneath. It’s quite satisfying to observe this transformation.
Post-Engraving Care
Congratulations, you’ve created a custom Yeti! But your work isn’t quite done. A little post-engraving care ensures your design looks its best and lasts for years to come. You want that design to pop, right?
Cleaning the Engraved Area
After engraving, there might be some fine residue or dust from the removed powder coat. Use a soft brush or a damp cloth with a little isopropyl alcohol to gently wipe away any debris. Be careful not to scratch the newly exposed stainless steel. A thorough but gentle cleaning will make your design stand out beautifully. We’ve found this step really enhances the final look.
Inspecting Your Work
Take a moment to admire your creation! Check for any imperfections. Is the design crisp? Is the coating fully removed? Are there any stray marks? This is your chance to learn and refine your techniques for future projects. Every engraving is a learning experience, helping you become an even better creator.
Conclusion
You’ve now got all the knowledge to transform your ordinary Yeti cup into a personalized statement piece. Remember, the right tools, like a fiber laser and rotary attachment, are key. Patience with setup and careful testing of your settings will ensure a flawless finish. We found that attention to detail in cleaning and design really makes your engraving pop.
Don’t be afraid to experiment a little with test pieces. Your unique design awaits! Get ready to enjoy a custom Yeti that truly stands out from the crowd.
Frequently Asked Questions
What kind of designs work best on Yeti cups?
Vector graphics with clean lines and solid fills tend to engrave best on Yeti cups. Simple logos, text, or geometric patterns often yield the sharpest results. While detailed images can work, overly complex designs might lose some clarity when engraved.
Can I engrave over an existing scratch or dent on my Yeti?
You can, but the laser will engrave the powder coating around the imperfection. This means the scratch or dent will likely remain visible through your design. For the best results, we recommend engraving on a smooth, undamaged surface to ensure a clean, consistent look.
How long does it take to laser engrave a Yeti cup?
The time it takes varies based on the size and complexity of your design, as well as your laser settings. A simple logo might take only a few minutes, while a more intricate, larger design could take 15-30 minutes. Faster speeds reduce engraving time but might require more passes.
Will laser engraving make my Yeti cup rust?
No, laser engraving removes the powder coating to expose the stainless steel beneath. Stainless steel is designed to be rust-resistant, so your engraved Yeti cup will not rust. It maintains its durability and resistance to corrosion, just with a personalized touch.
Is it possible to engrave a full-wrap design around a Yeti cup?
Yes, with a rotary attachment, you can engrave designs that wrap fully around your Yeti cup. The rotary attachment spins the cup precisely, allowing the laser to create a continuous design. You’ll need to carefully measure and prepare your design to ensure it aligns perfectly at the start and end points.
