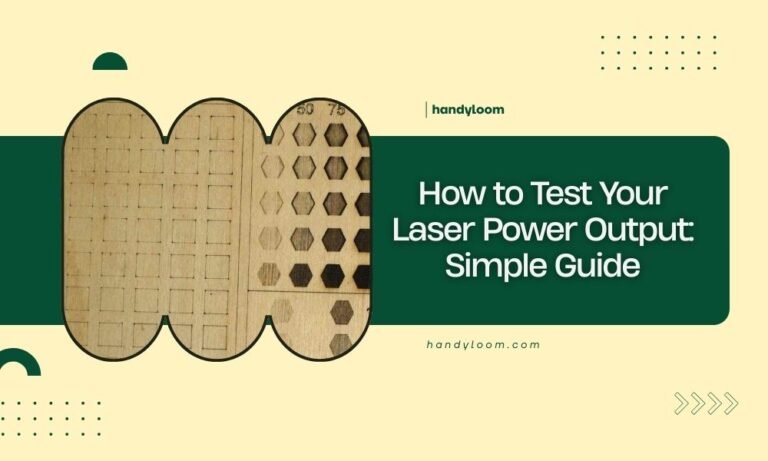
For laser cutting birch plywood, use power settings between 60-80%, speed at 10-15 mm/s, and make multiple passes for thicker wood (6mm+).
The key to clean birch plywood cuts lies in finding the right balance between power and speed while managing heat buildup through proper ventilation.
Understanding Birch Plywood for Laser Cutting
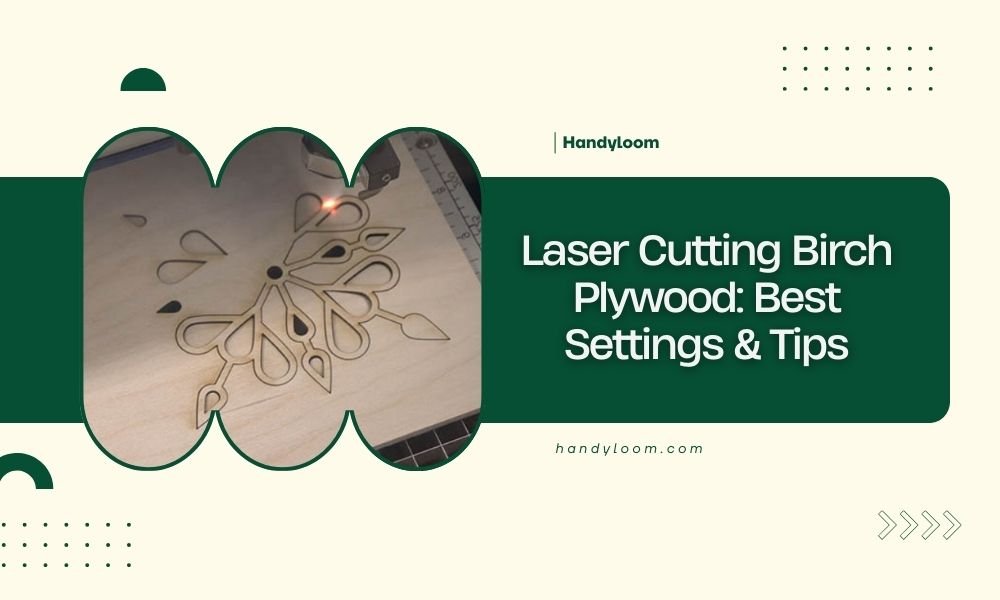
Birch plywood stands out as one of the best woods for laser cutting. You get consistent results because birch has tight, even grain patterns. The wood burns cleanly without creating messy charring like some other materials.
What makes birch special? It’s the smooth surface and predictable density. When your laser hits birch plywood, it cuts through evenly. You won’t deal with sudden hard spots that throw off your settings.
Why Birch Works Better Than Other Woods
I found that birch plywood gives cleaner edges than pine or oak. The reason comes down to resin content. Birch has less sticky resin, so you get less gummy buildup on your cuts.
Pine can create more smoke and char marks. Oak varies too much in density. Birch keeps things predictable, which saves you time and materials.
Essential Laser Settings for Birch Plywood
Getting your settings right makes the difference between clean cuts and burnt edges. Start with these baseline numbers, then adjust based on your specific laser and wood thickness.
Power Settings by Thickness
| Thickness | Power (%) | Speed (mm/s) | Passes |
|---|---|---|---|
| 3mm | 60-70 | 15-20 | 1 |
| 6mm | 70-80 | 10-15 | 1-2 |
| 9mm | 75-85 | 8-12 | 2-3 |
| 12mm | 80-90 | 6-10 | 3-4 |
Fine-Tuning Your Laser Power
Start at the lower power range first. You can always increase power, but you can’t undo burnt edges. Run a small test cut on scrap material before cutting your final project.
Watch for these signs your power is too high:
- Dark brown or black edges
- Excessive smoke during cutting
- Rough or melted-looking cut surfaces
- Wide kerf (cut width)
Speed vs Power Balance
Think of laser cutting like cooking. High heat and short time can burn the outside while leaving the inside uncooked. Lower power with slower speed gives you more control.
When you slow down the speed, reduce power slightly. This prevents overheating while still cutting all the way through.
Air Assist and Ventilation Setup
Air assist isn’t optional for birch plywood. You need airflow to blow away debris and prevent flame-ups. Proper ventilation also reduces the brown staining around cut edges.
Air Pressure Settings
Set your air assist to medium pressure. Too much air can actually blow flames around and create more charring. Too little air lets debris build up in the cut.
I found that consistent airflow matters more than high pressure. Make sure your air supply stays steady throughout the entire cut.
Exhaust Fan Considerations
Your exhaust fan should create gentle suction without being overpowering. Strong suction can pull flames deeper into the cut and create more burning.
Preventing Heat Buildup
Heat buildup causes most cutting problems with birch plywood. The wood starts to char when temperatures get too high around the cut area.
Break up long cuts into sections. Let the material cool between passes on thick plywood. This simple step prevents most burning issues.
Multiple Pass Techniques
For plywood thicker than 6mm, multiple passes often work better than high power single cuts. You get cleaner edges and less heat damage.
Pass Depth Strategy
Aim to cut about 3-4mm deep per pass. This keeps heat manageable while still making good progress through thick material.
Reduce power by 10-15% for each pass after the first one. The remaining material cuts easier once you’ve created a channel.
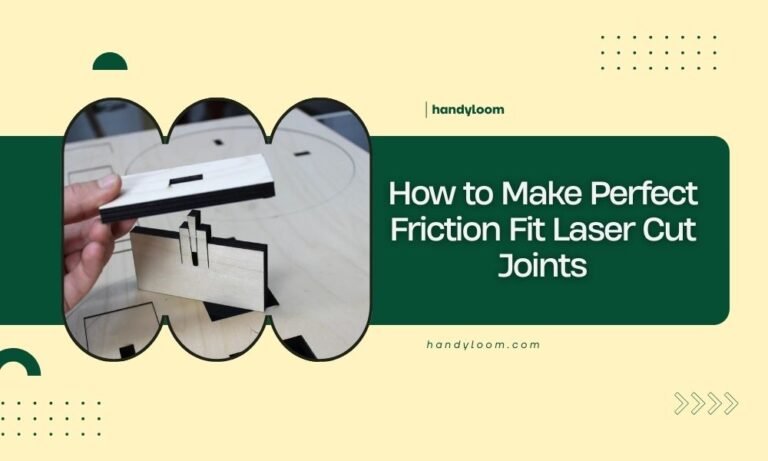
Registration Between Passes
Keep your material perfectly still between passes. Even tiny movements create stepped edges that look unprofessional.
Use hold-down clamps or weight the corners of your plywood. Double-check alignment before starting each new pass.
Dealing With Common Cutting Issues
Even with good settings, you might run into problems. Here’s how to fix the most common birch plywood cutting issues.
Reducing Char and Burn Marks
Light sanding removes most char marks from birch plywood edges. Use 220-grit sandpaper and work gently along the cut line.
For prevention, try masking tape on both sides of your cut lines. The tape protects the surface and peels off cleanly after cutting.
When Cuts Don’t Go All The Way Through
Incomplete cuts usually mean your power is too low or speed too high. Don’t just crank up the power dramatically.
Instead, slow down by 2-3 mm/s first. This often solves the problem without creating burn marks.
Handling Rough Cut Edges
Rough edges come from dull lenses, poor focus, or inconsistent material thickness. Clean your optics first, then check your focus height.
Birch plywood should have smooth, slightly brown edges when cut properly. Gray or black edges mean too much heat.
Focus Height Adjustments
Set your focus point about 1/3 down into the material thickness. For 6mm plywood, focus about 2mm below the surface.
This technique gives you the cleanest cut through the full thickness of your material.
Safety Considerations
Birch plywood creates fine dust and can catch fire during cutting. Keep safety equipment nearby and never leave your laser unattended.
Fire Prevention
Keep a spray bottle with water nearby for small flare-ups. Don’t use a full stream, just light misting to control flames.
Watch for glowing edges after cutting stops. Birch can smolder for several minutes after the laser passes.
Dust Management
Birch creates more dust than solid wood because of the layered construction. Make sure your ventilation system handles the extra debris.
Clean your laser bed more often when cutting plywood. Dust buildup can cause reflection problems and poor cut quality.
Optimizing Cut Quality
Getting professional results from birch plywood takes attention to small details. These finishing techniques make your projects look store-bought.
Edge Finishing Techniques
Light sanding with fine grit paper smooths any roughness. Sand with the grain direction when possible.
For projects that need painted edges, seal the cut surfaces first. Laser-cut edges absorb paint differently than the face veneer.
Surface Preparation
Remove any tape residue with mineral spirits before finishing. Adhesive residue shows through most finishes and looks unprofessional.
Test your finish on scrap pieces first. Laser cutting can change how wood accepts stain and other finishes.
Troubleshooting Guide
When things go wrong, systematic troubleshooting saves time and materials. Work through these steps before changing multiple settings at once.
Problem: Excessive Charring
Reduce power by 10% and try again. If charring continues, increase speed by 2-3 mm/s while keeping the lower power setting.
Problem: Incomplete Cuts
Check focus height first. Decrease speed by 2-3 mm/s before increasing power. Add an extra pass for thick materials.
Problem: Uneven Cut Depth
This usually indicates warped plywood or uneven bed height. Check that your material sits flat against the cutting bed.
Use small weights or hold-downs to keep plywood flat during cutting. Warped material creates inconsistent focus distance.
Conclusion
Mastering birch plywood laser cutting comes down to finding the right balance of power, speed, and heat management. Start with conservative settings and work up gradually. Remember that multiple light passes often produce better results than single high-power cuts.
The key is understanding that every laser behaves slightly differently. Use these settings as starting points, then adjust based on what you see. Keep detailed notes about what works with your specific setup. With practice, you’ll develop an intuition for getting perfect cuts every time.
What’s the best thickness of birch plywood for laser cutting beginners?
Start with 3mm birch plywood for your first projects. It cuts easily with lower power settings and forgives small mistakes in your technique. You can practice different speeds and power levels without wasting expensive material.
Can you laser cut birch plywood without air assist?
Air assist is essential for clean cuts in birch plywood. Without airflow, debris builds up in the cut kerf and creates rough edges. You’ll also get more charring and higher risk of small fires from accumulated sawdust.
Why do my birch plywood edges look fuzzy after cutting?
Fuzzy edges usually mean your laser focus needs adjustment or your speed is too fast for the power level. Try slowing down by 3-5 mm/s first. If that doesn’t help, check that your focus point sits about one-third down into the material thickness.
How do you prevent birch plywood from warping during laser cutting?
Use hold-down clamps or weights at the corners and edges of your plywood sheet. Make sure your cutting bed is completely flat and clean. For large sheets, add support weights in the middle areas to prevent sagging during long cuts.
What grade of birch plywood works best for detailed laser cutting?
Baltic birch plywood gives the most consistent results for detailed work. It has more layers with thinner veneers, creating uniform density throughout the thickness. Avoid construction-grade birch plywood which often has voids and inconsistent glue layers.